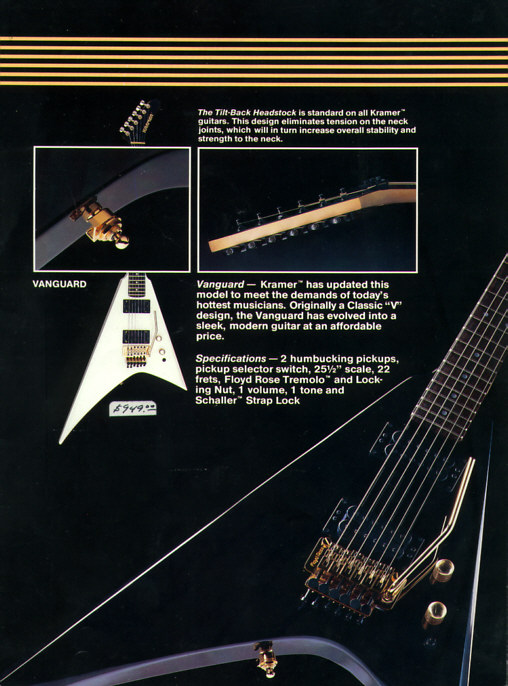
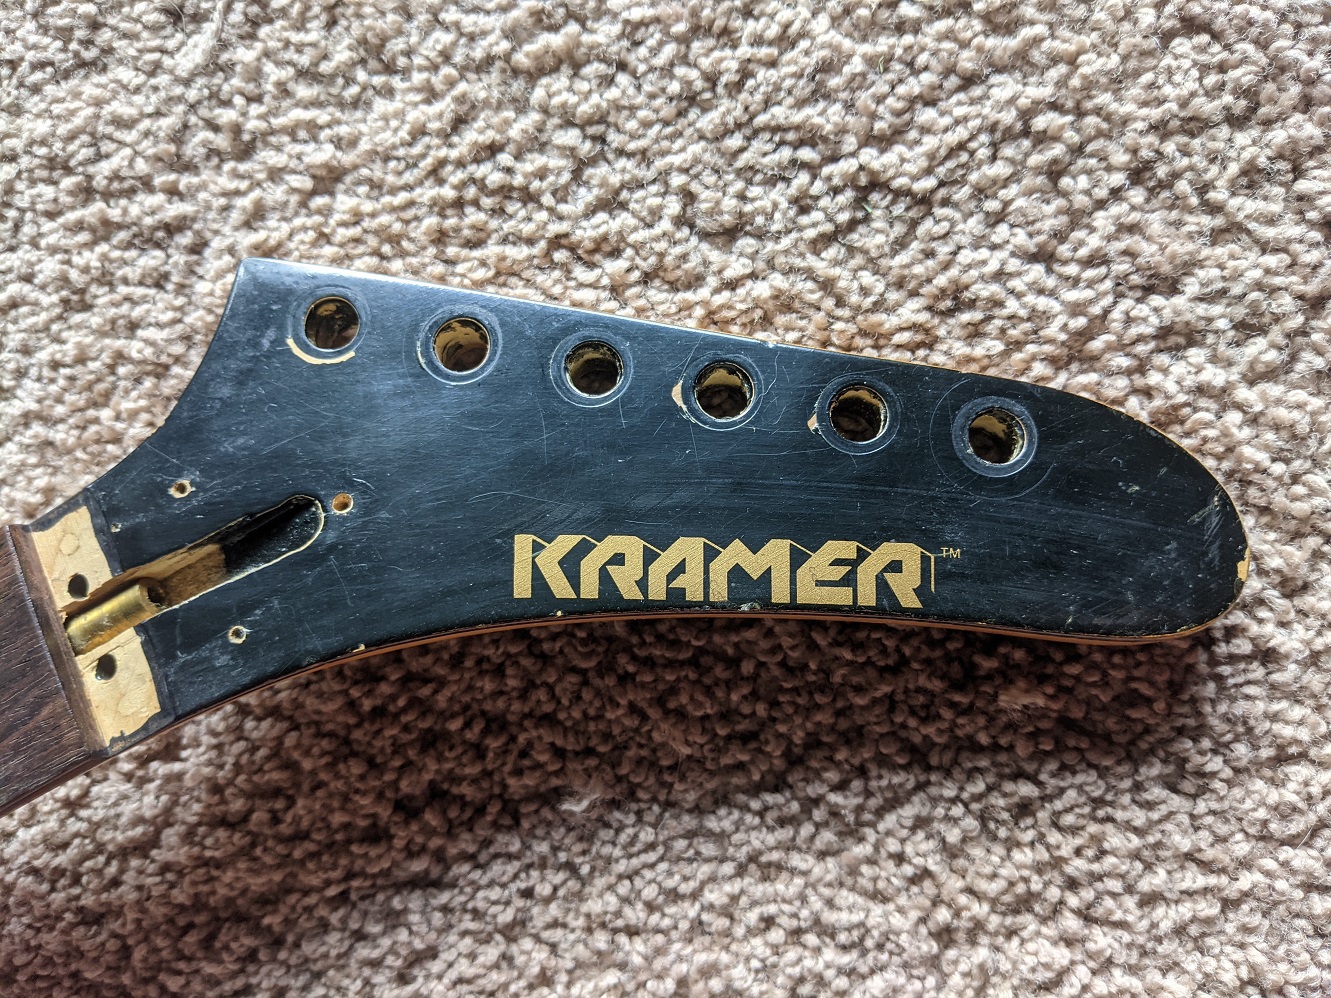
The site vintagekramer.com has some old scans of Kramer catalogs. I think the guitar I’m rebuilding is from 1986. The site has scans of the catalogs from 1985. Here is the page that has the Vangaurd on it. According to their site, they discontinued the guitar in 1986.
Page from 1985 Kramer catalog courtesy of vintagekramer.com
My friend got a First Act Stratocaster clone for free. For those who don’t know, First Act is a guitar brand that used to be sold at toy stores (like Toys ‘R Us) and such.
My friend said he wanted to fix it up and set it up in Nashville tuning which means the four low strings are tuned an octave high (and replaced with lighter gauge).
Plus he correctly thinks whipping out a First Act guitar that plays and sounds cool would be funny!
He asked if I could help and see what it needed. So this guitar shaped object was not in a playable condition.
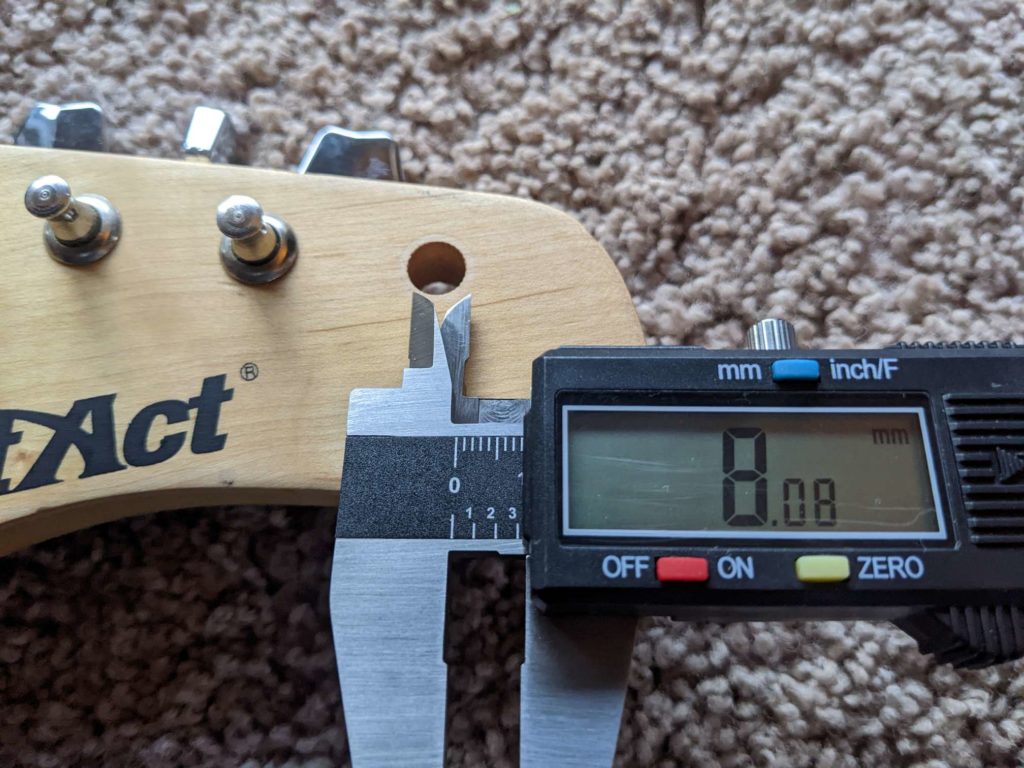
Missing tuning machine
No strings
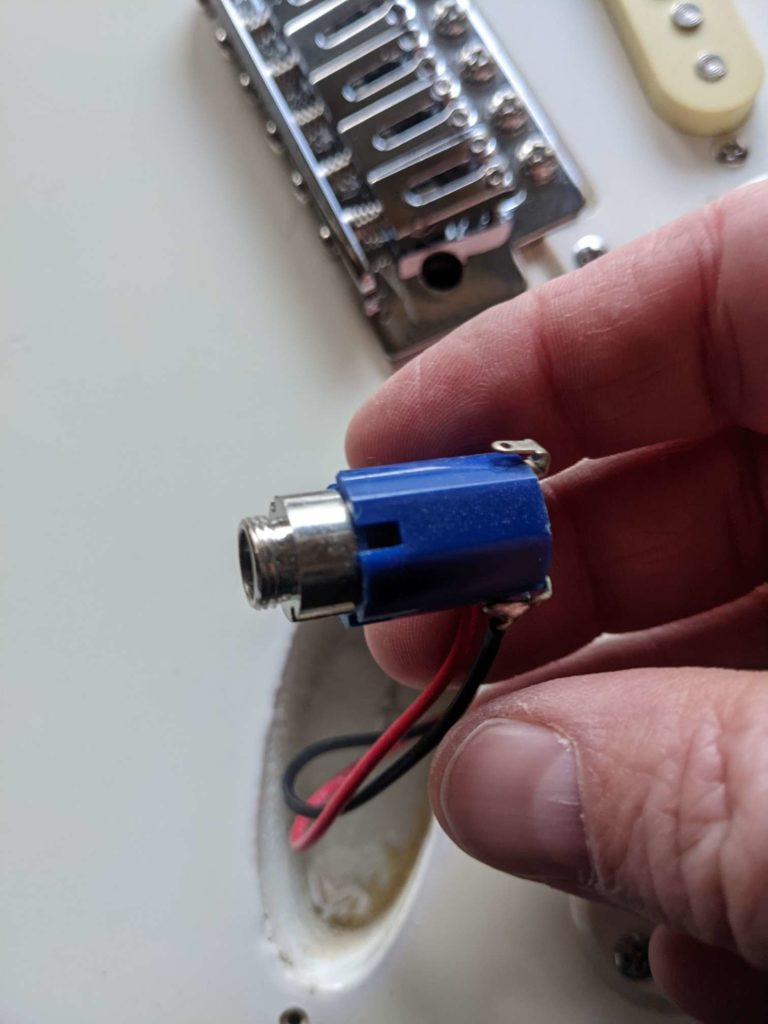
Input jack loose
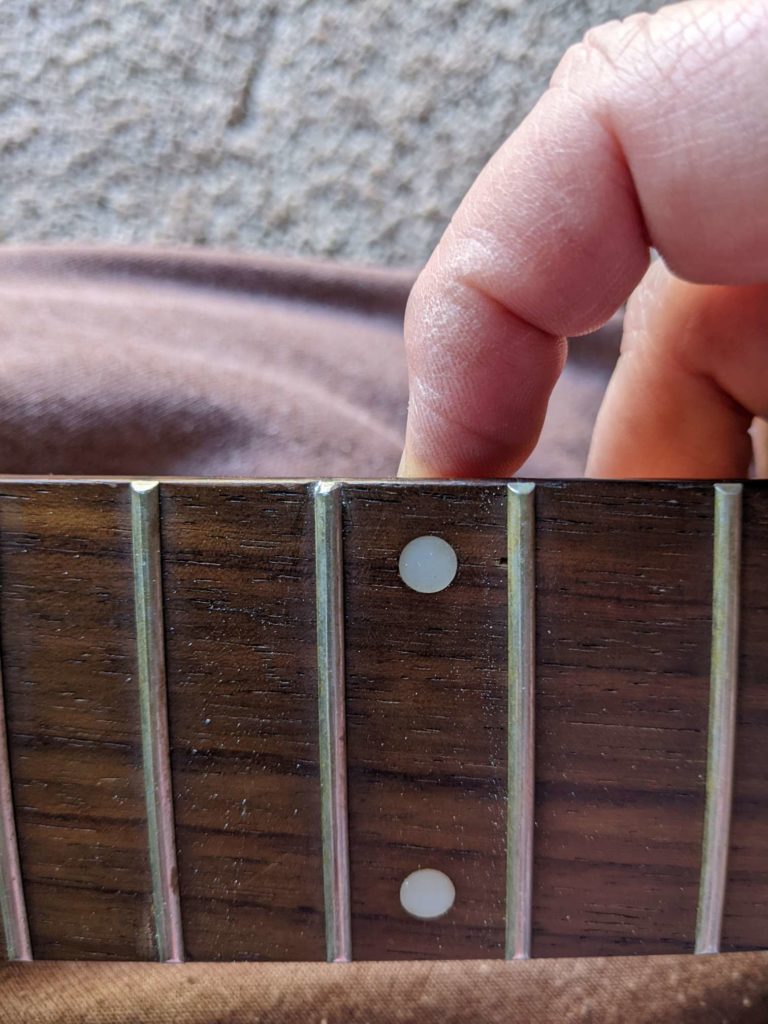
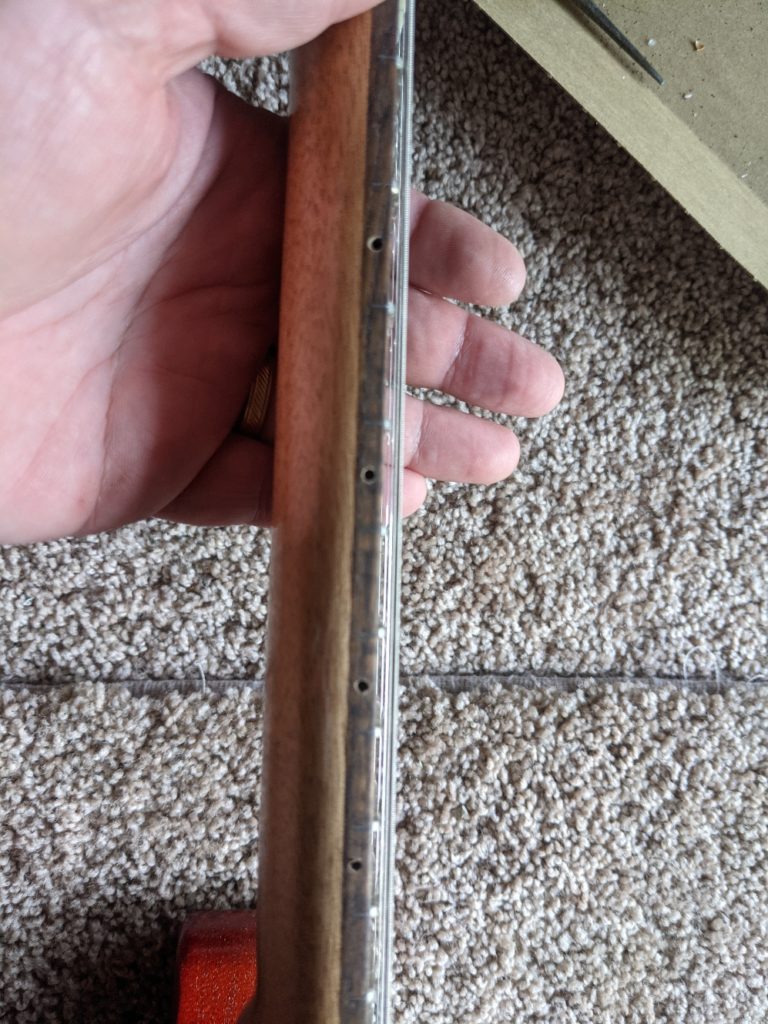
Fret ends feel like a hacksaw
Frets popping up off the fretboard
Action was mile high
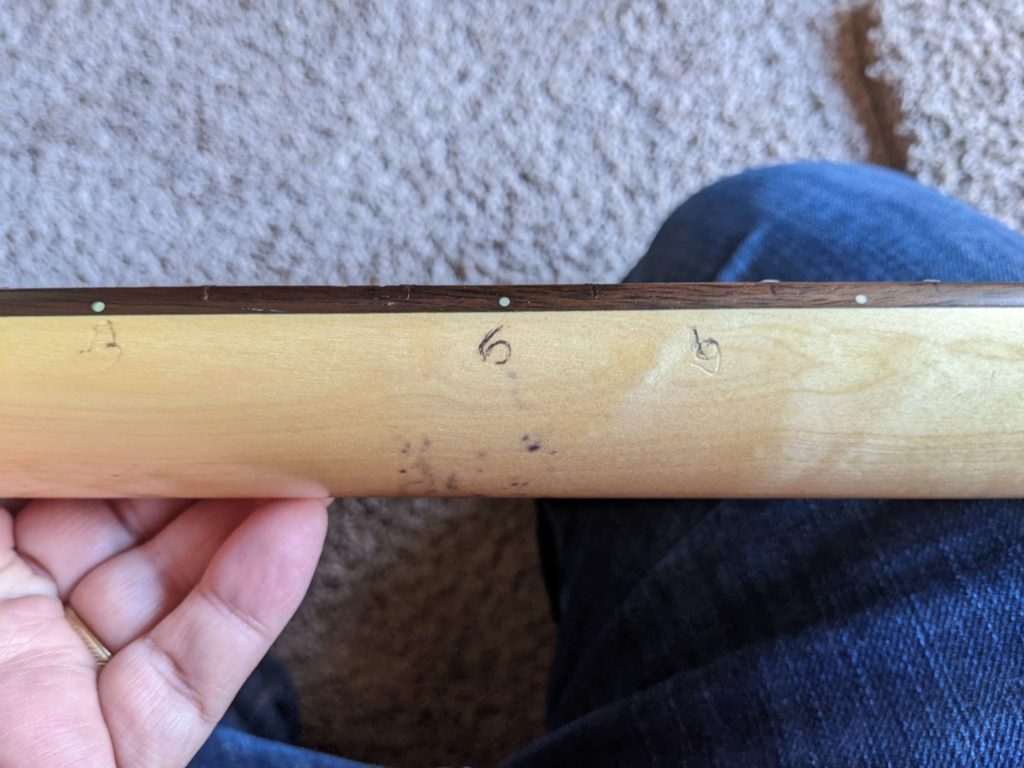
Missing tunerLol, a plastic input jack (nut and washer was missing)Someone scratched the 3,5,6 on the neck (prolly to help remember Smoke On The Water riff).
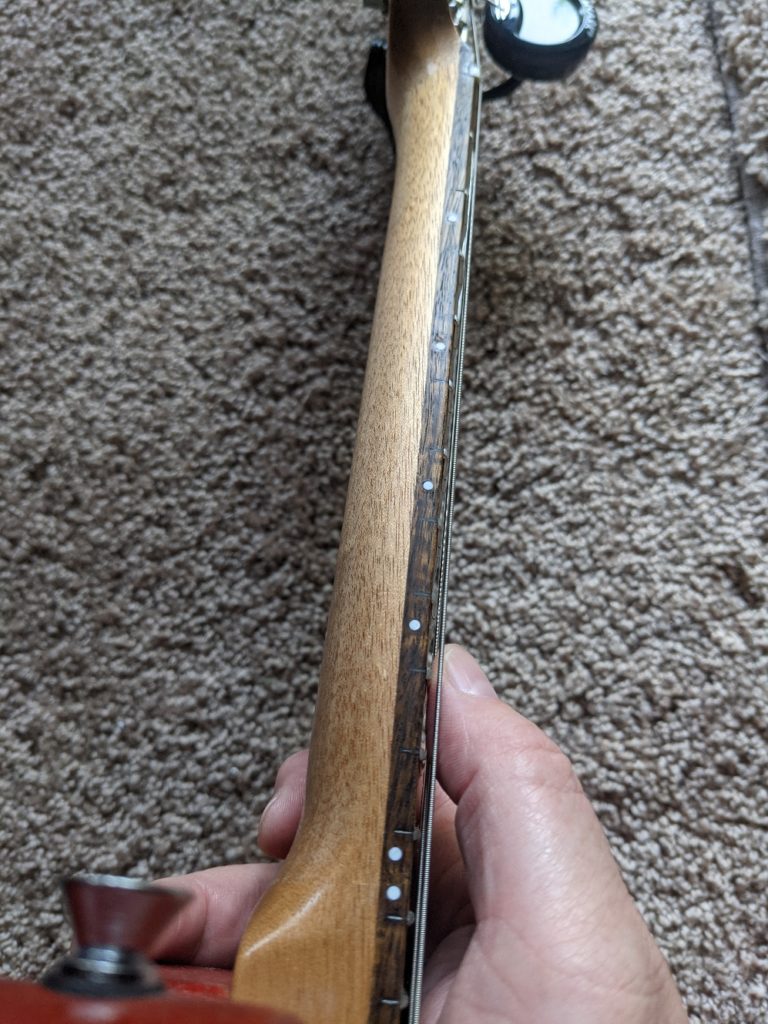
I checked all the electronics out and everything worked. The neck looks like some kind of maple with some kind of rosewood fretboard.
I started by working on the frets. Most of the we’re sticking up and needed to be fixed. If not this thing would never be right and wouldn’t be worth it.
I could get a 0.005″ feeler gauge under almost all the frets. I started by hammering them down with a mallet. This worked for most of them, but some would need to be glued. I ordered some supplies to glue them down.
Next I started to fix the fret ends. I used my files and rounded the ends over until they were nice and smooth.
The fret end on the left is fixed. The others are still in hacksaw mode
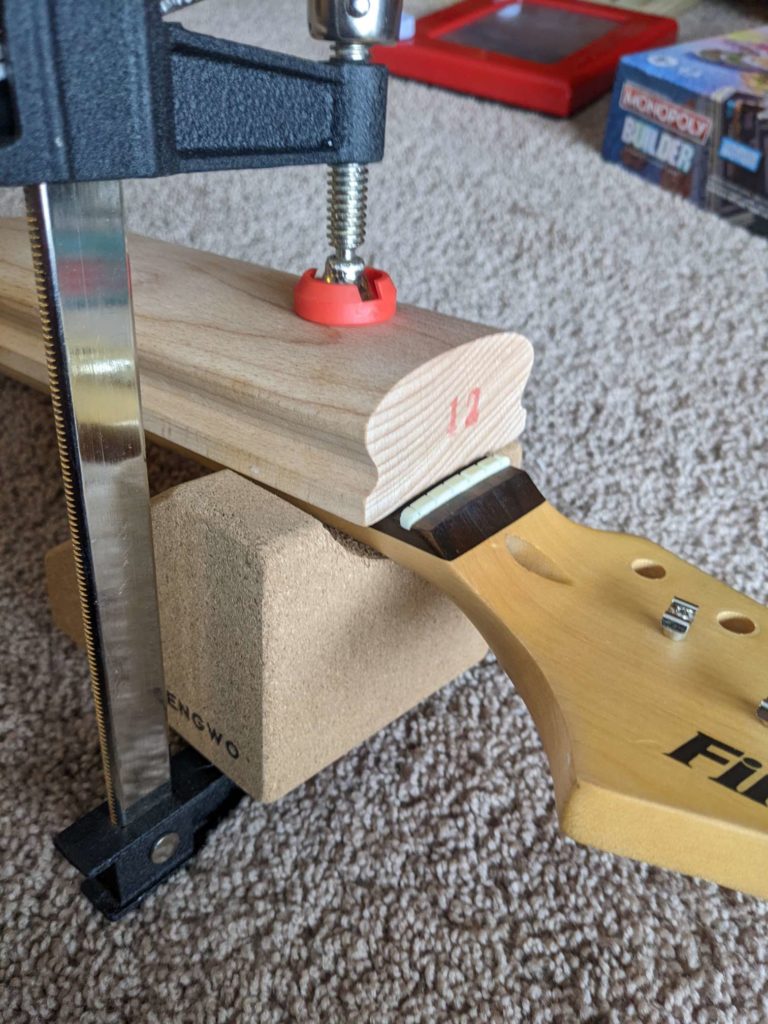
I got the supplies I needed and went about gluing down the problem frets. I applied a TON of oil to the fretboard (it was super dry anyway) so the glue would clean up easier. Then a drop of glue on each side of the fret, then clamp it using a radius block. After about 5 minutes move to the next one. All in all, I glued about 10 frets.
I’m gluing the first fret down. The radius block helps provide evenish pressure.
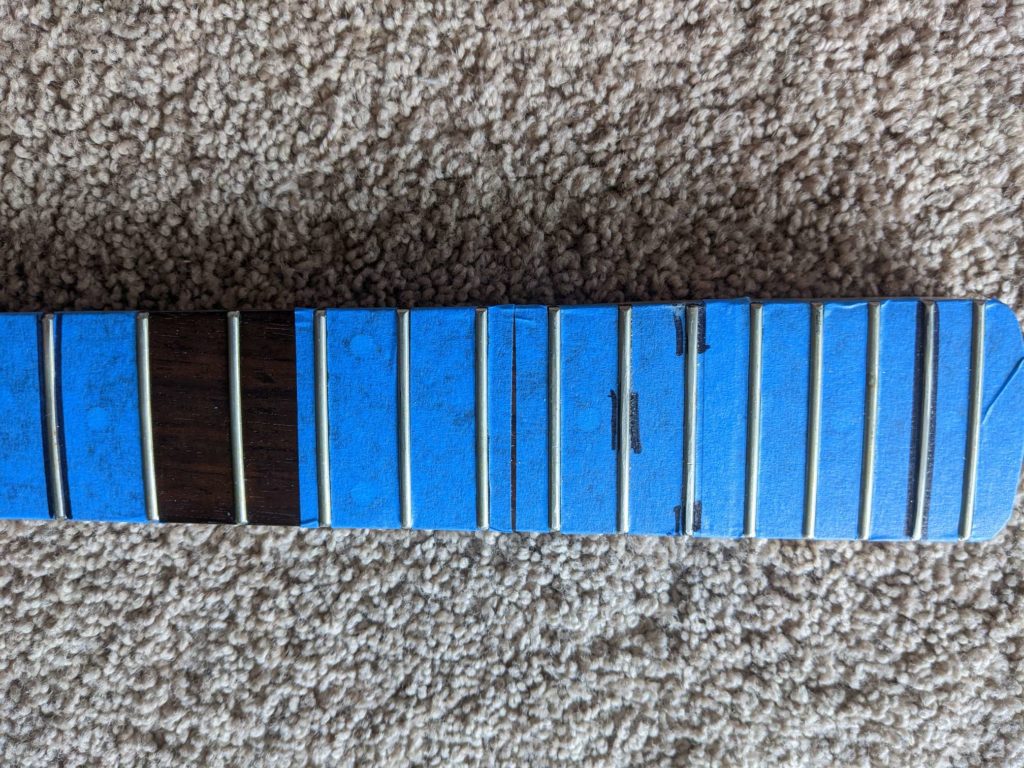
After gluing, now it’s time to level out the high frets. I used a fret rocker to find the high frets and marked the high spots with a sharpie marker. Luckily only about 6 frets needed to be dressed.
High spots marked with a black sharpie
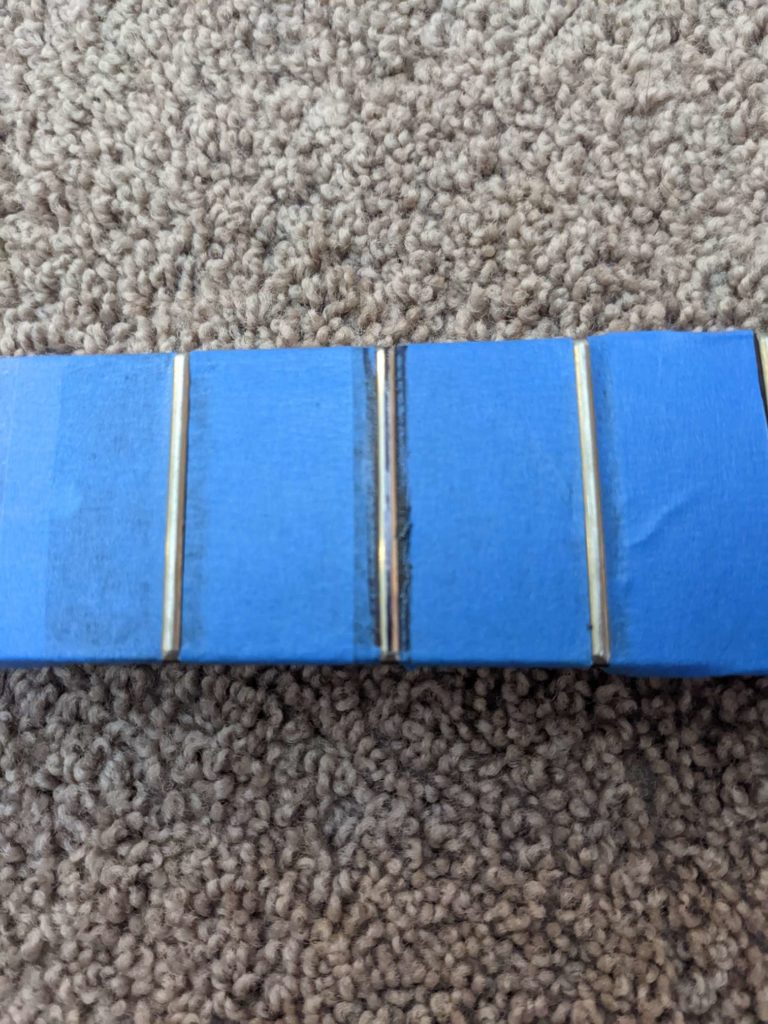
Next I used my feet crowning file to knock off the high spots. For stubborn ones, I used a more aggressive triangle file.
I masked off the high frets with blue tape and fixed them
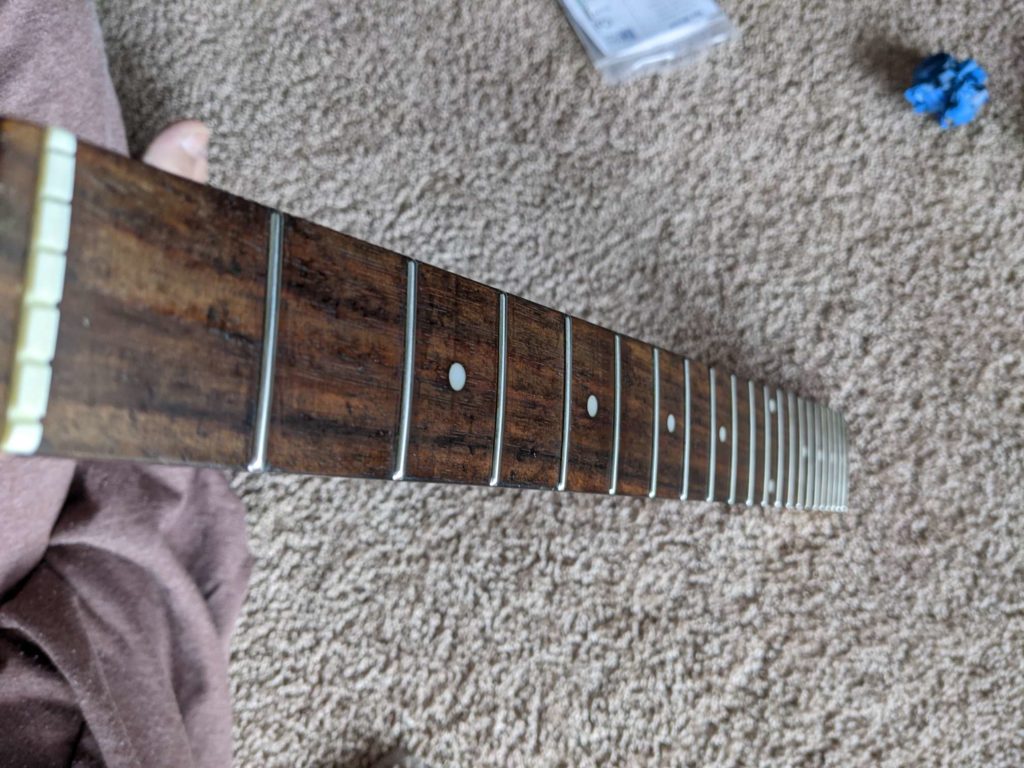
Now the tops of the frets are flat and need to be made round again. I used my feet dressing file for this (the one that I round the ends with).
The fret is all round again. I marked it with sharpie and filed until a small strip of marker is left.
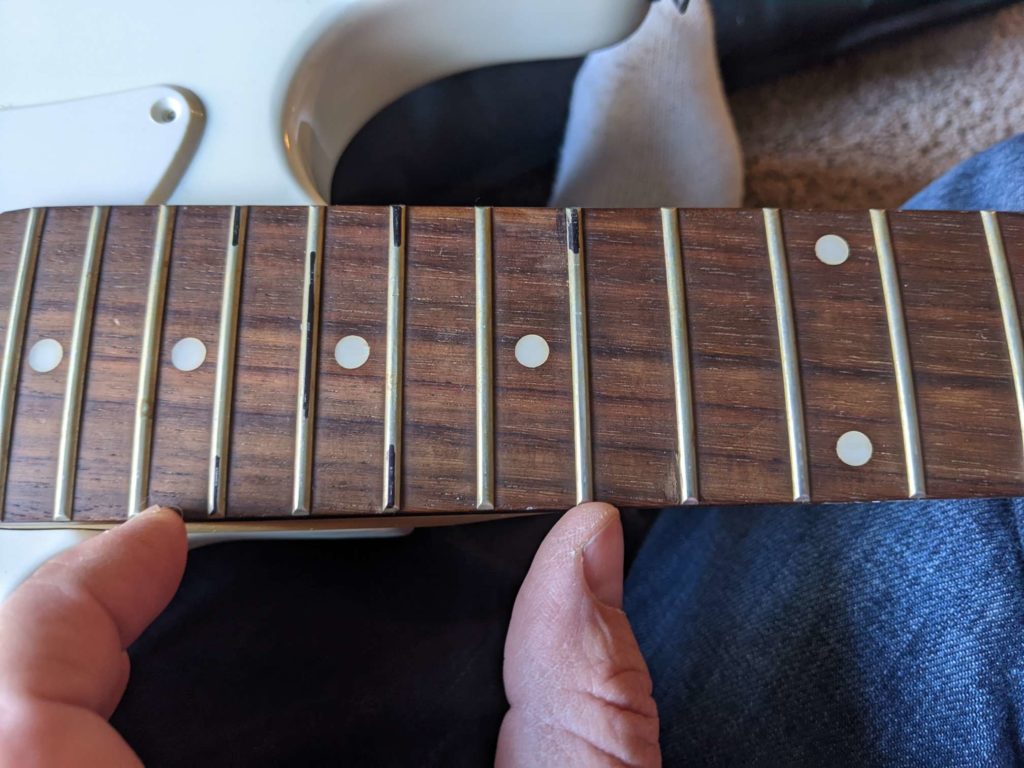
Now it’s time to clean and polish the frets. I use my micro mesh pads for this. The end result is a mirror finish!
The photo doesn’t do this justice. Those frets are shiny and smooth!
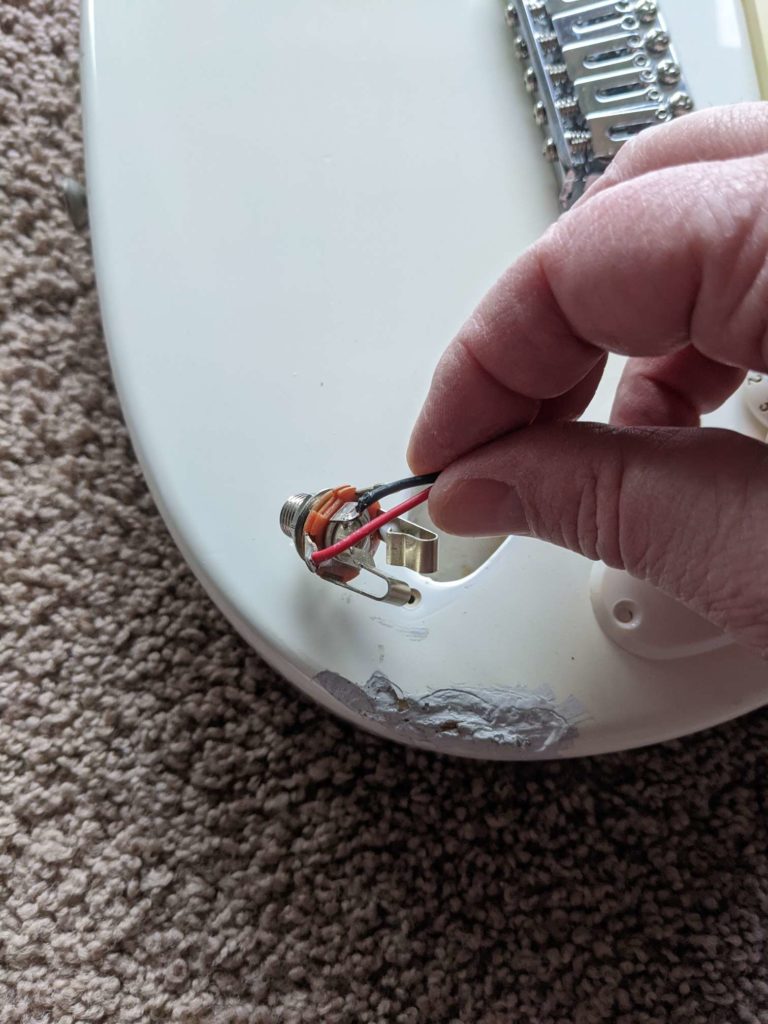
Next job is to replace that shitty plastic input jack. 5 minutes and a soldering iron is all that takes.
Old jack and new jackNew jack is soldered on. This is a stereo jack (that’s what I grabbed).
Nex job was reassembly and strings. I don’t have Nashville strings so I just used a pack of 9s. After that a setup.
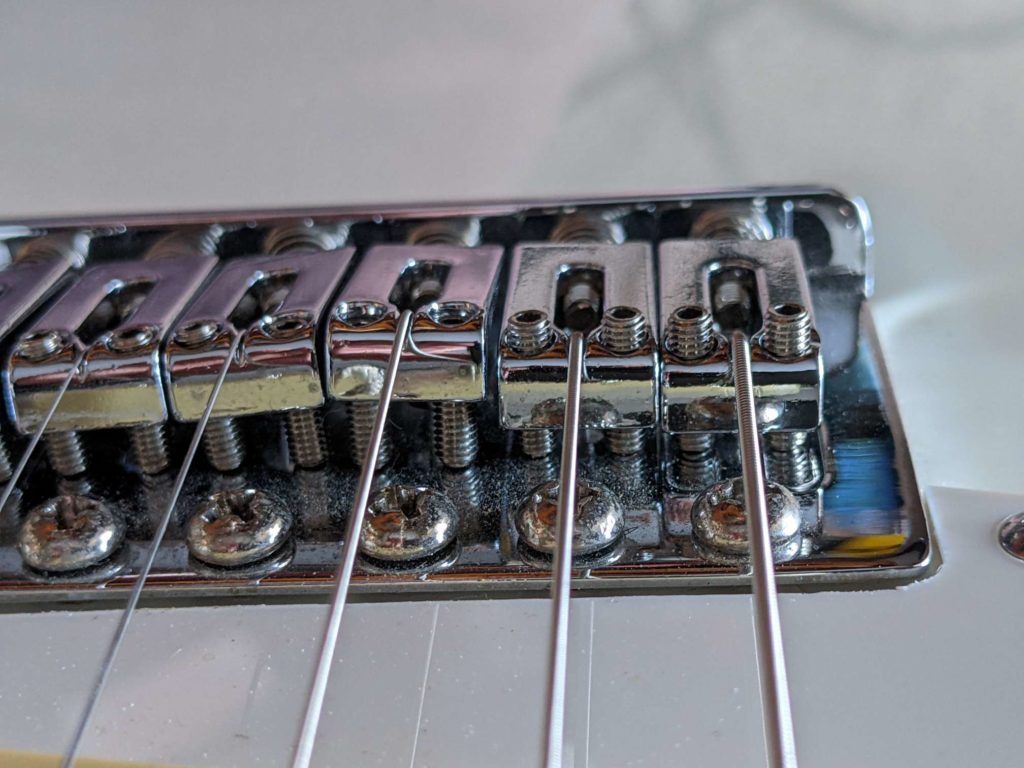
I adjusted the truss rod (it was too tight and back bowed the neck. The action was a MILE high (prolly to defeat the buzz from the back bowed neck). The intonation was way out.
Look at how high the saddles were. 2 on the right are good, ones on the left are >1/8″ lol.
The guitar plays pretty good now. The action and frets feel great. It sounds kinda cheap, but pretty good.
The nut slots are still high and we need some Nashville strings. My friend is coming over soon to help finish this beast.
We strung it up with Nashville tuning. Nashville style tuning has the 4 low strings tuned up an octave higher than normal. In order to do this we we used a set of strings for a 12 string electric guitar.
You start with using normal high E and B strings. Then you use the octave strings for the G, D, A, and E. It’s kinda funny because the G string was a smaller gauge (0.008) than the high E (0.010). The only wound string on the guitar is the low E.
Because it is a chepamundo guitar we had to file the nut slots a half t to get the first fret action right.
Other than having the cheap stock pickups, it sounds cool as hell! Here is a video of my friend playing it.
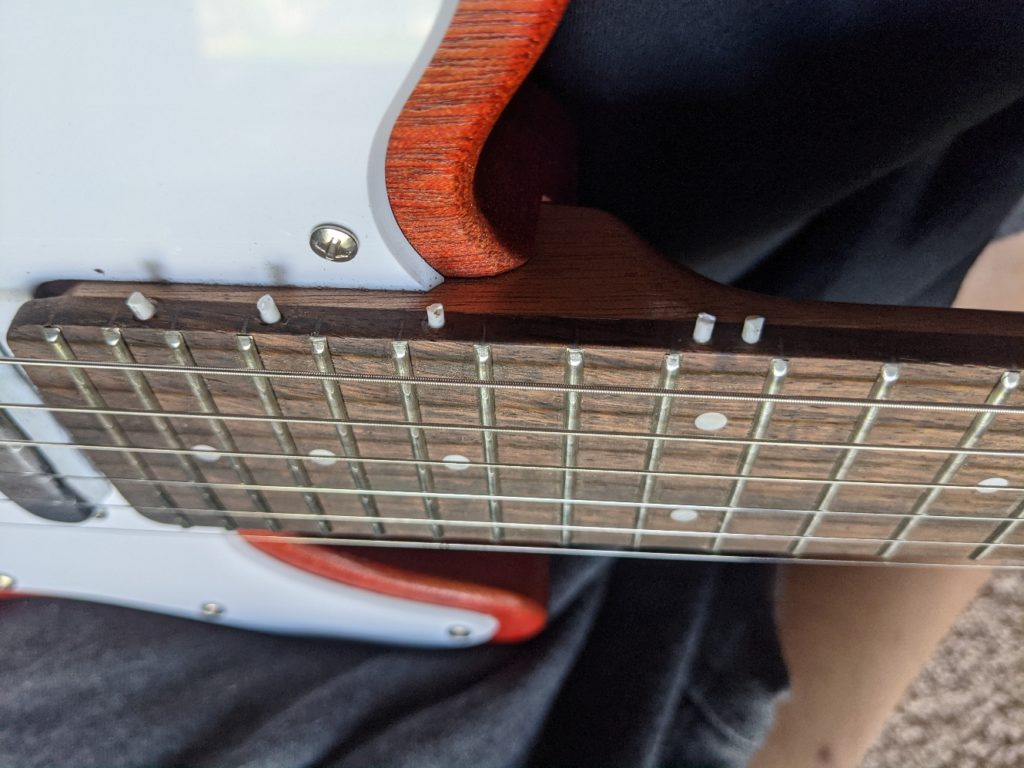
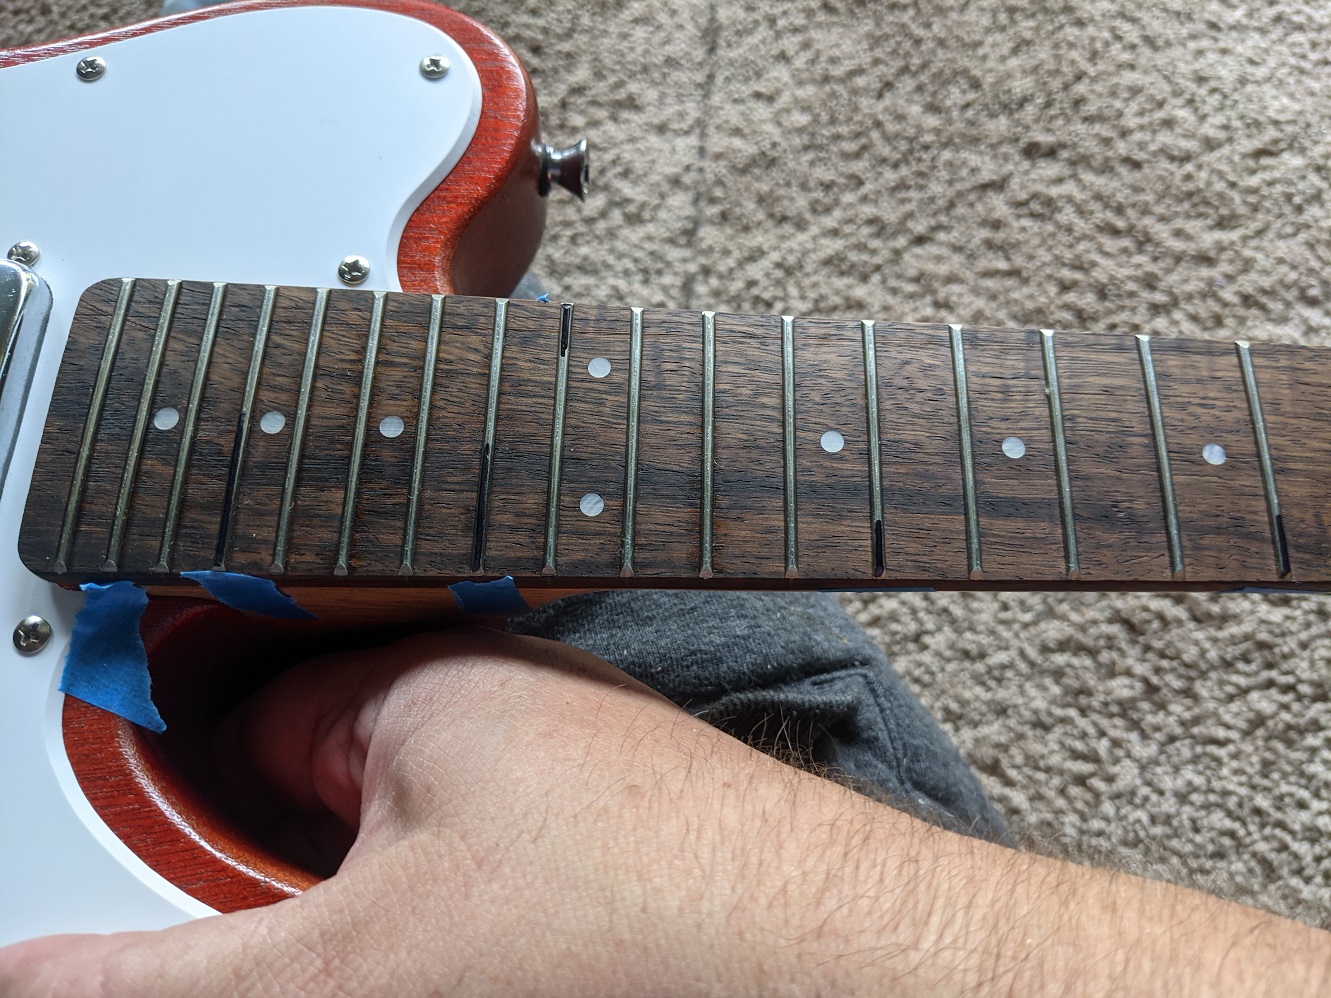
The neck that came with the kit did not have side marker dots. Time to fix this (actually I should have done this before). I eyeballed the locations and drilled some holes, glued in some side dot material, then trimmed them off and sanded smooth. A little oil made everything nicey nice.
A bunch of holes!Dot material glued in.Trimmed off flush, sanded, and oiled up.
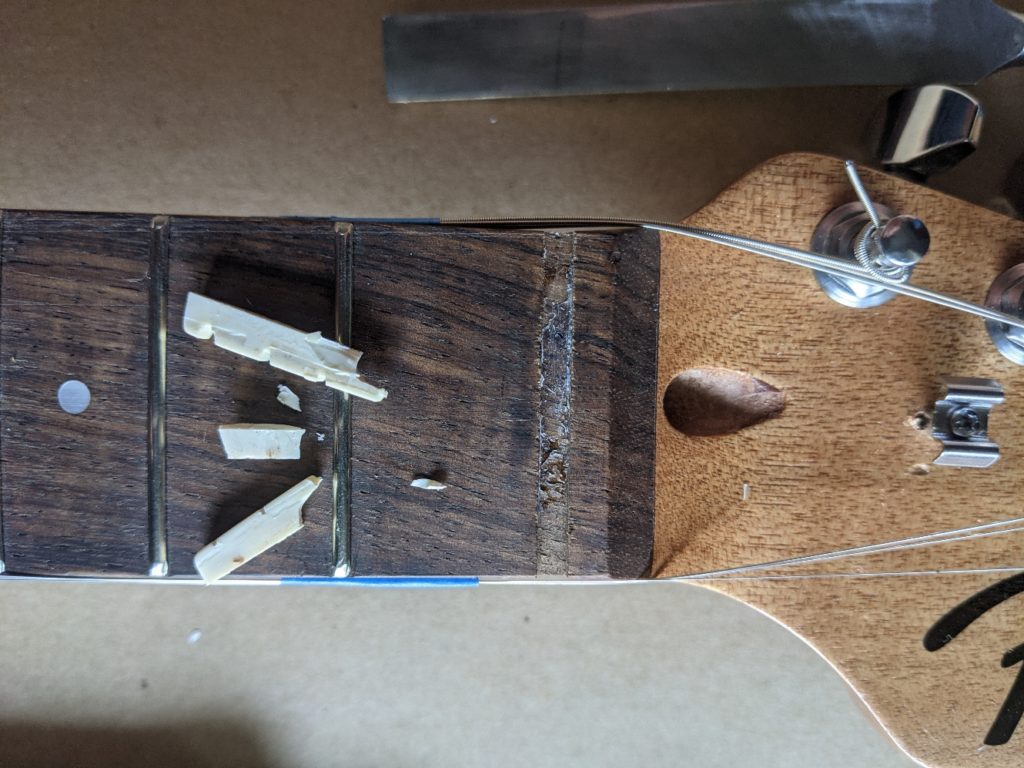
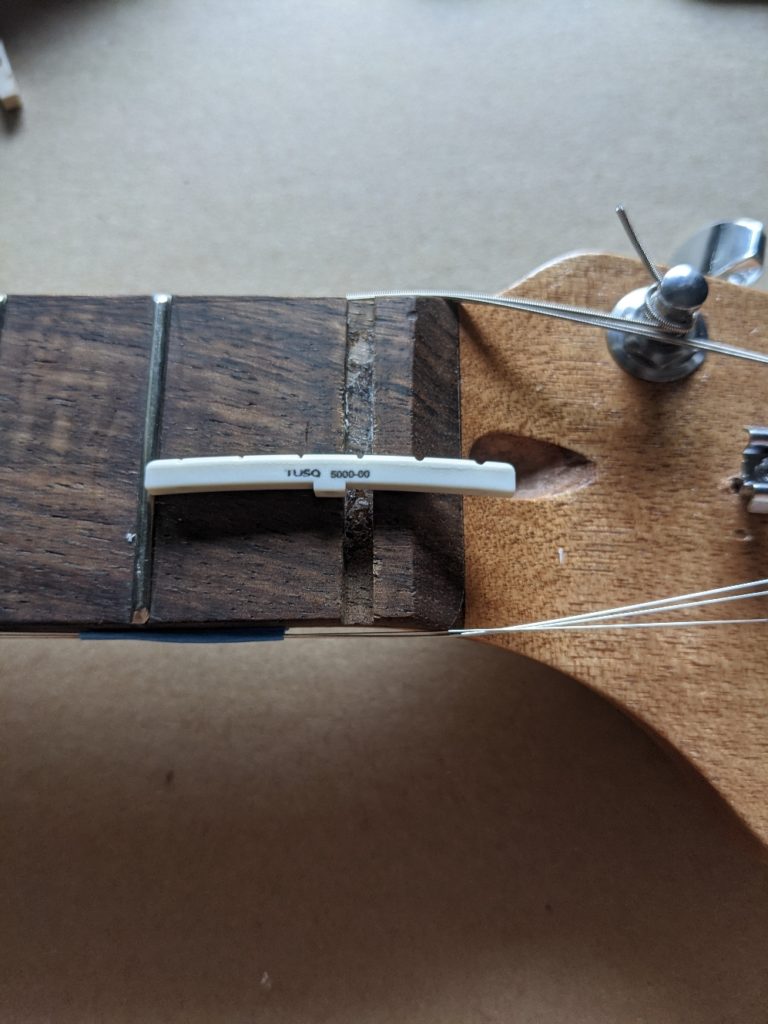
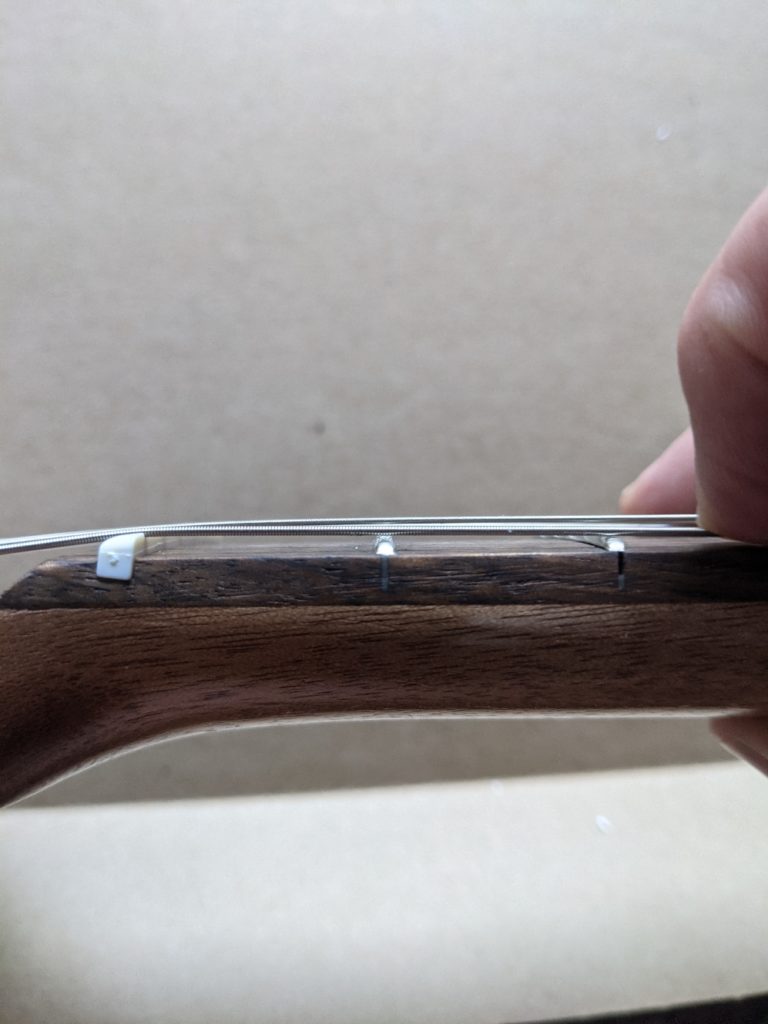
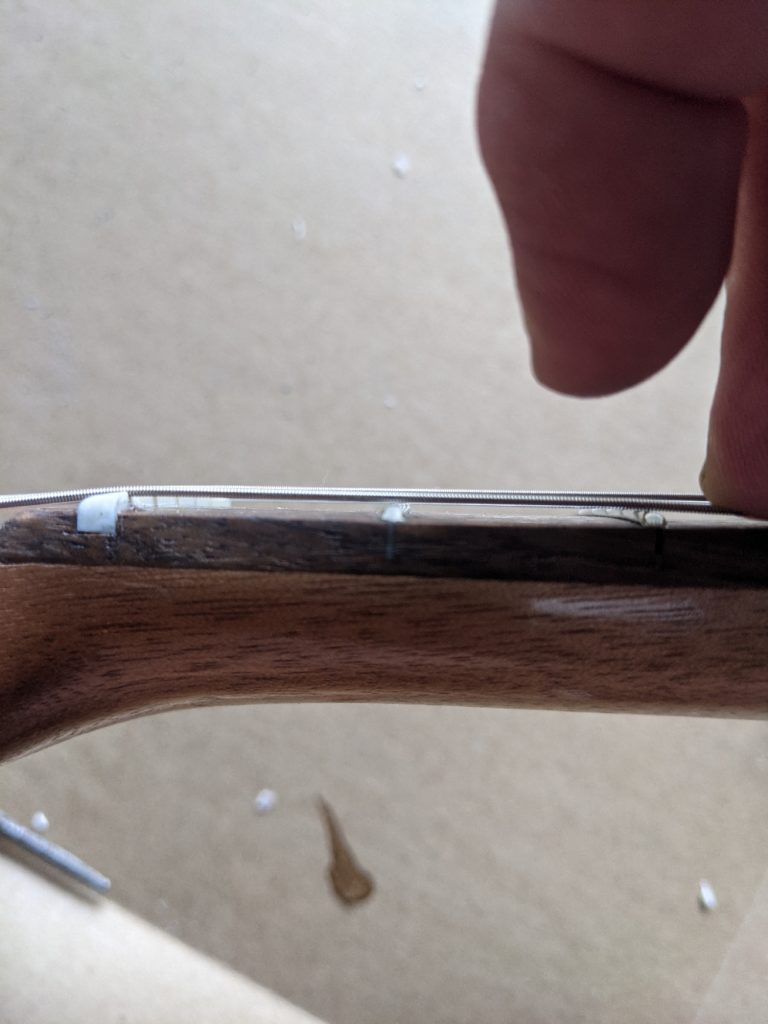
Time to replace the crappy plastic nut with something better. I picked up a new TUSQ nut, removed the crappy chinesium nut (it came out in pieces lol), cleaned up the nut slot in the fretboard, sanded the nut down to get the nut slots about right, and added a couple drops of super glue to hold it in place. Easy least.
Oh no! The plastic nut broke. I chiseled out the remaining shards of it’s broken dreams.There is a new nut in town, and she is much nicer.The nut is too thick, so gap at the first fret is too bigSome sandpaper fixed the nut. Now the gap is mucho holder.
Next I’ll refine the nut slots with my files and redo the intonation and action.
This is such a brilliant idea! Ton Anderson guitars include 2 strap buttons so when you put it down and lean against an amp or something, the strap buttons form “feet” so it doesn’t tip over!
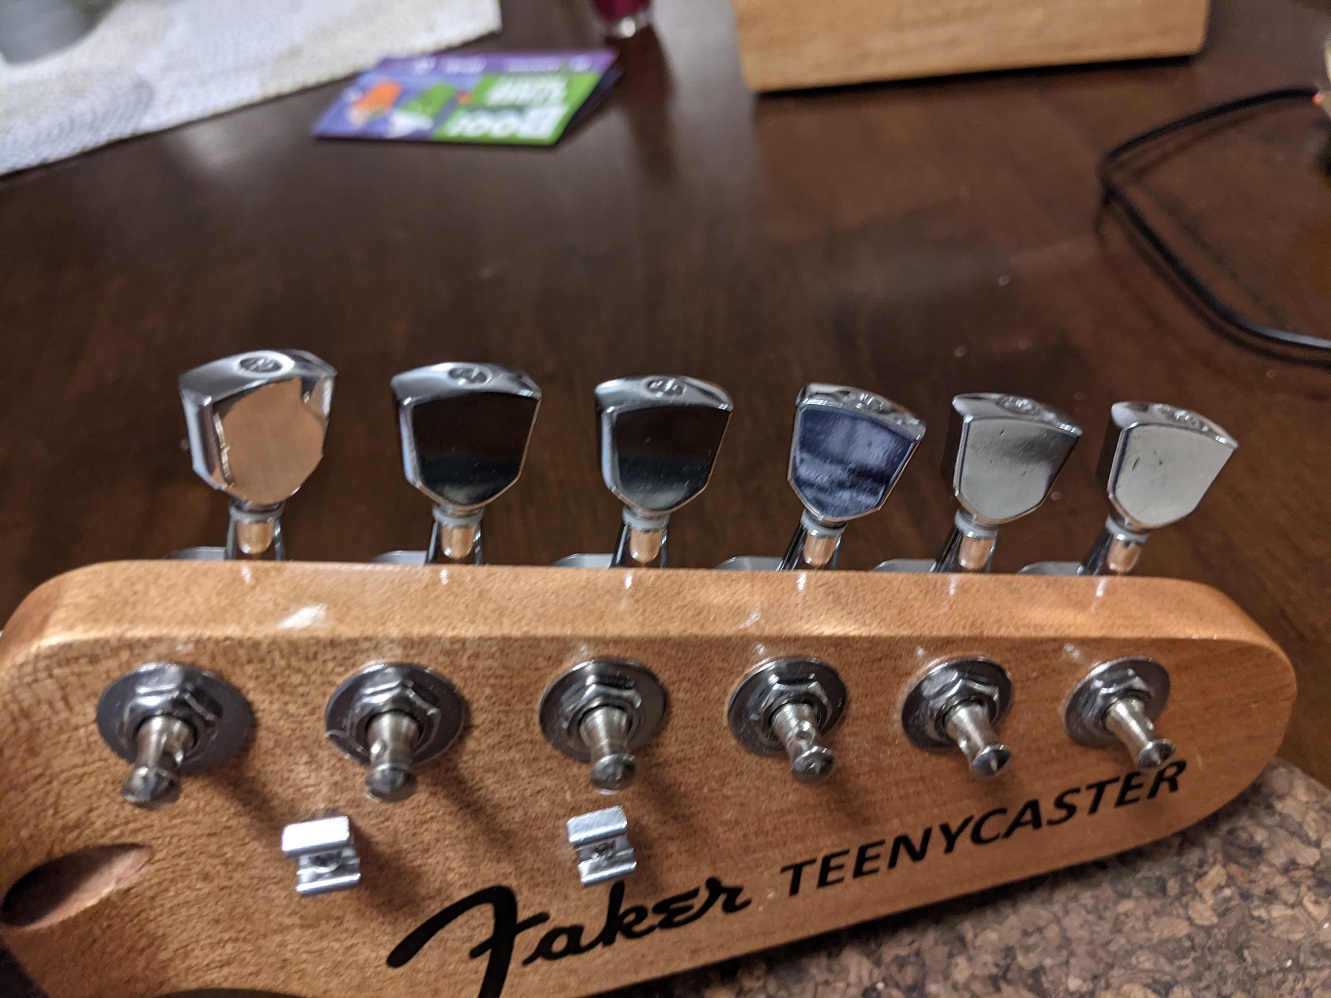
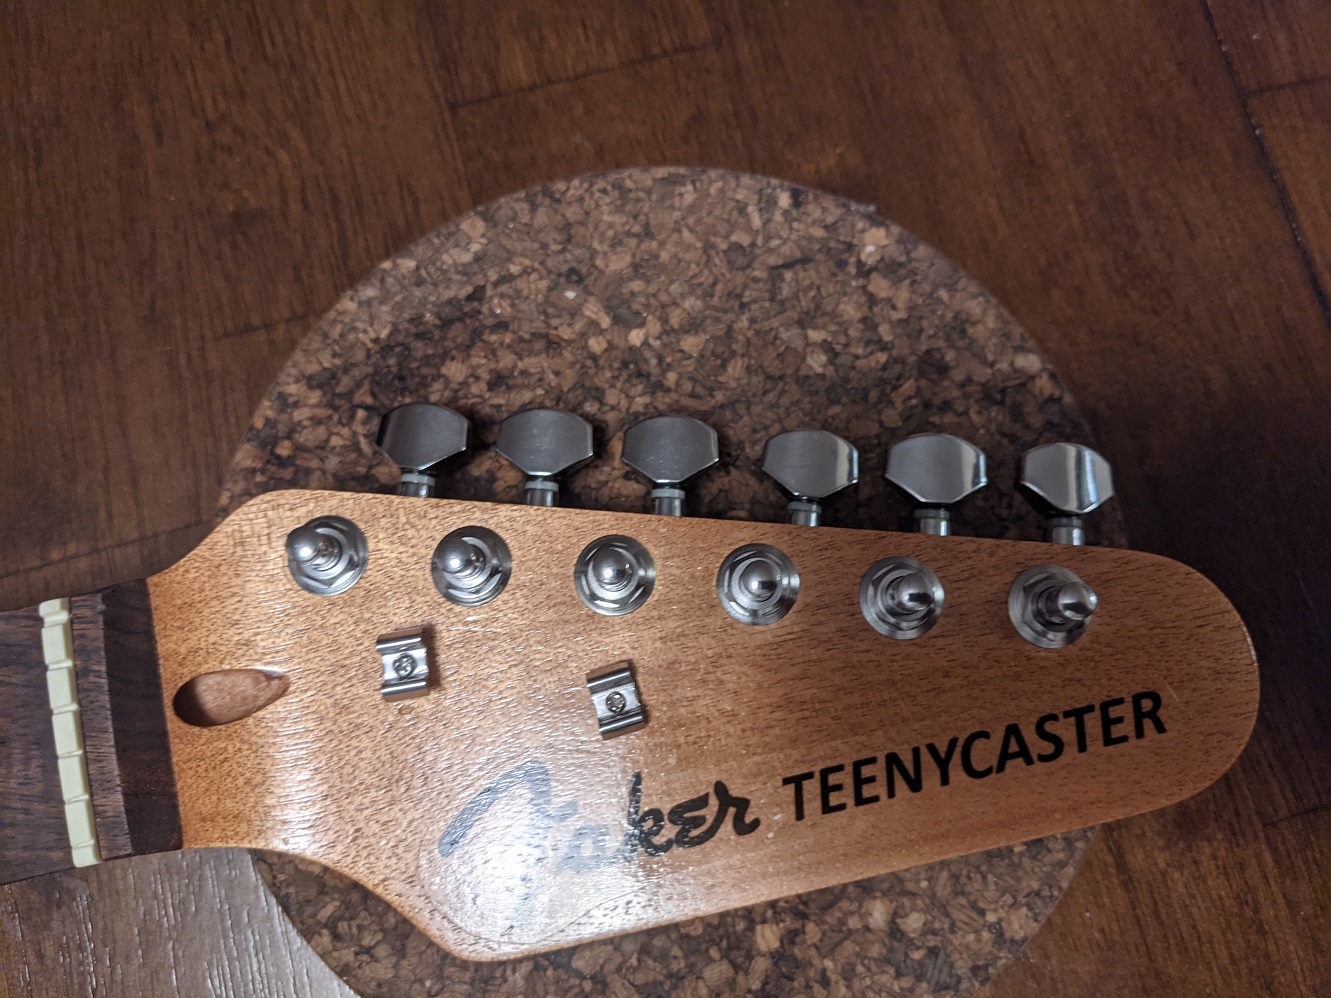
The Teenycaster neck needed some attention. The frets sucked (they are dull, the ends are sharp, and some are high and buzz) and the tuners suck (they are wobbly and the ratio is too low). I bought an inexpensive set of Wilkinson tuners that are really nice. They are much better quality than the tuners that come on most inexpensive guitars and they don’t cost an arm and a leg.
First it is time to fix the frets… Use a fret rocker to mark out the high spots on the frets.Use some special fret files (and a trusty triangle file) to knock down the high spots ad crown the tops.Polish the frets to a mirror finish using some high grit sandpaper and micro polishing pads.
Now it’s time to address the tuners. Old cruddy tuners with loose posts, sloppy gears, and too low of a ratio.New tuners with tight tolerances and an 18:1 gear ratio.Tuner booty shot. These are thicc, but were a drop in replacement for the originals.
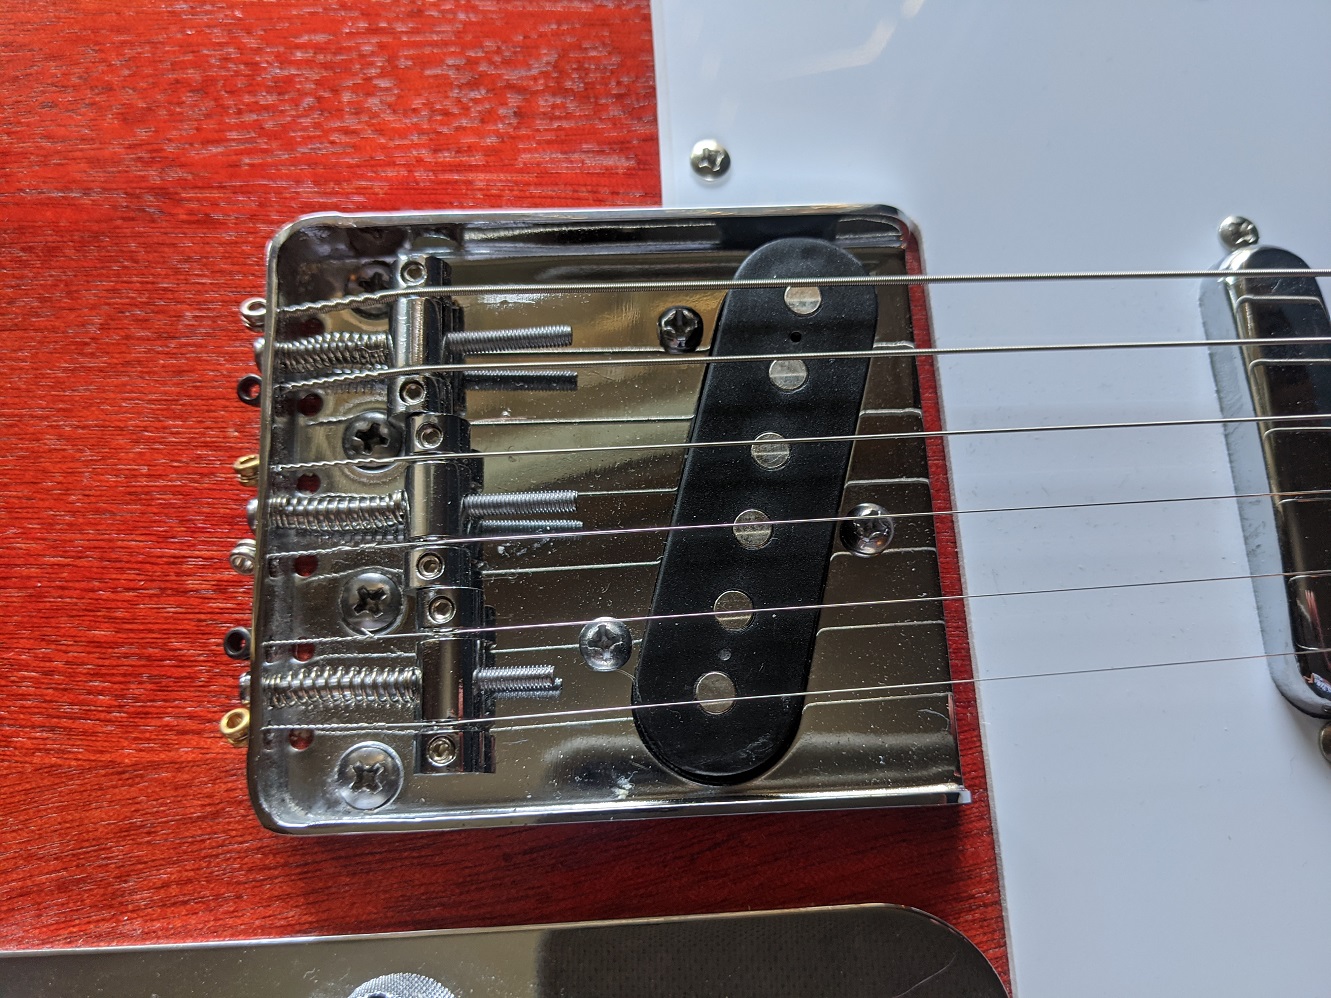
They have the stupid lips to attach a cover that nobody uses.
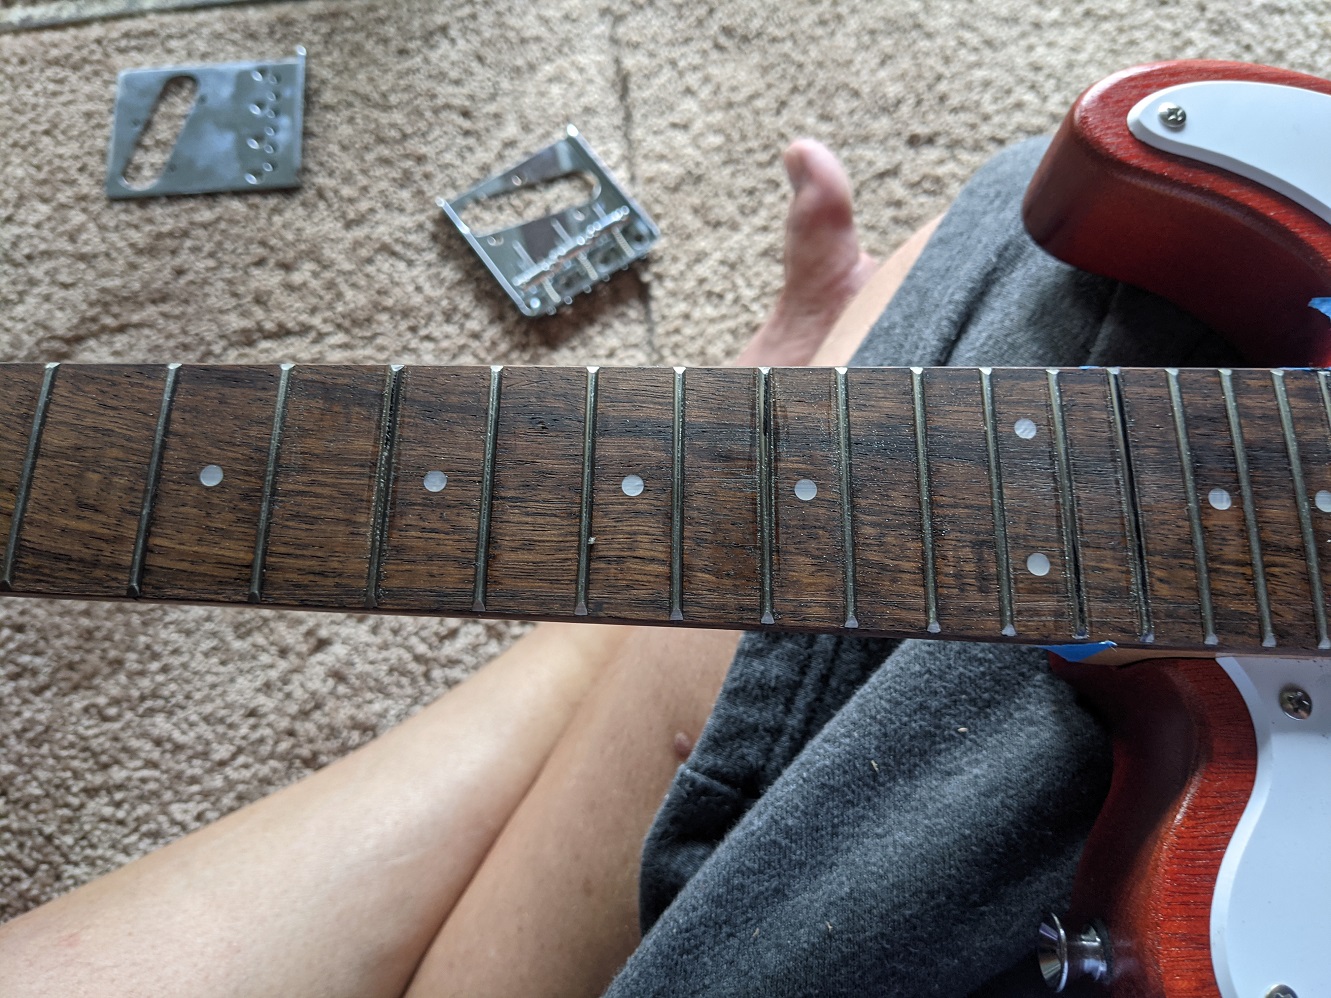
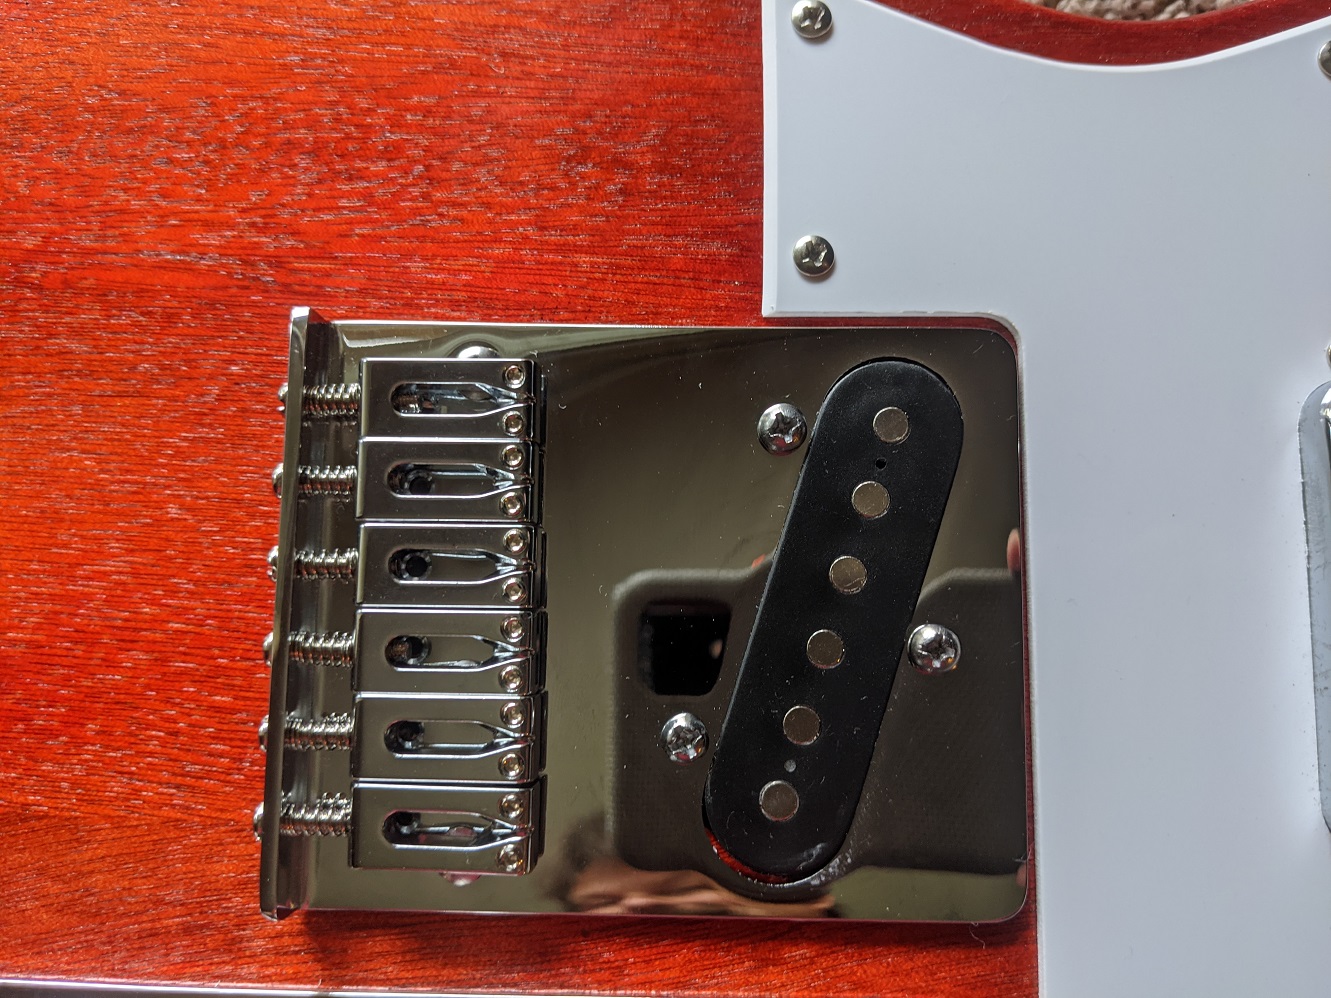
They only have 3 saddles so you can’t get the intonation right (especially on a short scale like this)
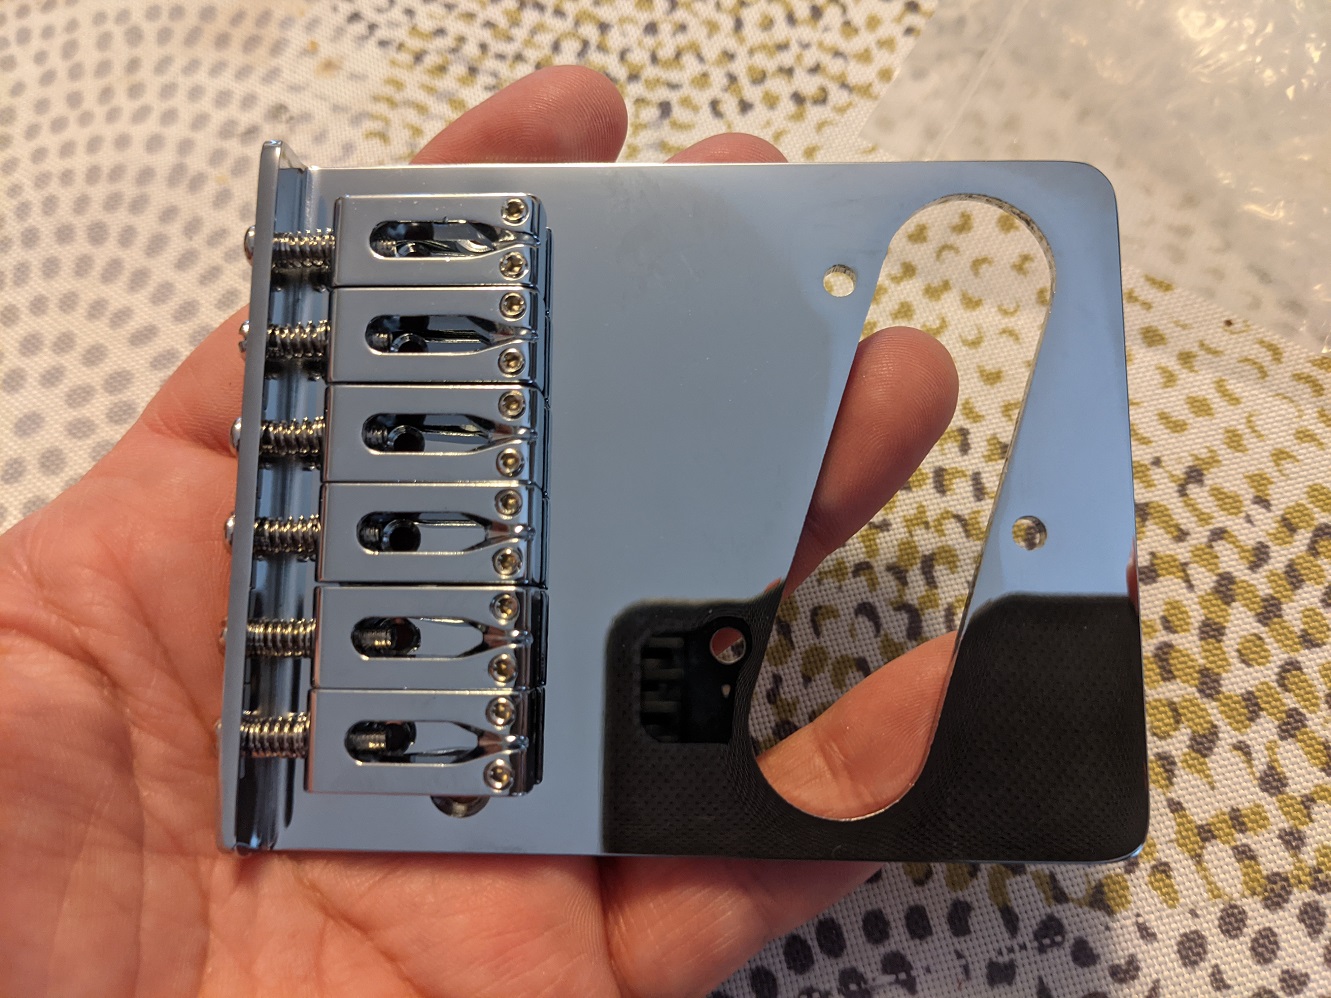
Time to upgrade. Original bridge
I bought a new replacement bridge with six saddles so it can be properly intonated. The new bridge is a “string through” bridge which should make it sound better too. Also, the new one is thicker metal so it should resonate some more. New and hot bridge
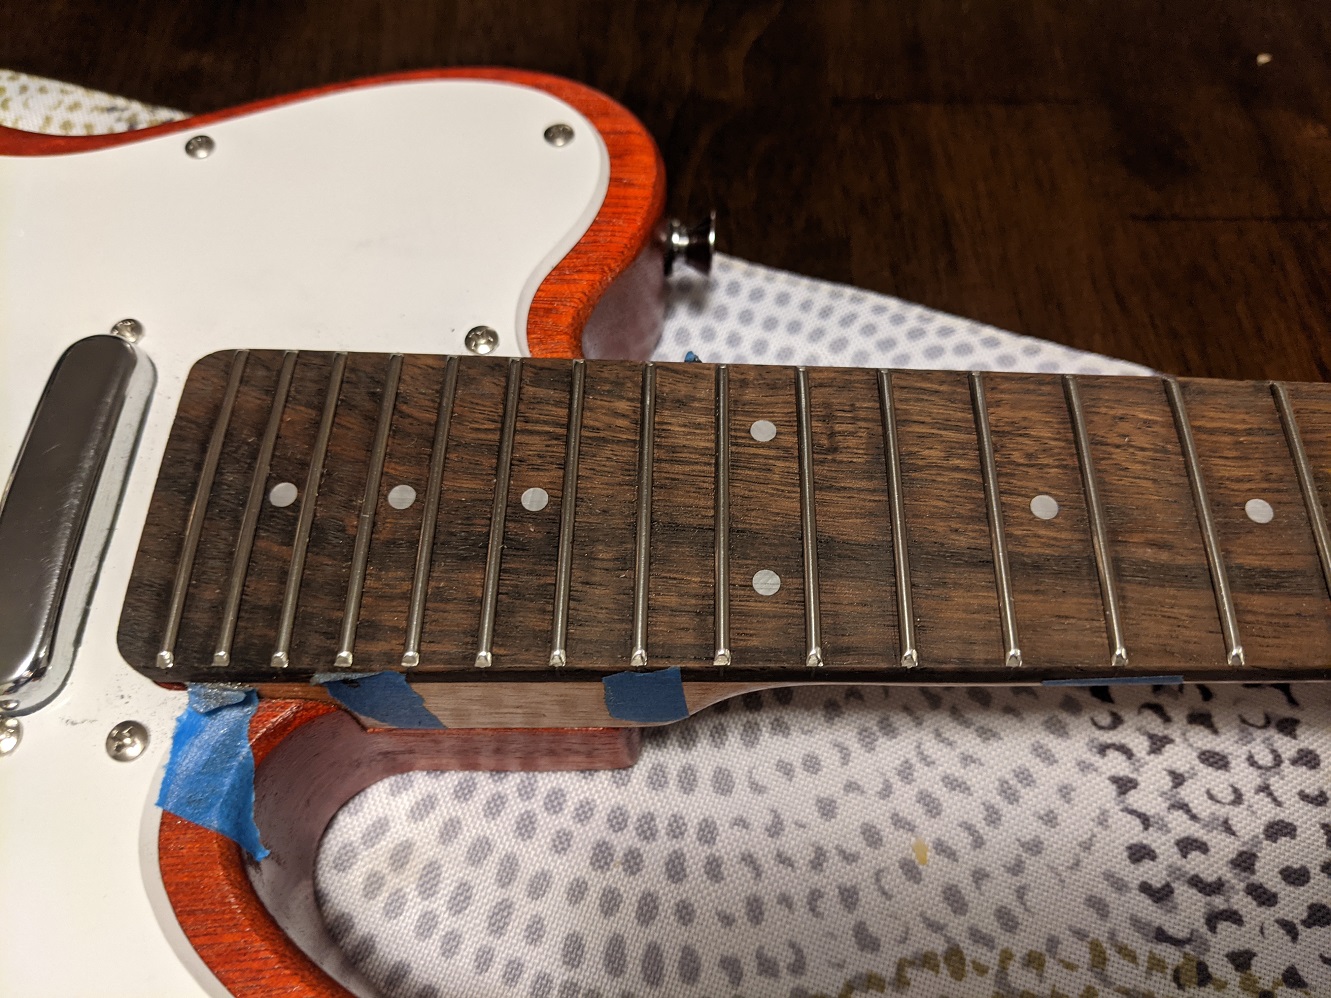
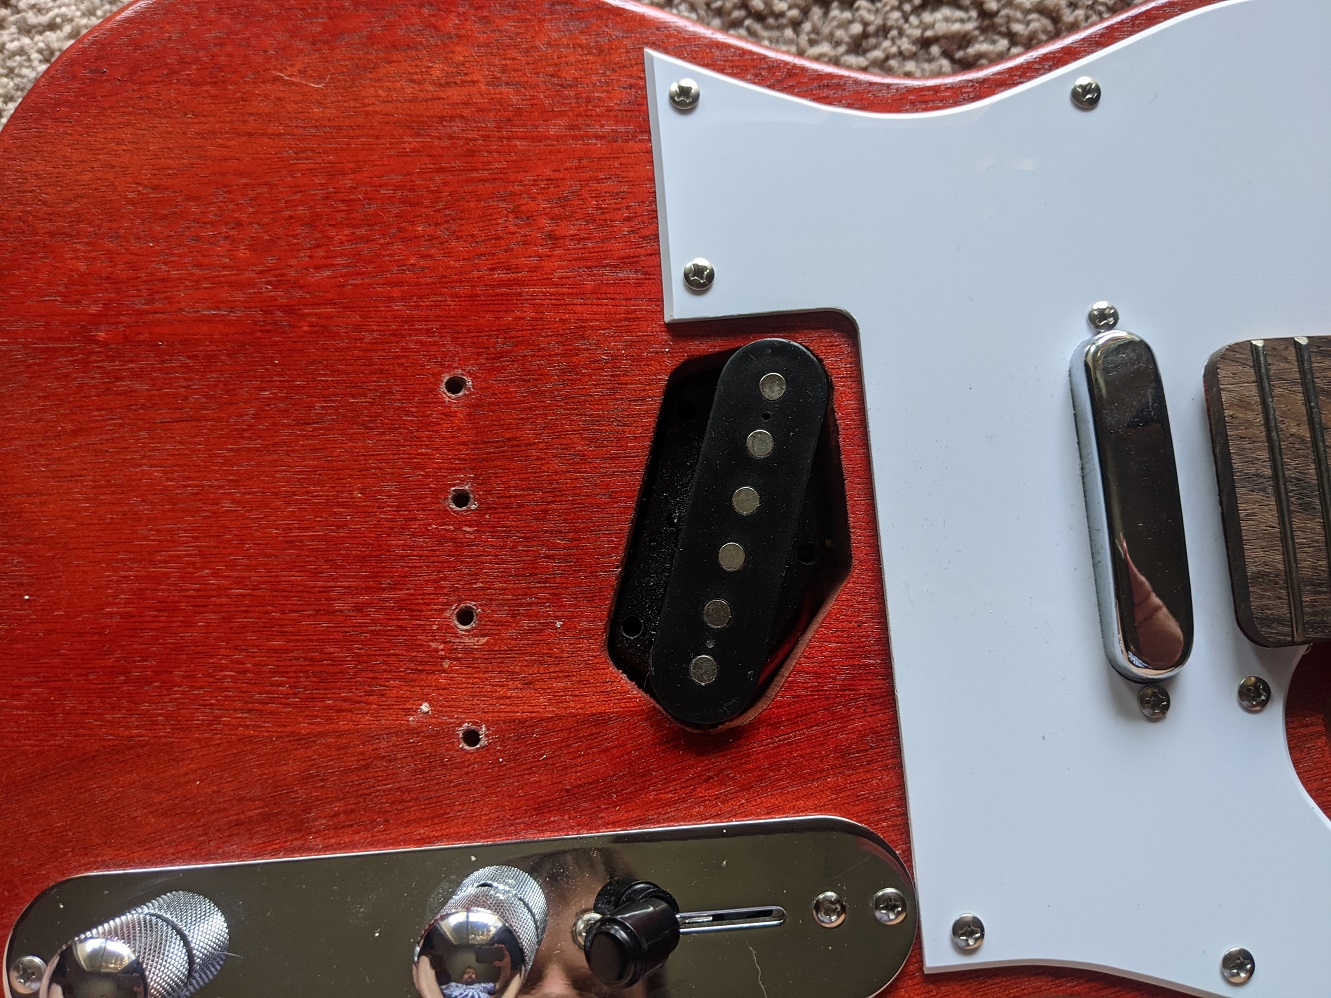
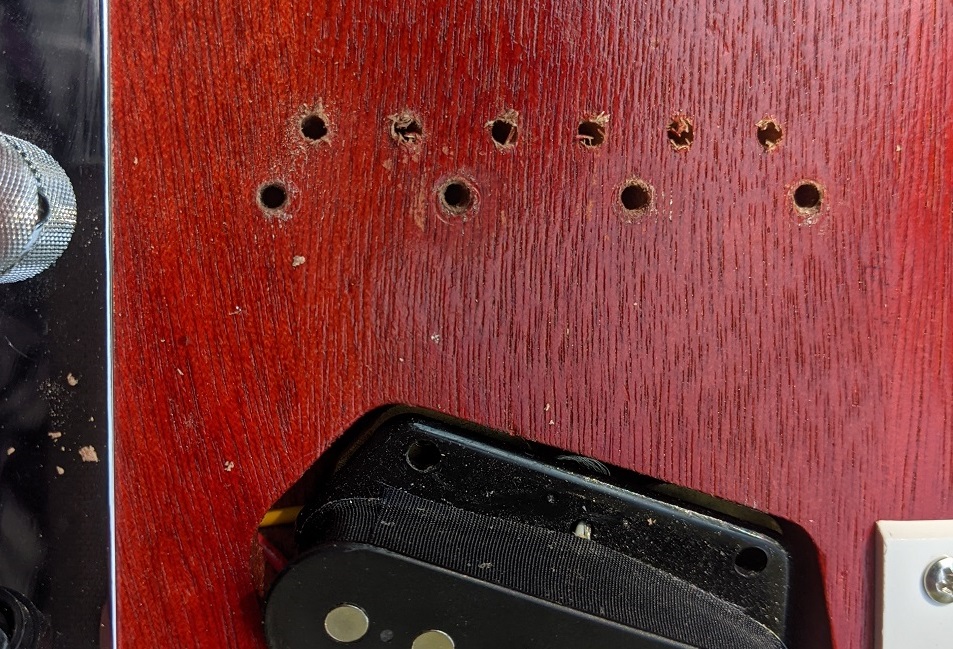
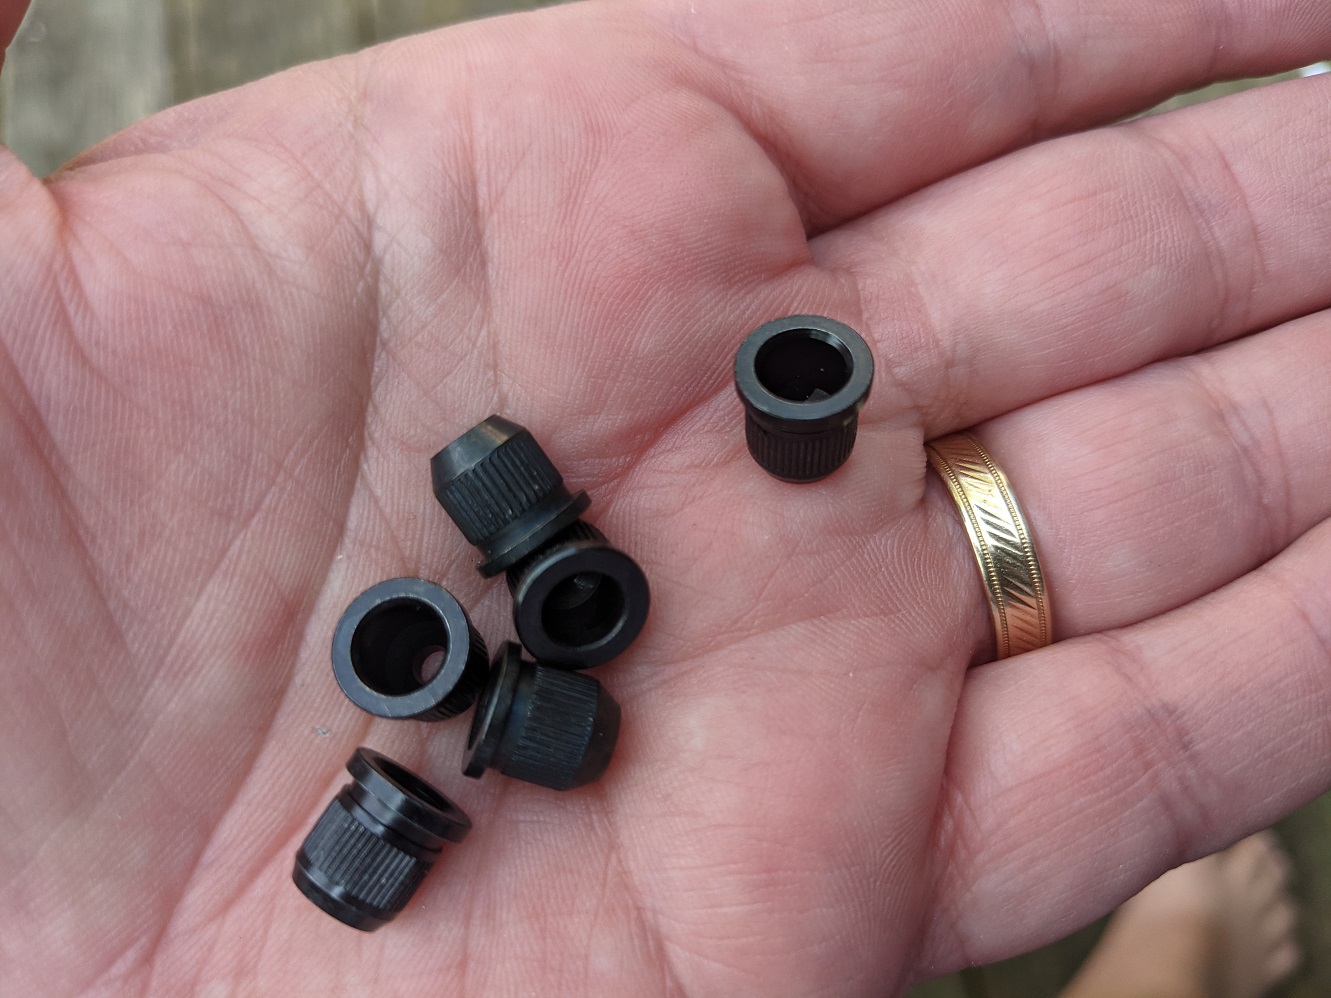
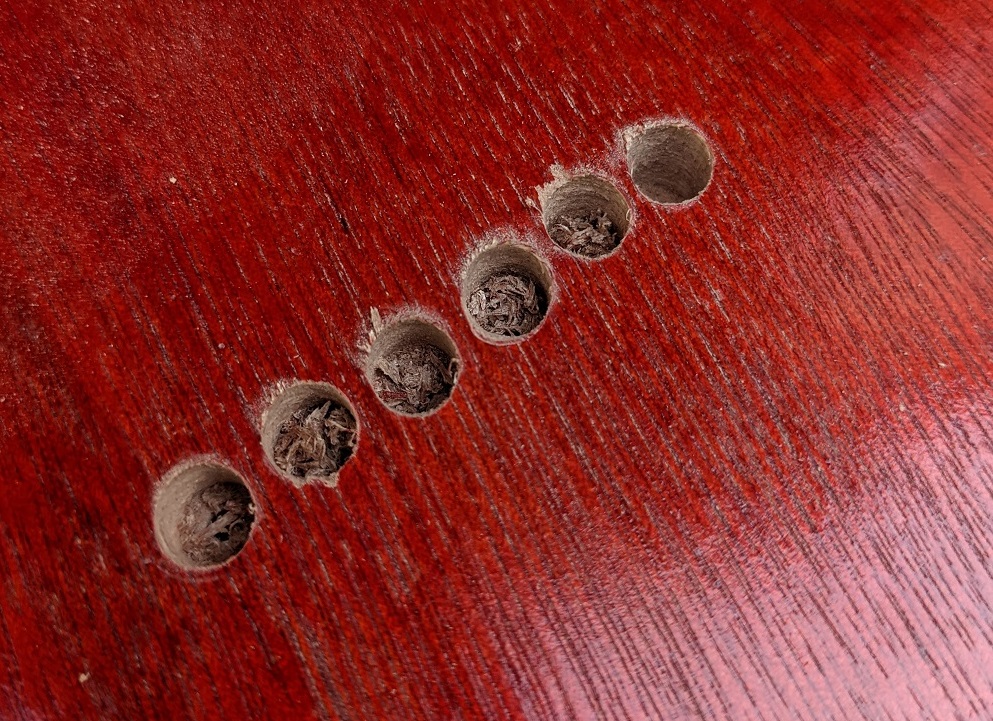
Time to install it. The first step is marking the location where the strings will go through the body. Then I need to drill the holes through the body as straight as I can without a drill press (spoiler, they are crooked). Then some counterbores on the back side and then installed the ferrules to hold the ends of the strings. Next up is installing the bridge and voila! Marking the holes where the strings go.Drilling holes for the stringsFerrulesCounterbores for ferrulesFerrules installed (crookedly)Bridge installed
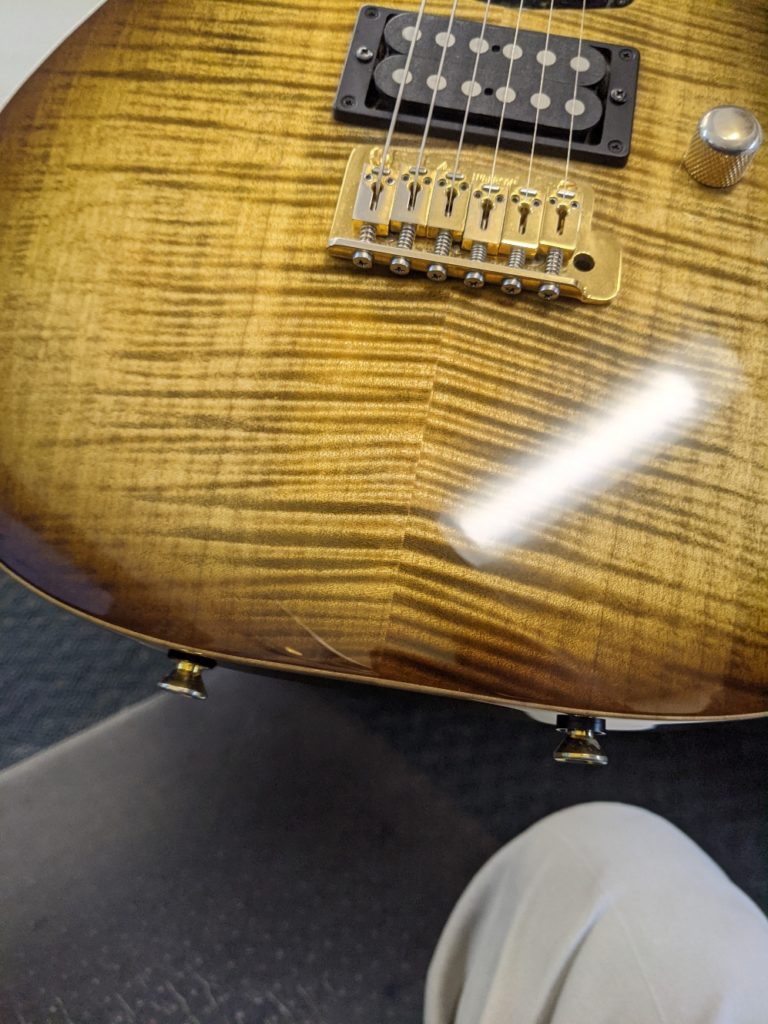
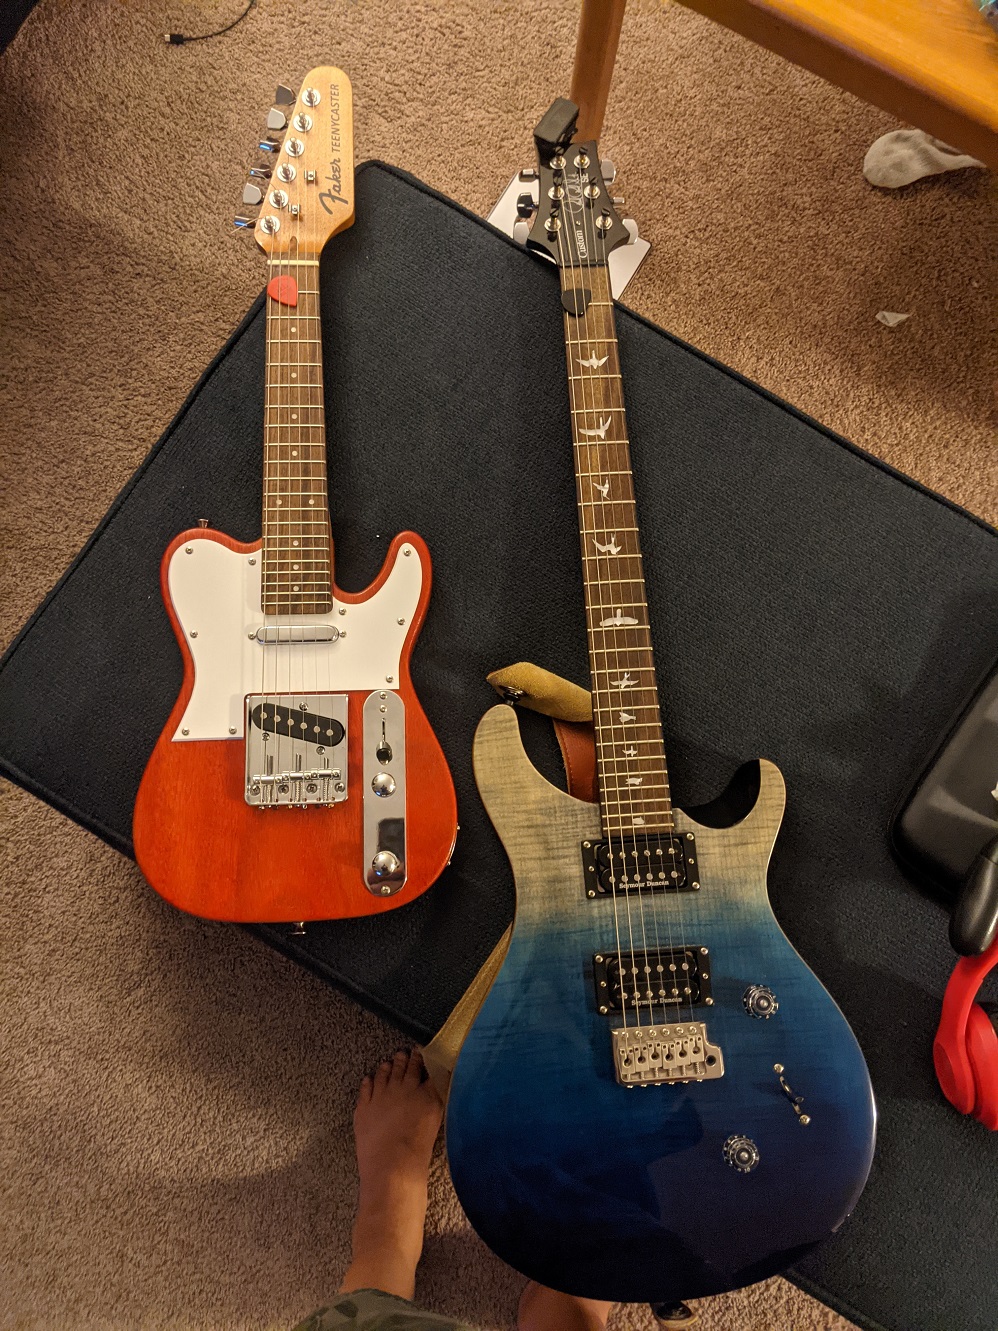
I’ve been working on the Teenycaster again after a hiatus, and doing some upgrades as well. It’s a lot more fun that I initially thought. For giggles, here is a photo comparing the Teenycaster to my normal size PRS.
Teenycaster on the left, PRS SE Custom 24 on the right.
The Teenycaster has a ~16″ scale length compared to the 24″ scale length of the full size PRS. After my upgrades I hope to get it tuned to E standard tuning.
I think I have settled on a color for the V. My friend’s daughter has a Squier Telecaster that is bright orange and I love it. Her guitar is orange with a white pickguard and chrome hardware. It looks like an orange creamsicle. As everyone knows, orange and black look really cool together so I think I’m going that direction.
A company named Createx makes a line of water based paints that can be used on guitars and purchased in small amounts. The have a some really cool metallic colors that can be used with their clear orange. The video below shows all of their candy colors applied on 4 different basecoats. I love the orange applied over a charcoal metallic basecoat.
Metallic orange has a cool 1980’s vibe with a cool “heavy metal” twist with the dark metallic undercoat. Slap some all black hardware on that and it will pop.
I think I also want to paint the black part of the headstock with the same orange metallic and add the same logo back except in black. The black headstock will be the same orange as the body, and the Kramer logo will be in black.


You must be logged in to post a comment.