I’ve done work on lots of other guitars, now I need to get the Less Paul working.
It’s spent the last year or more in my closet. When it was together last, I just did the wiring and strung it up. I found a problem with the wiring and hated the sound of the pickups, and it needed a set up.
I bought some Wilkinson pickups for it and some new wiring parts and there it sat.
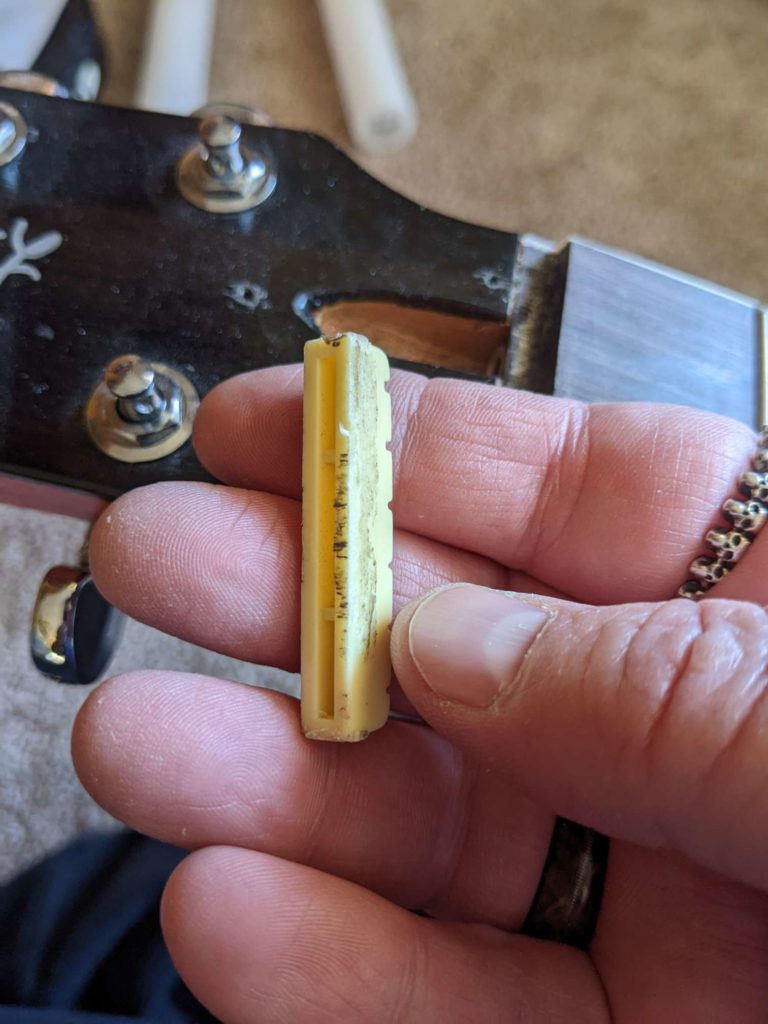
I started working on it yesterday. I removed the nut and did some fretwork on it. Look at this cheap nut that came with the kit! It’s hollow inside!
I put about 8 more coats of clear lacquer on the back where I repaired the finish. Now that’s done. The picture looks the same as last weekend so I didn’t take any.
One thing I noticed is where the new clear lacquer overlapped with the original clear it’s much shinier and I like it. I have an extra can of clear and I think I’m put of the woods (finish wise) so I’m going to add that can of clear to the front of the guitar to make it shinier.
During the last week I fixed the red lacquer on the back and sides of the guitar that was ruined when I steamed the neck loose. It came out pretty good, but you can definitely see the scar. Pictures are below.
Speaking of scars… I decided my lacquer repair boo boo needs a band aid to make it better.
I went to Michael’s and bought some water slide paper that you can print on with an ink jet printer. It makes the little decals that you soak in water and slide on the object.
Custom band aid decal
The base decal material is clear and common house printers are meant to print on material with a white background. My decal didn’t look good on a sweet red guitar. No bueno
Amazon to the rescue! I bought some more waterslide paper that has a solid white background instead of clear and started over. The result looks great! Water slide decal paper with white backgroundBand aid looks great!The lacquer repair looks pretty good!
The band aid is a fun reminder of the path to get here.
Next step is 6-8 coats of clear on top of the band aid decal.
I re-glued the neck last weekend and it seemed to be a success! After I unclamped the guitar, I strung out up and let it sit for a few days. The wood has spent most of its life being a tree, then it became guitar parts. I hear it’s important to let it acclimate to being a guitar. It’s been strung up for a few days now so the neck should be more set.
I adjusted the truss rod to put in a little relief (about 0.007″ at the 8th fret) and set the string height to about 4/64 to 5/64. I get a little bit of fret buzz at the 22nd fret, but that’s ok for now. All I really wanted to see is if it would set up nice and it will be fine and dandy!
Next step is to fix the paint job this weekend and then do the wiring.
Yay!
Here are some photos.
String height looks good which means the neck angle is good. The bridge is up about 1 turn.
The neck is glued in (again)! Hopefully this is the last time anyone ever see the pieces apart! 🤞
This time I used “hide glue” for the joint. This type of glue is traditional for making musical instruments, especially on parts that need to be repaired in the future. It is plenty strong, and also can be taken apart fairly easy using heat. If o used hide glue the first time, I prolly wouldn’t have messed up the lacquer trying to get it apart.
Hide glue is made of animal leftovers like skins and hoofs (think of the old cartoons where they sent the horse to the glue factory). It comes to me in a crystal form that needs to be mixed with water to re-hydrate it. Before use, it needs to be heated to around 140°F before applying. You need to act quick when applying it and clamping the wood because once it cools down a bit, it’s too late and you have to start over. This page has a lot of info about hide glue.
The gluing went well I think and the guitar is clamped to my workbench until tomorrow.
So I played around with the guitar all week and decided I don’t like to play it with the neck angle too steep. Sooo…..
Time for major surgery. Spoiler, it went as good as I could hope.
I used Titebond original glue which is water soluble and softens with heat. So it seems getting hot water to the glue joint is the thing to do. Luckily, the wife has a nice clothes steamer I could use.
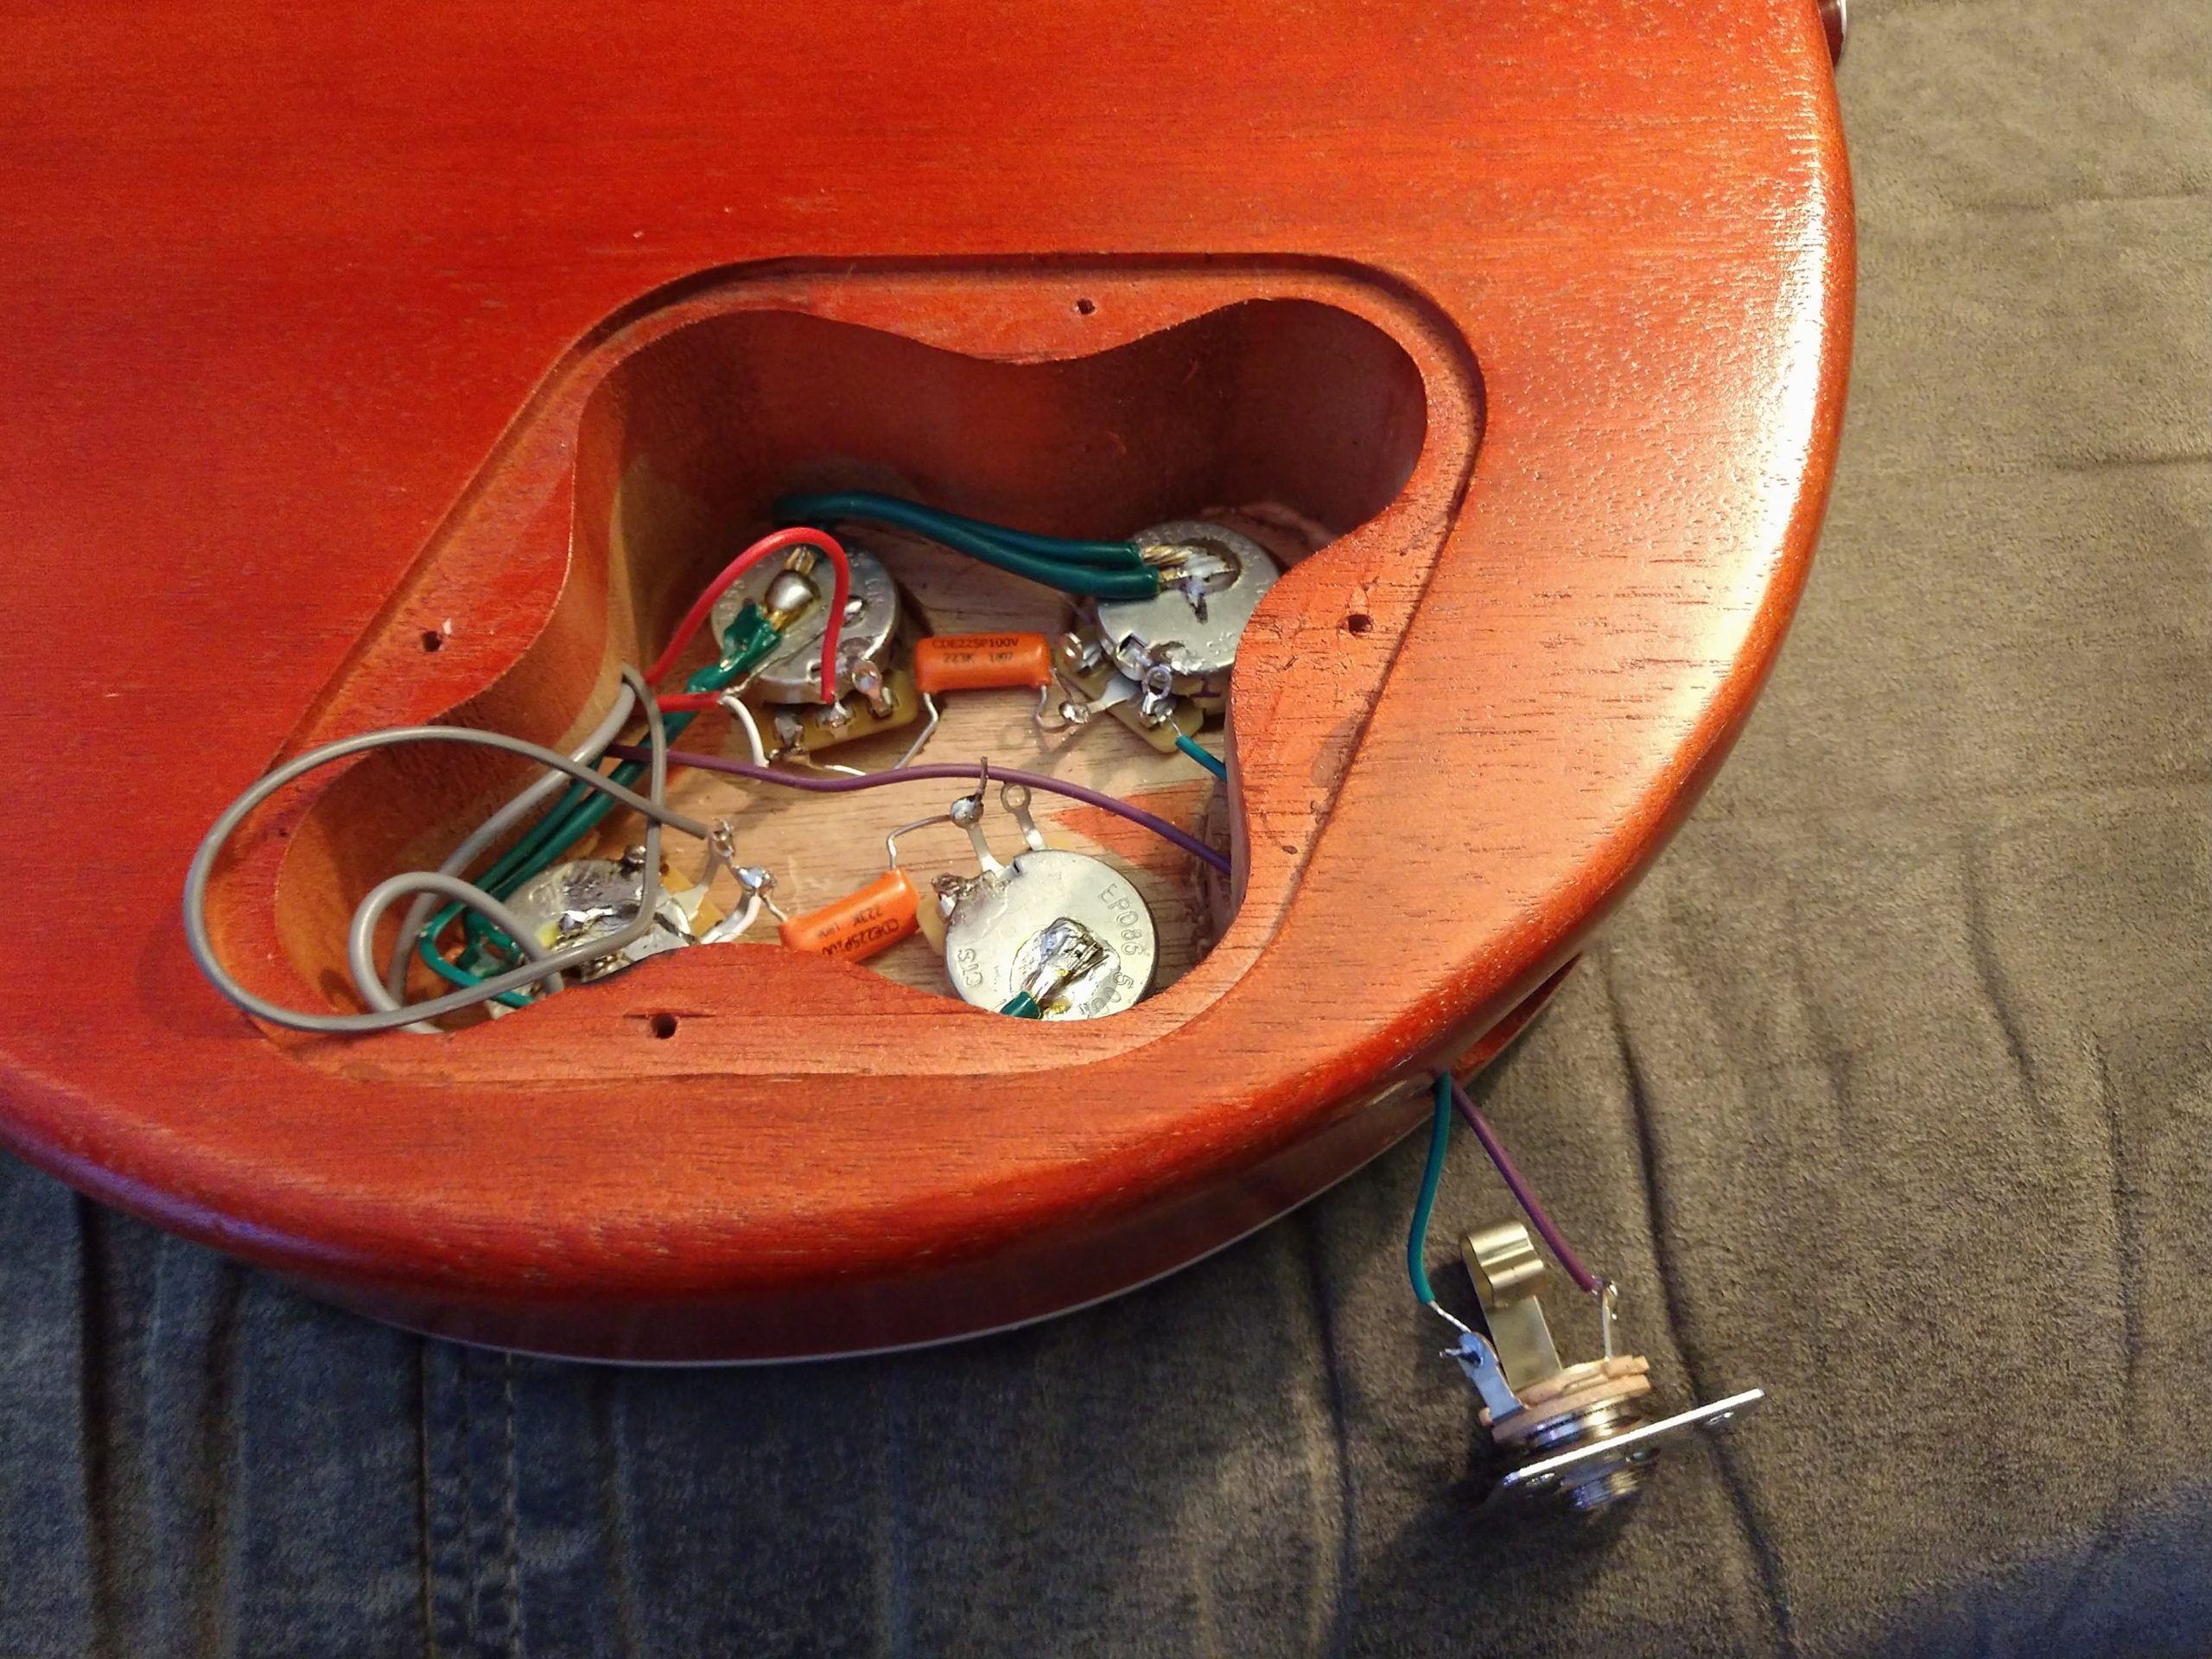
I took all the electronics out (I want to rewire anyway) so I could get access to the neck joint.
I need a way to get steam into the joint between the neck and the body. So I bought a 12″ long drill bit and drilled some holes.
After that, I used my wife’s steamer and some small towels to heat and steam the neck and body joint.
I didn’t take any photos of the steaming because o was home alone and I’m not an octopus.
After about 30-40 minutes I got the joint hot and wet enough for the joint to release. There was no structural damage to the neck or body. Yay for me!
Although I won the war, there was a casualty. The lacquer got pretty messed up from the heat and steam. I should be able to repair it, but it’s a bummer for sure. Scars tell stories, and this is a good one.
This week I will work on the neck angle and repair the lacquer. Stay tuned!
I took the clamps off this morning and started the final assembly. I installed the pickups, finished the wiring, installed the pickguard and trussrod cover, installed the strap locks (Dunlop is my jam), and strung it up.
There are a few things left to do, I need some screws for the back plates, and the knobs don’t fit my pots unfortunately.
Overall I’m happy with the result, and it was a lot of fun getting here. Wiring done (see below)Child labor
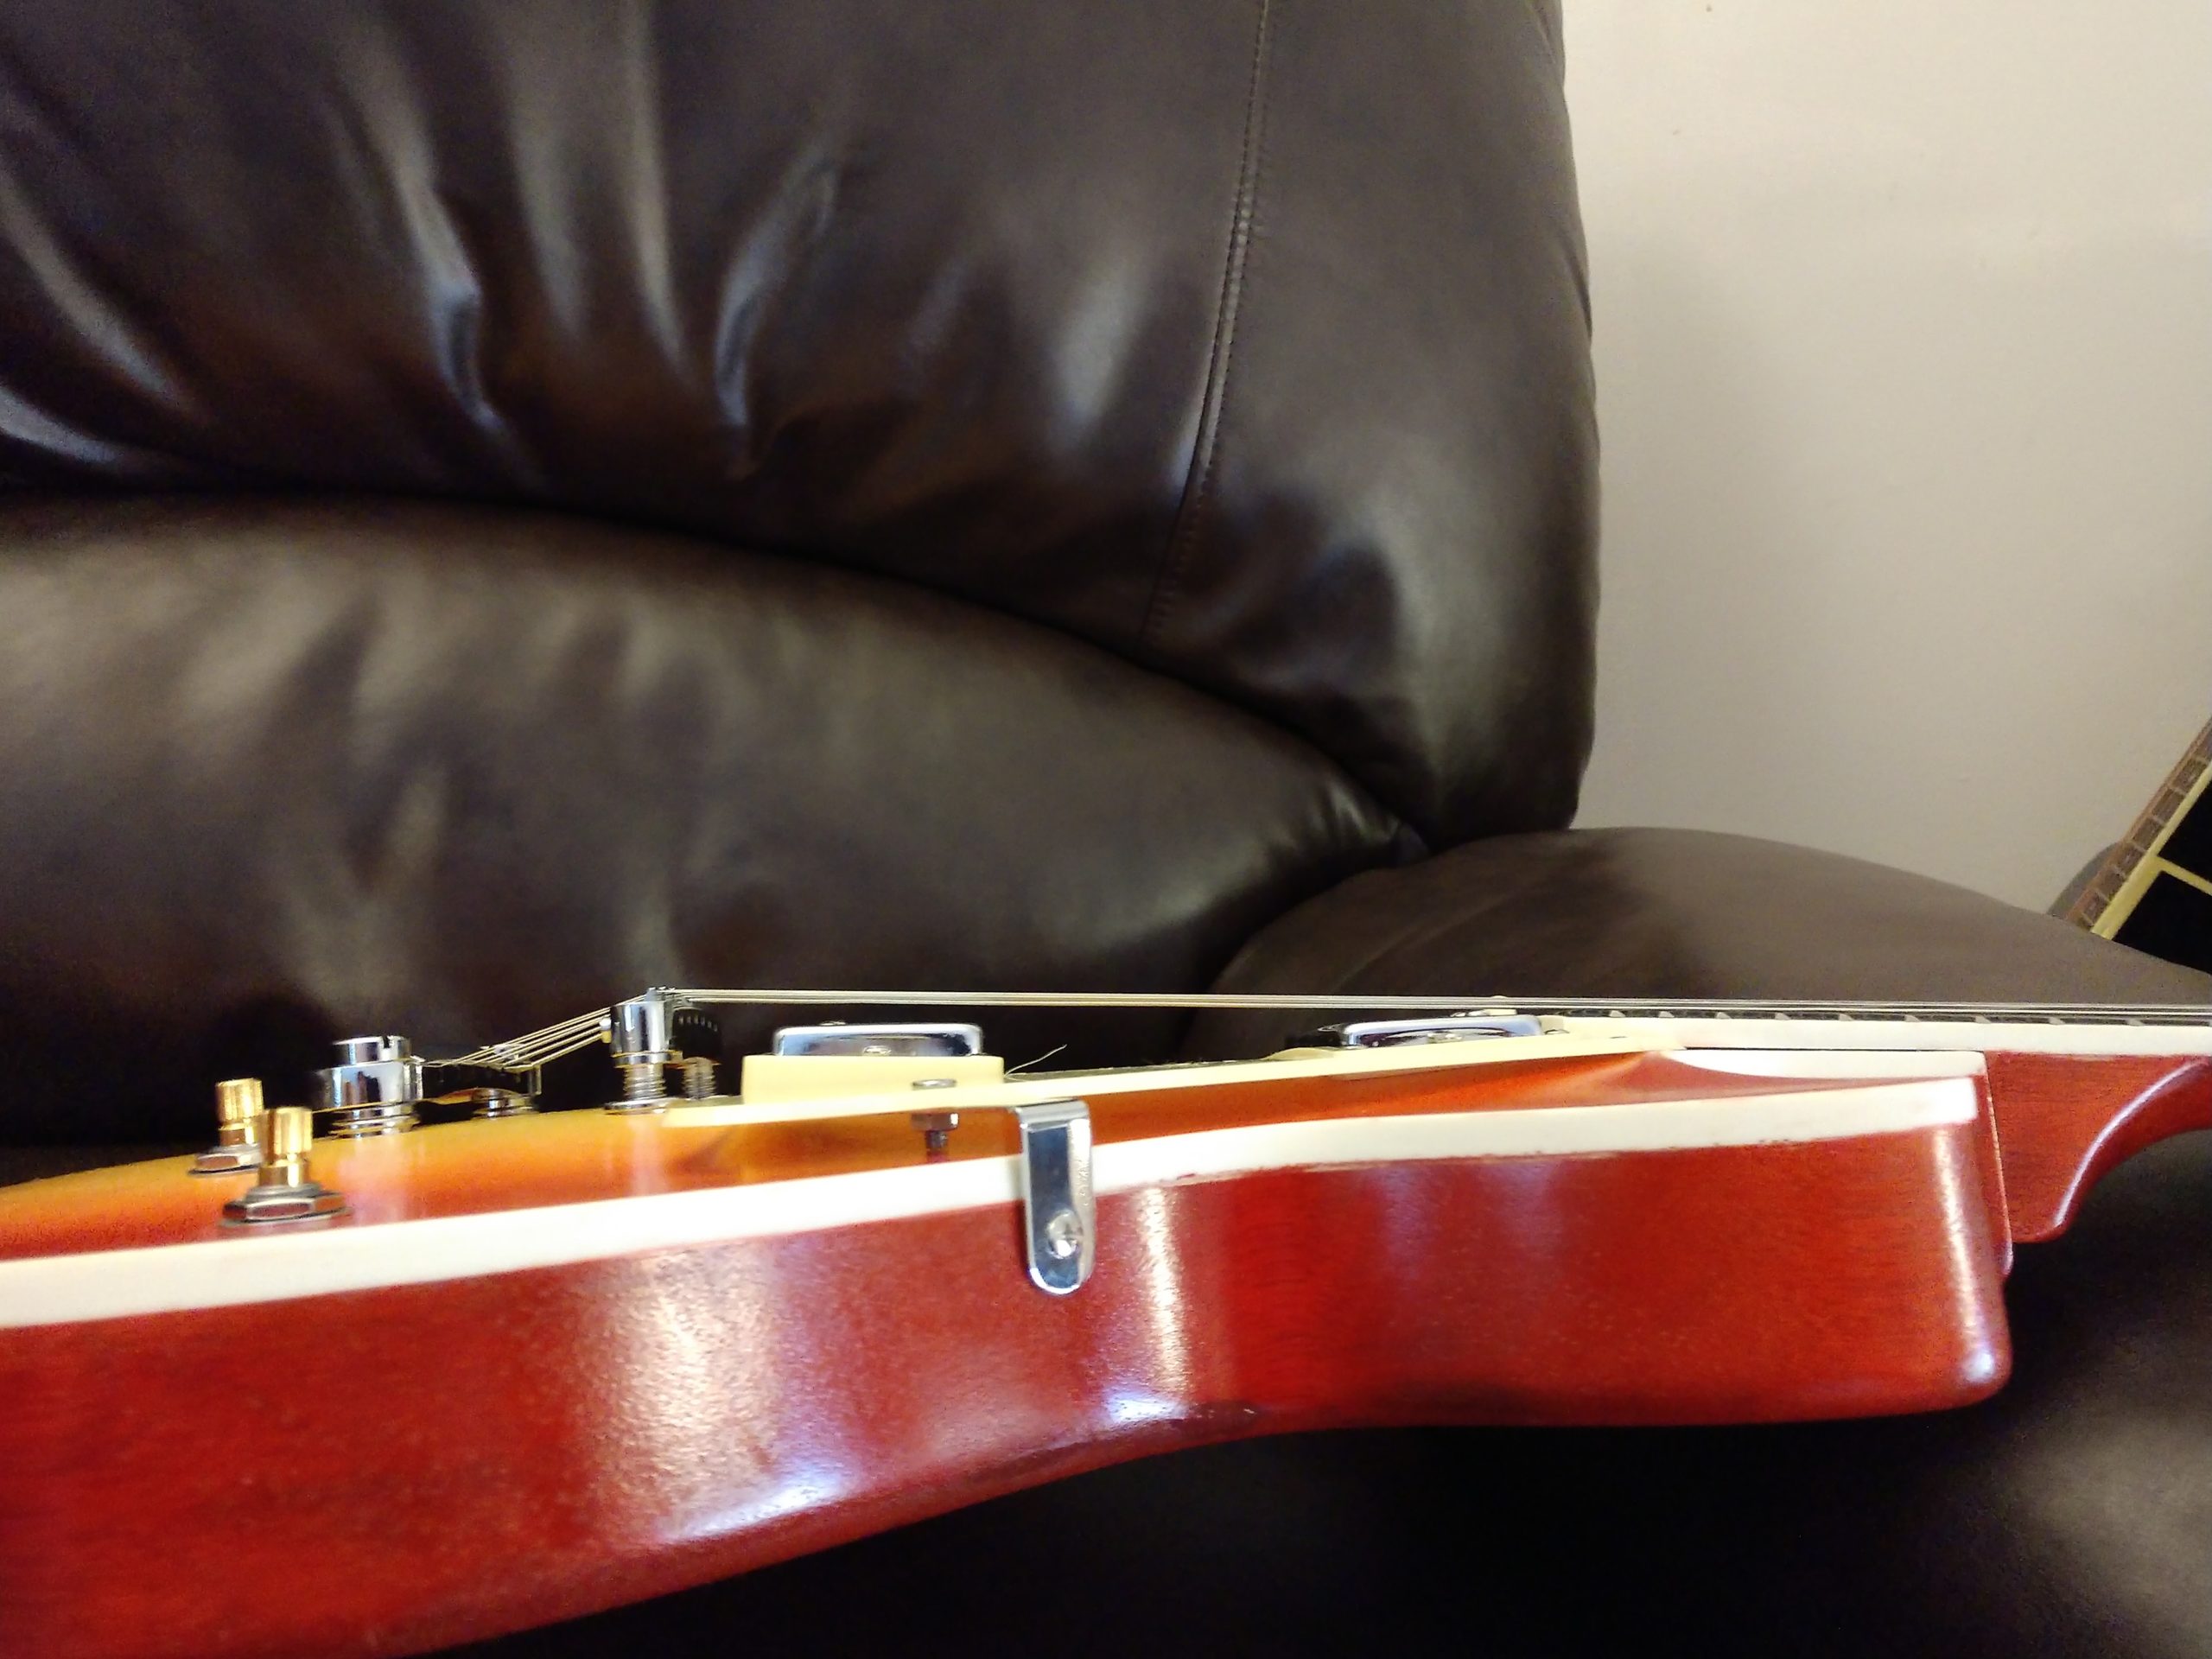
It looks pretty good. Now for the bad parts…
The kit was supposed to be ready to go, but I had to do some surgery on the neck. Apparently, I didn’t do enough surgery
I think the angle is too steep because the bridge is WAY high. The bridge is way too high.
Because the bridge is too high, the pickups are not close enough.
I’ll have to remove the neck to fix this, and it’s gonna be a giant pain in the ass. Not looking forward to this.
Also, I think I have a bad ground connection or something because o have a HORRIFIC buzz when it’s plugged into the amp. I’m not sure what kind of pickups are in it. I assumed they are humbuckers by the size and shape, but they only seem to have 1 set of magnets.
Point of no return here (or at least a real pain on the ass to go back). I glued the neck on just now. Thanks to advice from some helpful redditors, I didn’t use the wrong glue! I used Titebond original glue because it can be undone with water if I ever need to take it apart (hopefully never).
I’ll let this sit and cure until tomorrow morning. Wish me luck!


You must be logged in to post a comment.