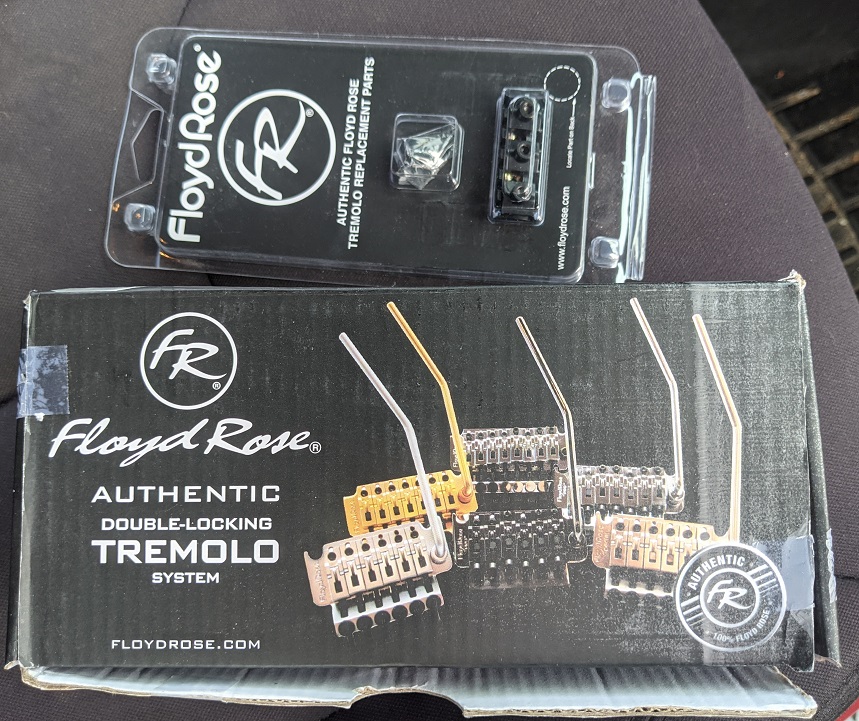
I picked up a new Floyd Rose tremolo and locking nut for the Kramer Vanguard. Bombs away! It seems like a drop in replacement for the original tremolo (that’s what I was hoping for).

 gummibearheads
I picked up a new Floyd Rose tremolo and locking nut for the Kramer Vanguard. Bombs away! It seems like a drop in replacement for the original tremolo (that’s what I was hoping for).
A friend donated a pickup to me. It’s a wicked nasty Seymour Duncan Invader.

I measured the resistance of it and it’s 18k Ohms which is STUPID hot! It’s going to be a flamethrower.
I’ll prolly fill in the neck pickup rout with wood and run this as a single pickup guitar. Edit: I decided I’ll buy another one of these for the neck position.
I’ve always wanted a flying V guitar. My friend gave me an old one that he had laying around for a bunch of years.
This is the assembled guitar. My friend wanted to convert it to a hardtail and disassembled it and then lost interest.
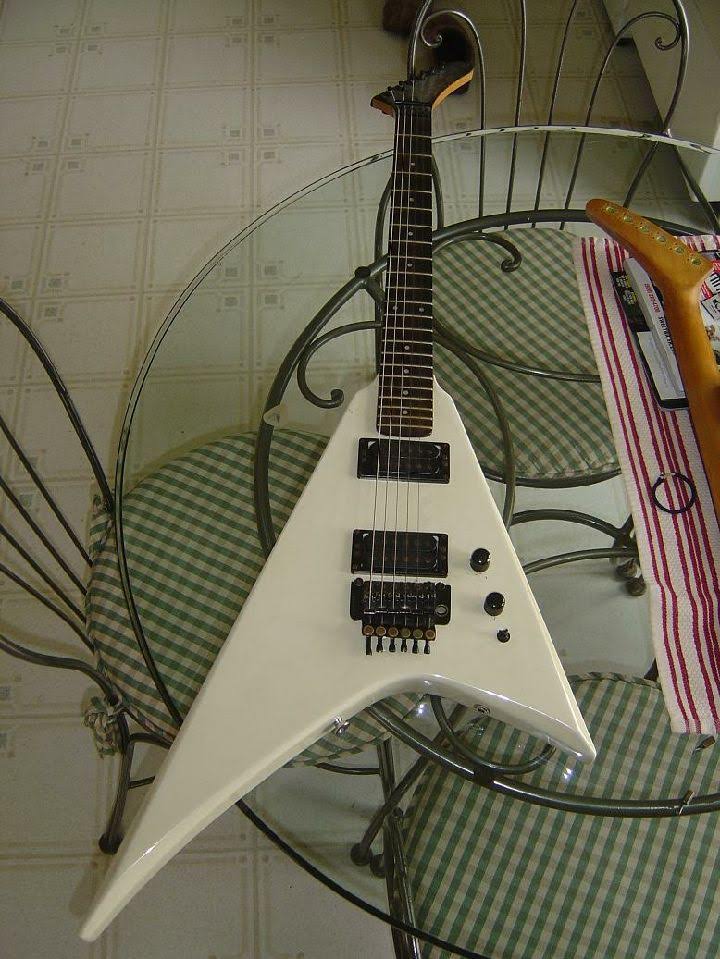
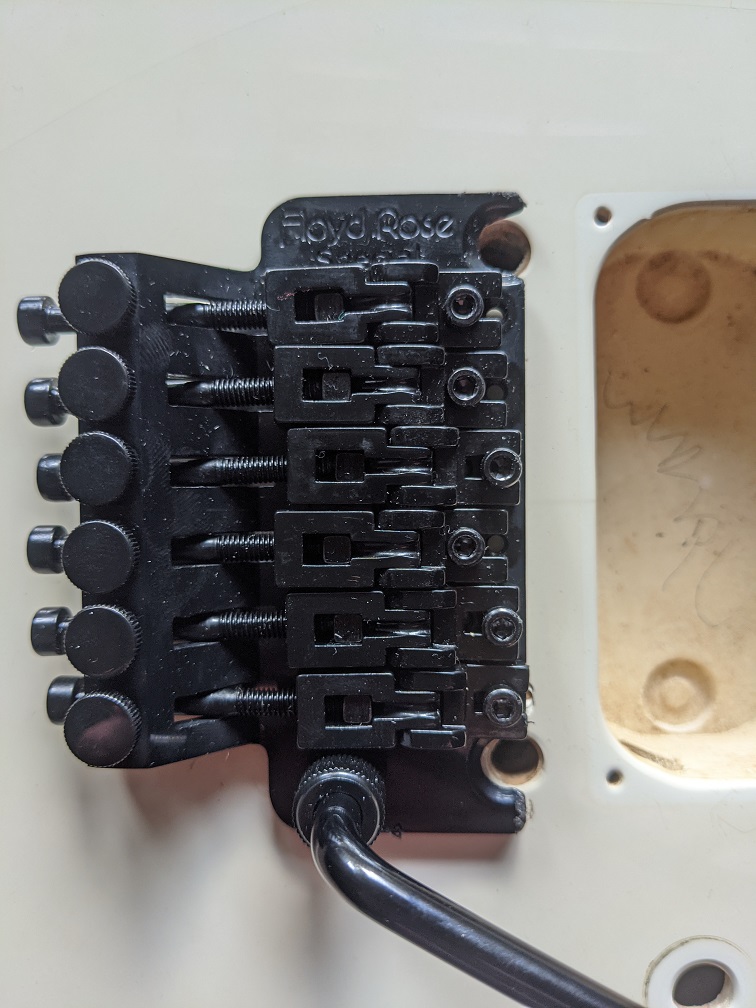
Assuming all the parts he gave me are correct, it’s a Kramer Vangaurd. The serial number on the neckplate dates it to 1985-1986 according to vintagekramer.com. The included pickups are Schaller brand which jives with the date. The tuners are also Schaller and are stamped with “Made in W. Germany”. The tremolo is a licensed Floyd Rose.
This page has some info on Kramer Vangaurd
I want to put a cool flashy paint job on it and some newer parts to get it back into playing shape.


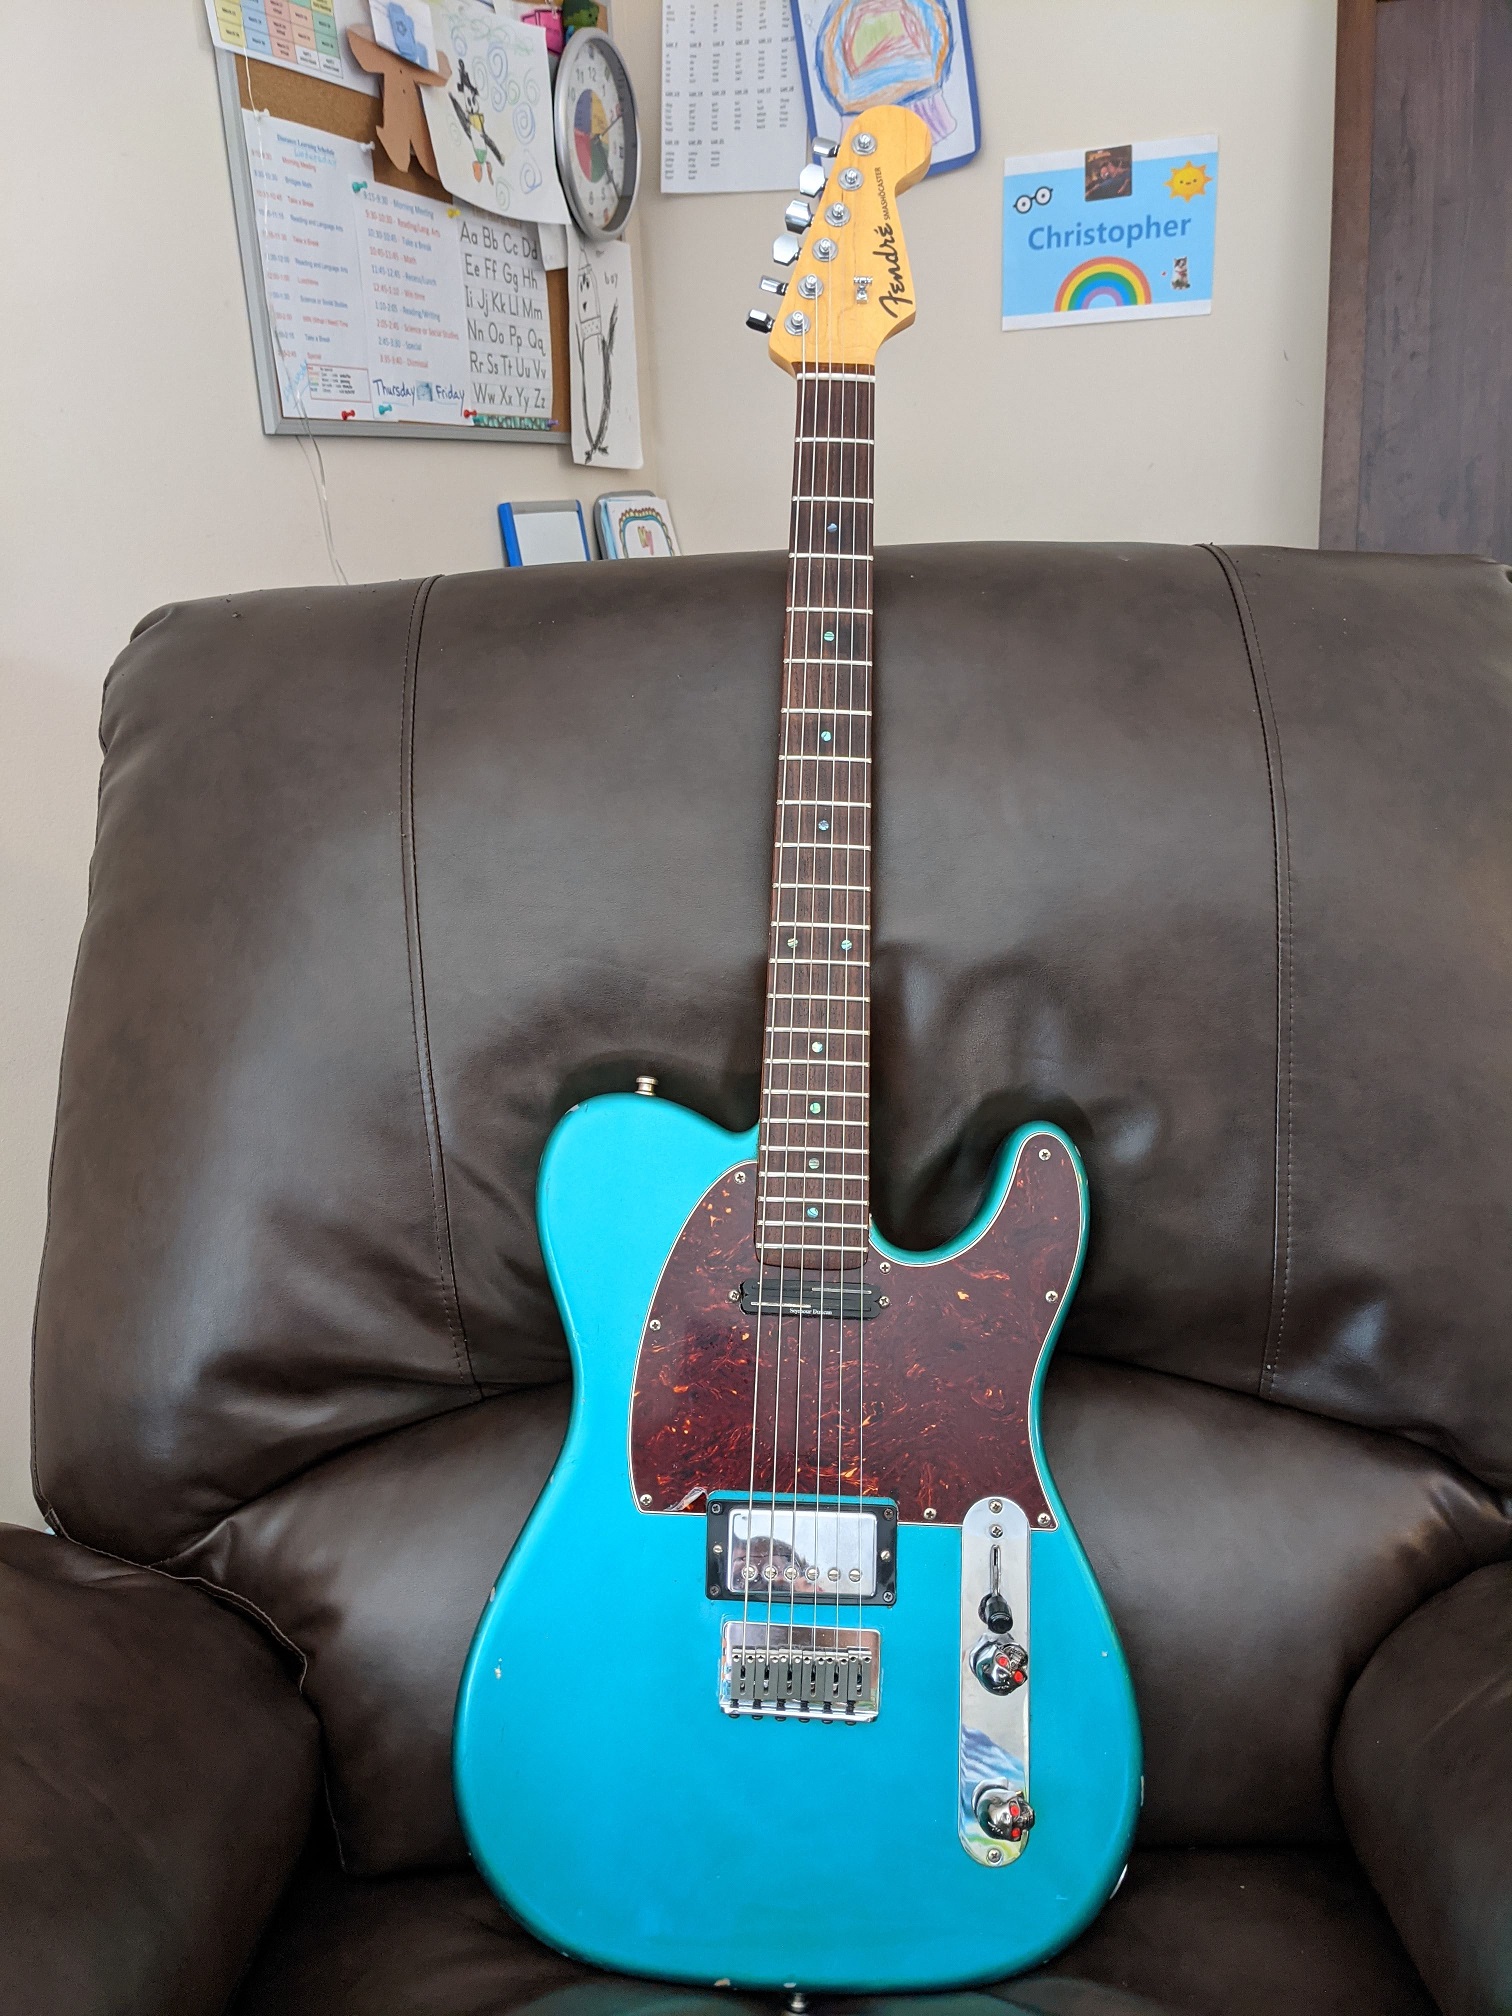
I fixed up my friend’s guitar for him. It came out really cool. Check it out!
See the guitar here!
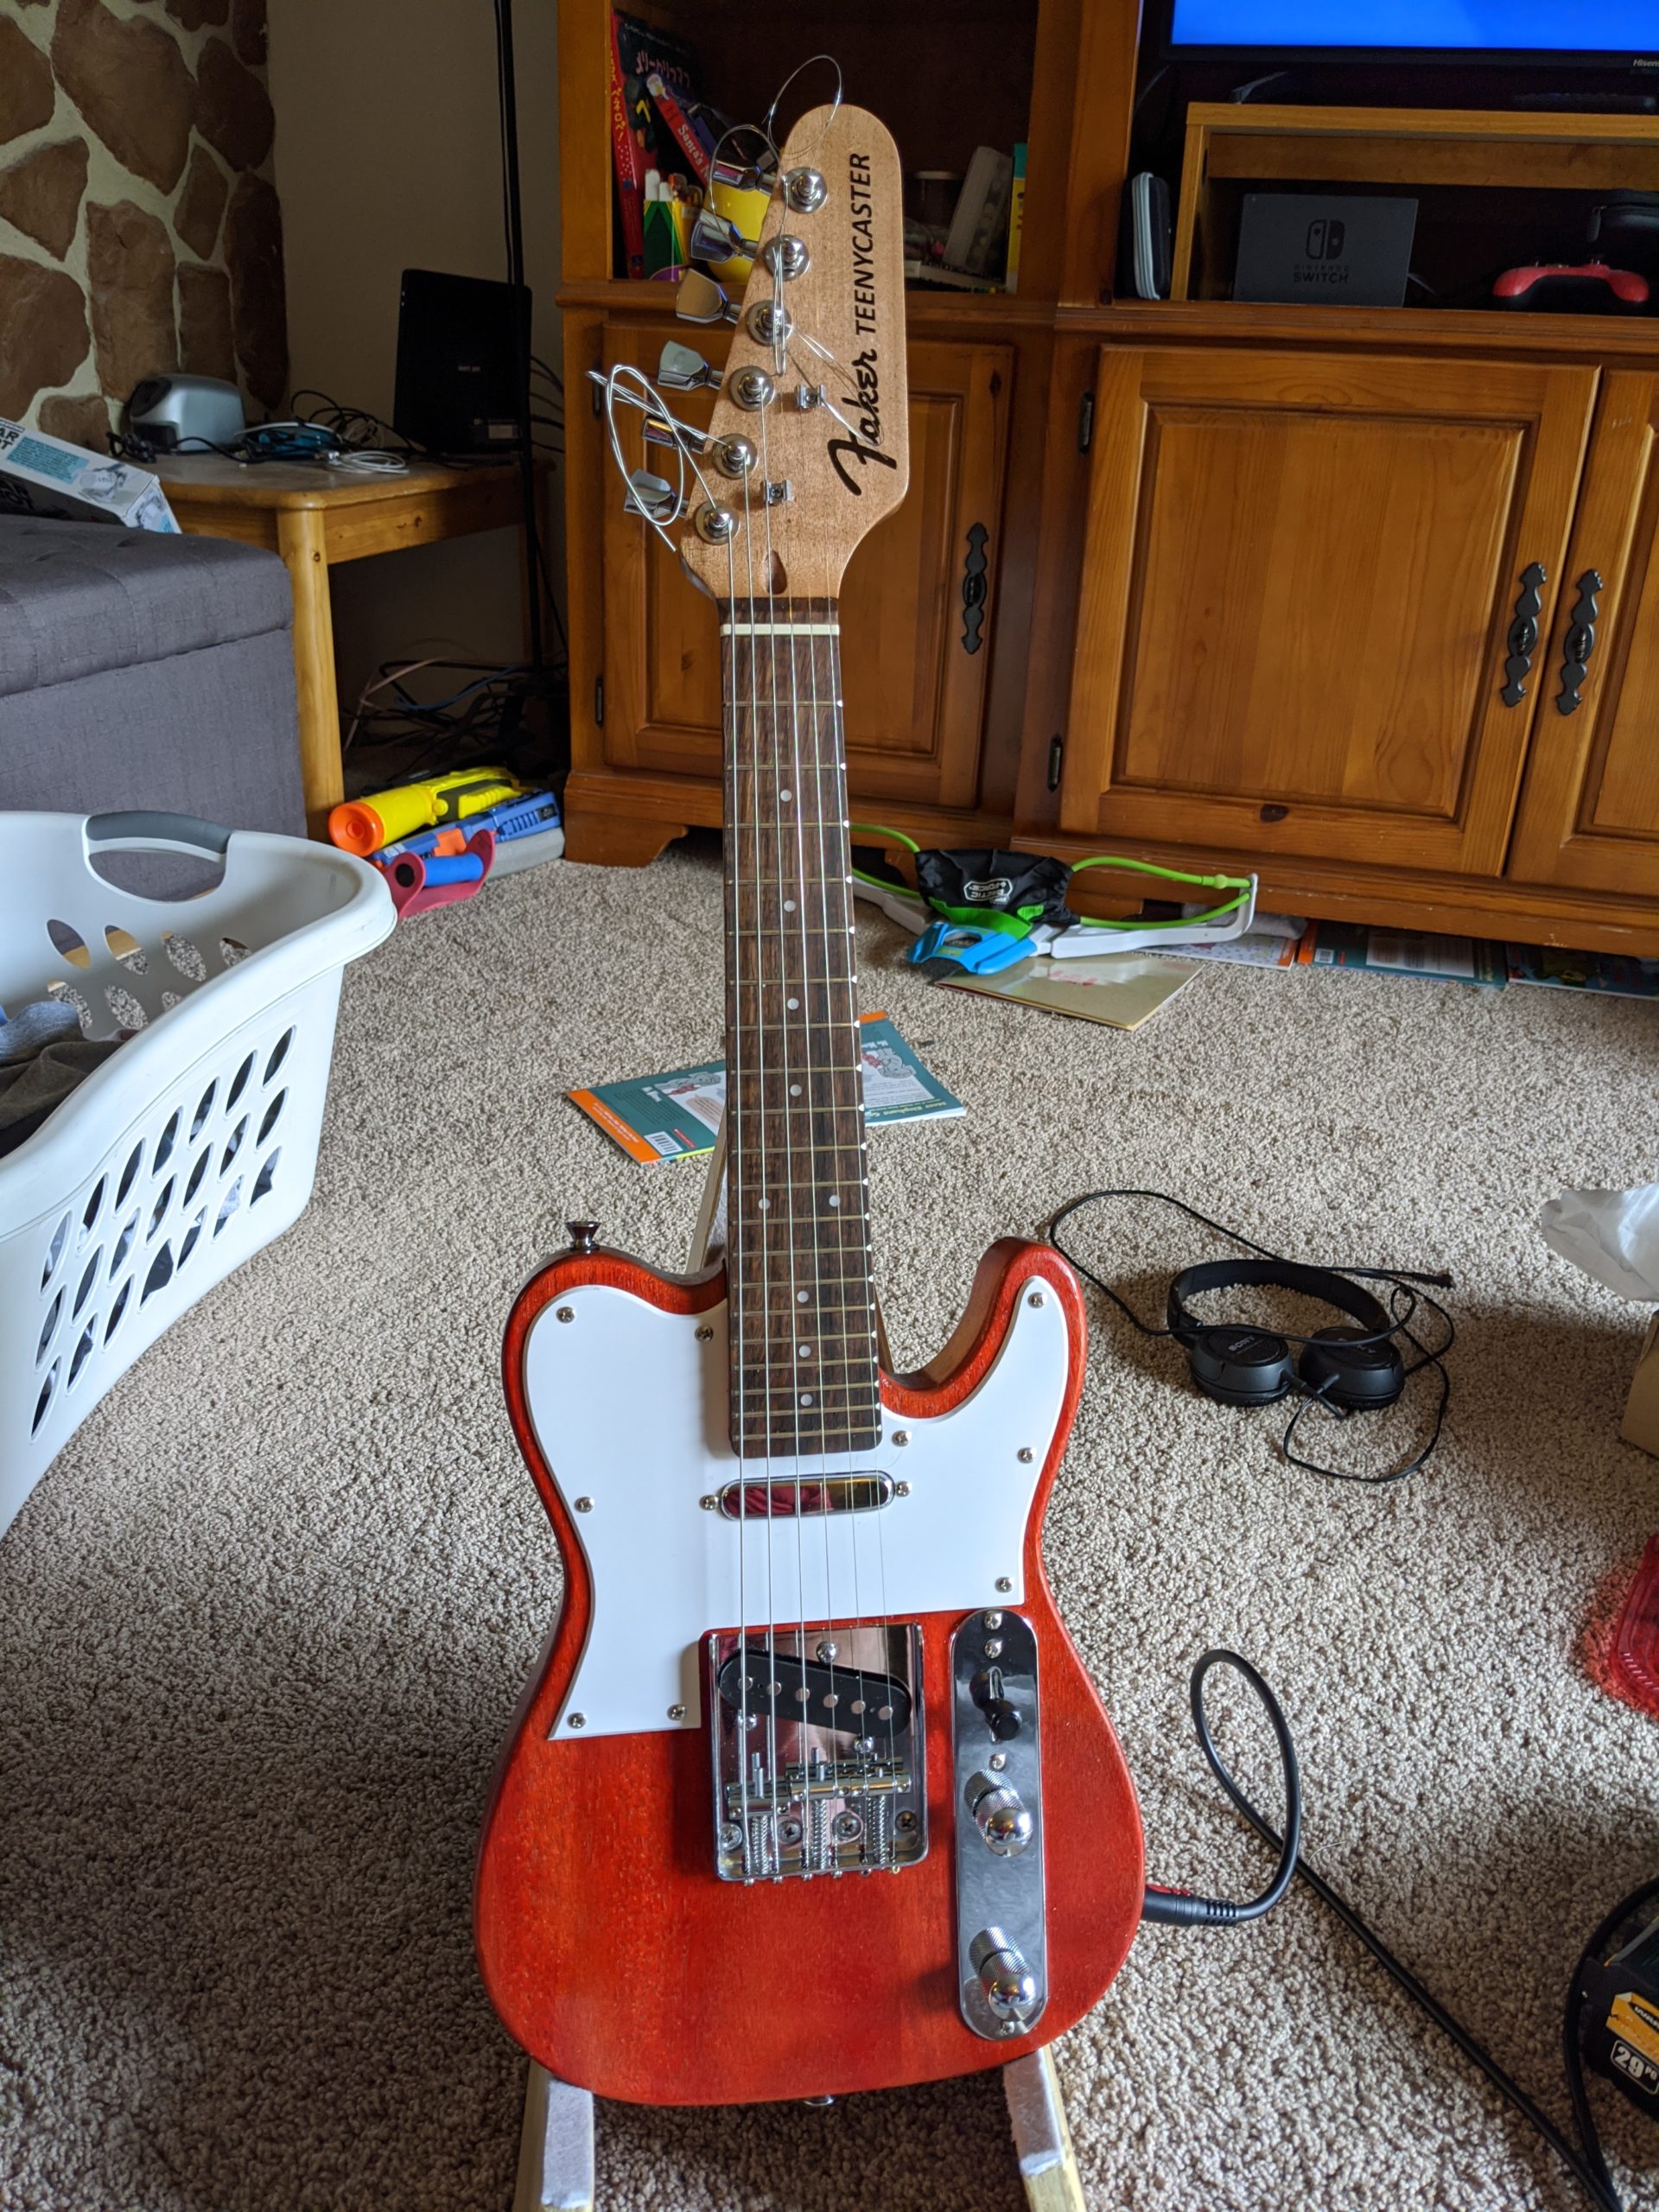
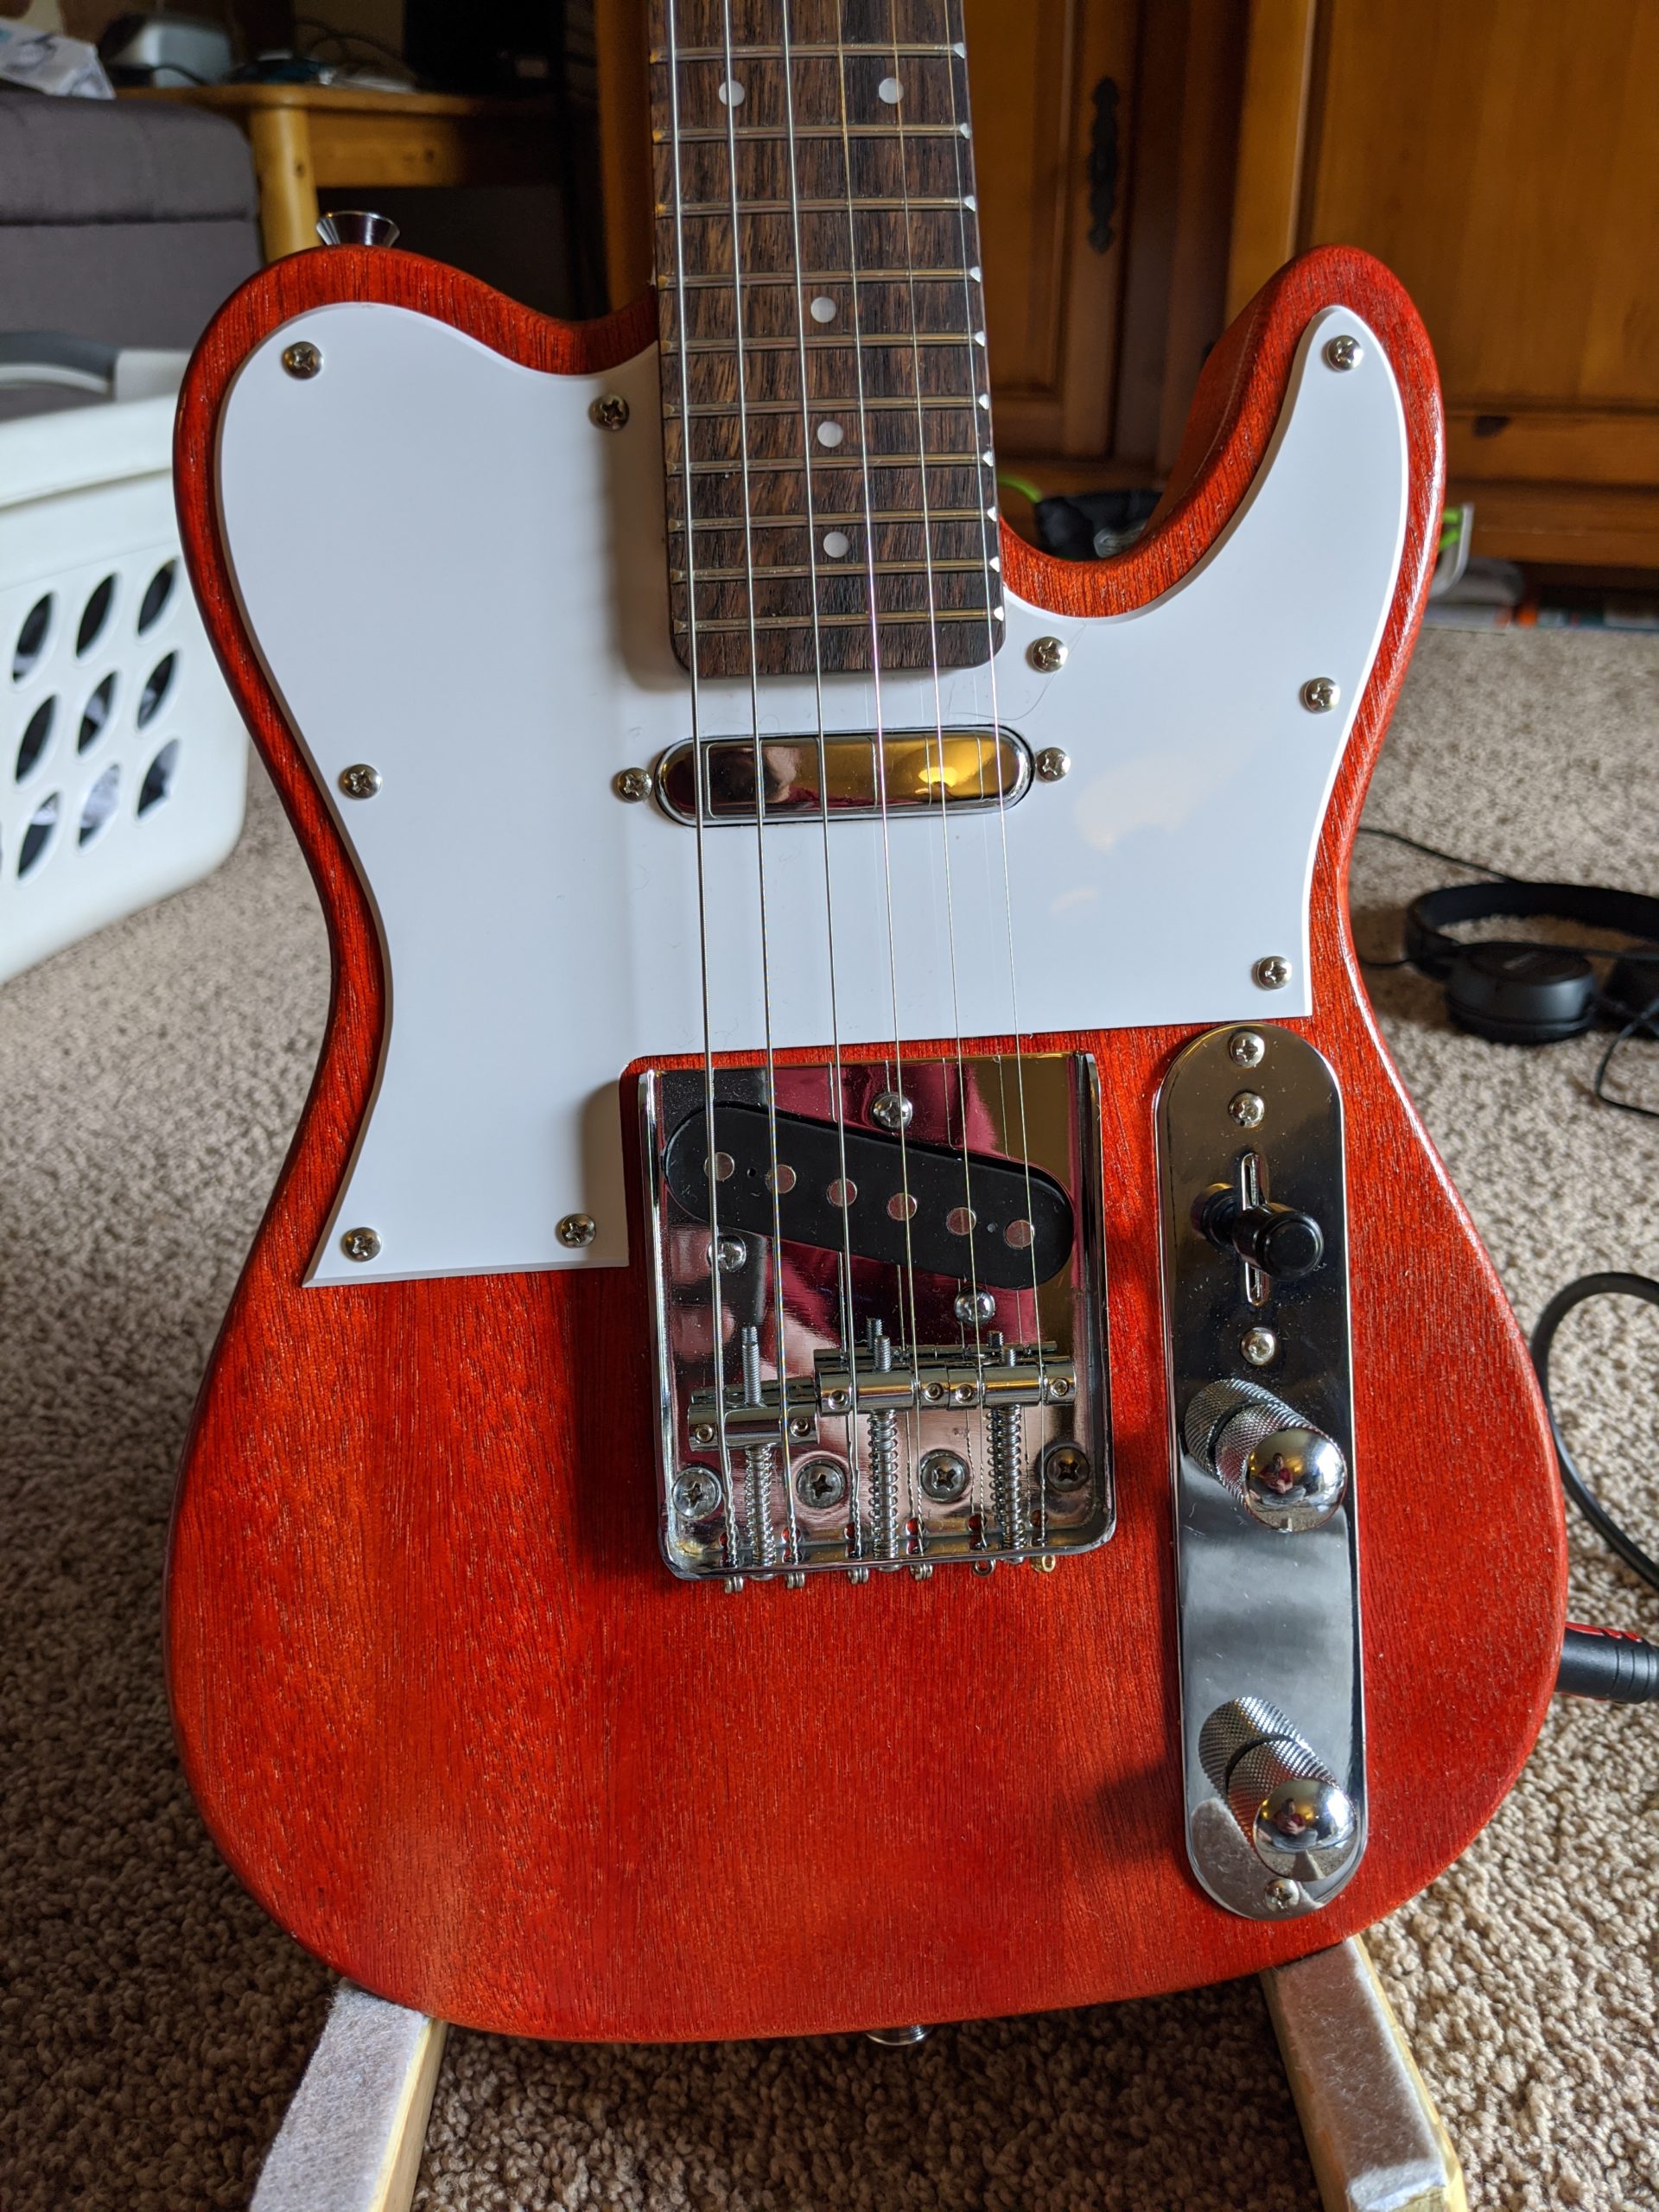
Today, I assembled the Teenycaster. It went together good and looks cool as hell.im having a problem with intonation unfortunately so I can’t play it right now.
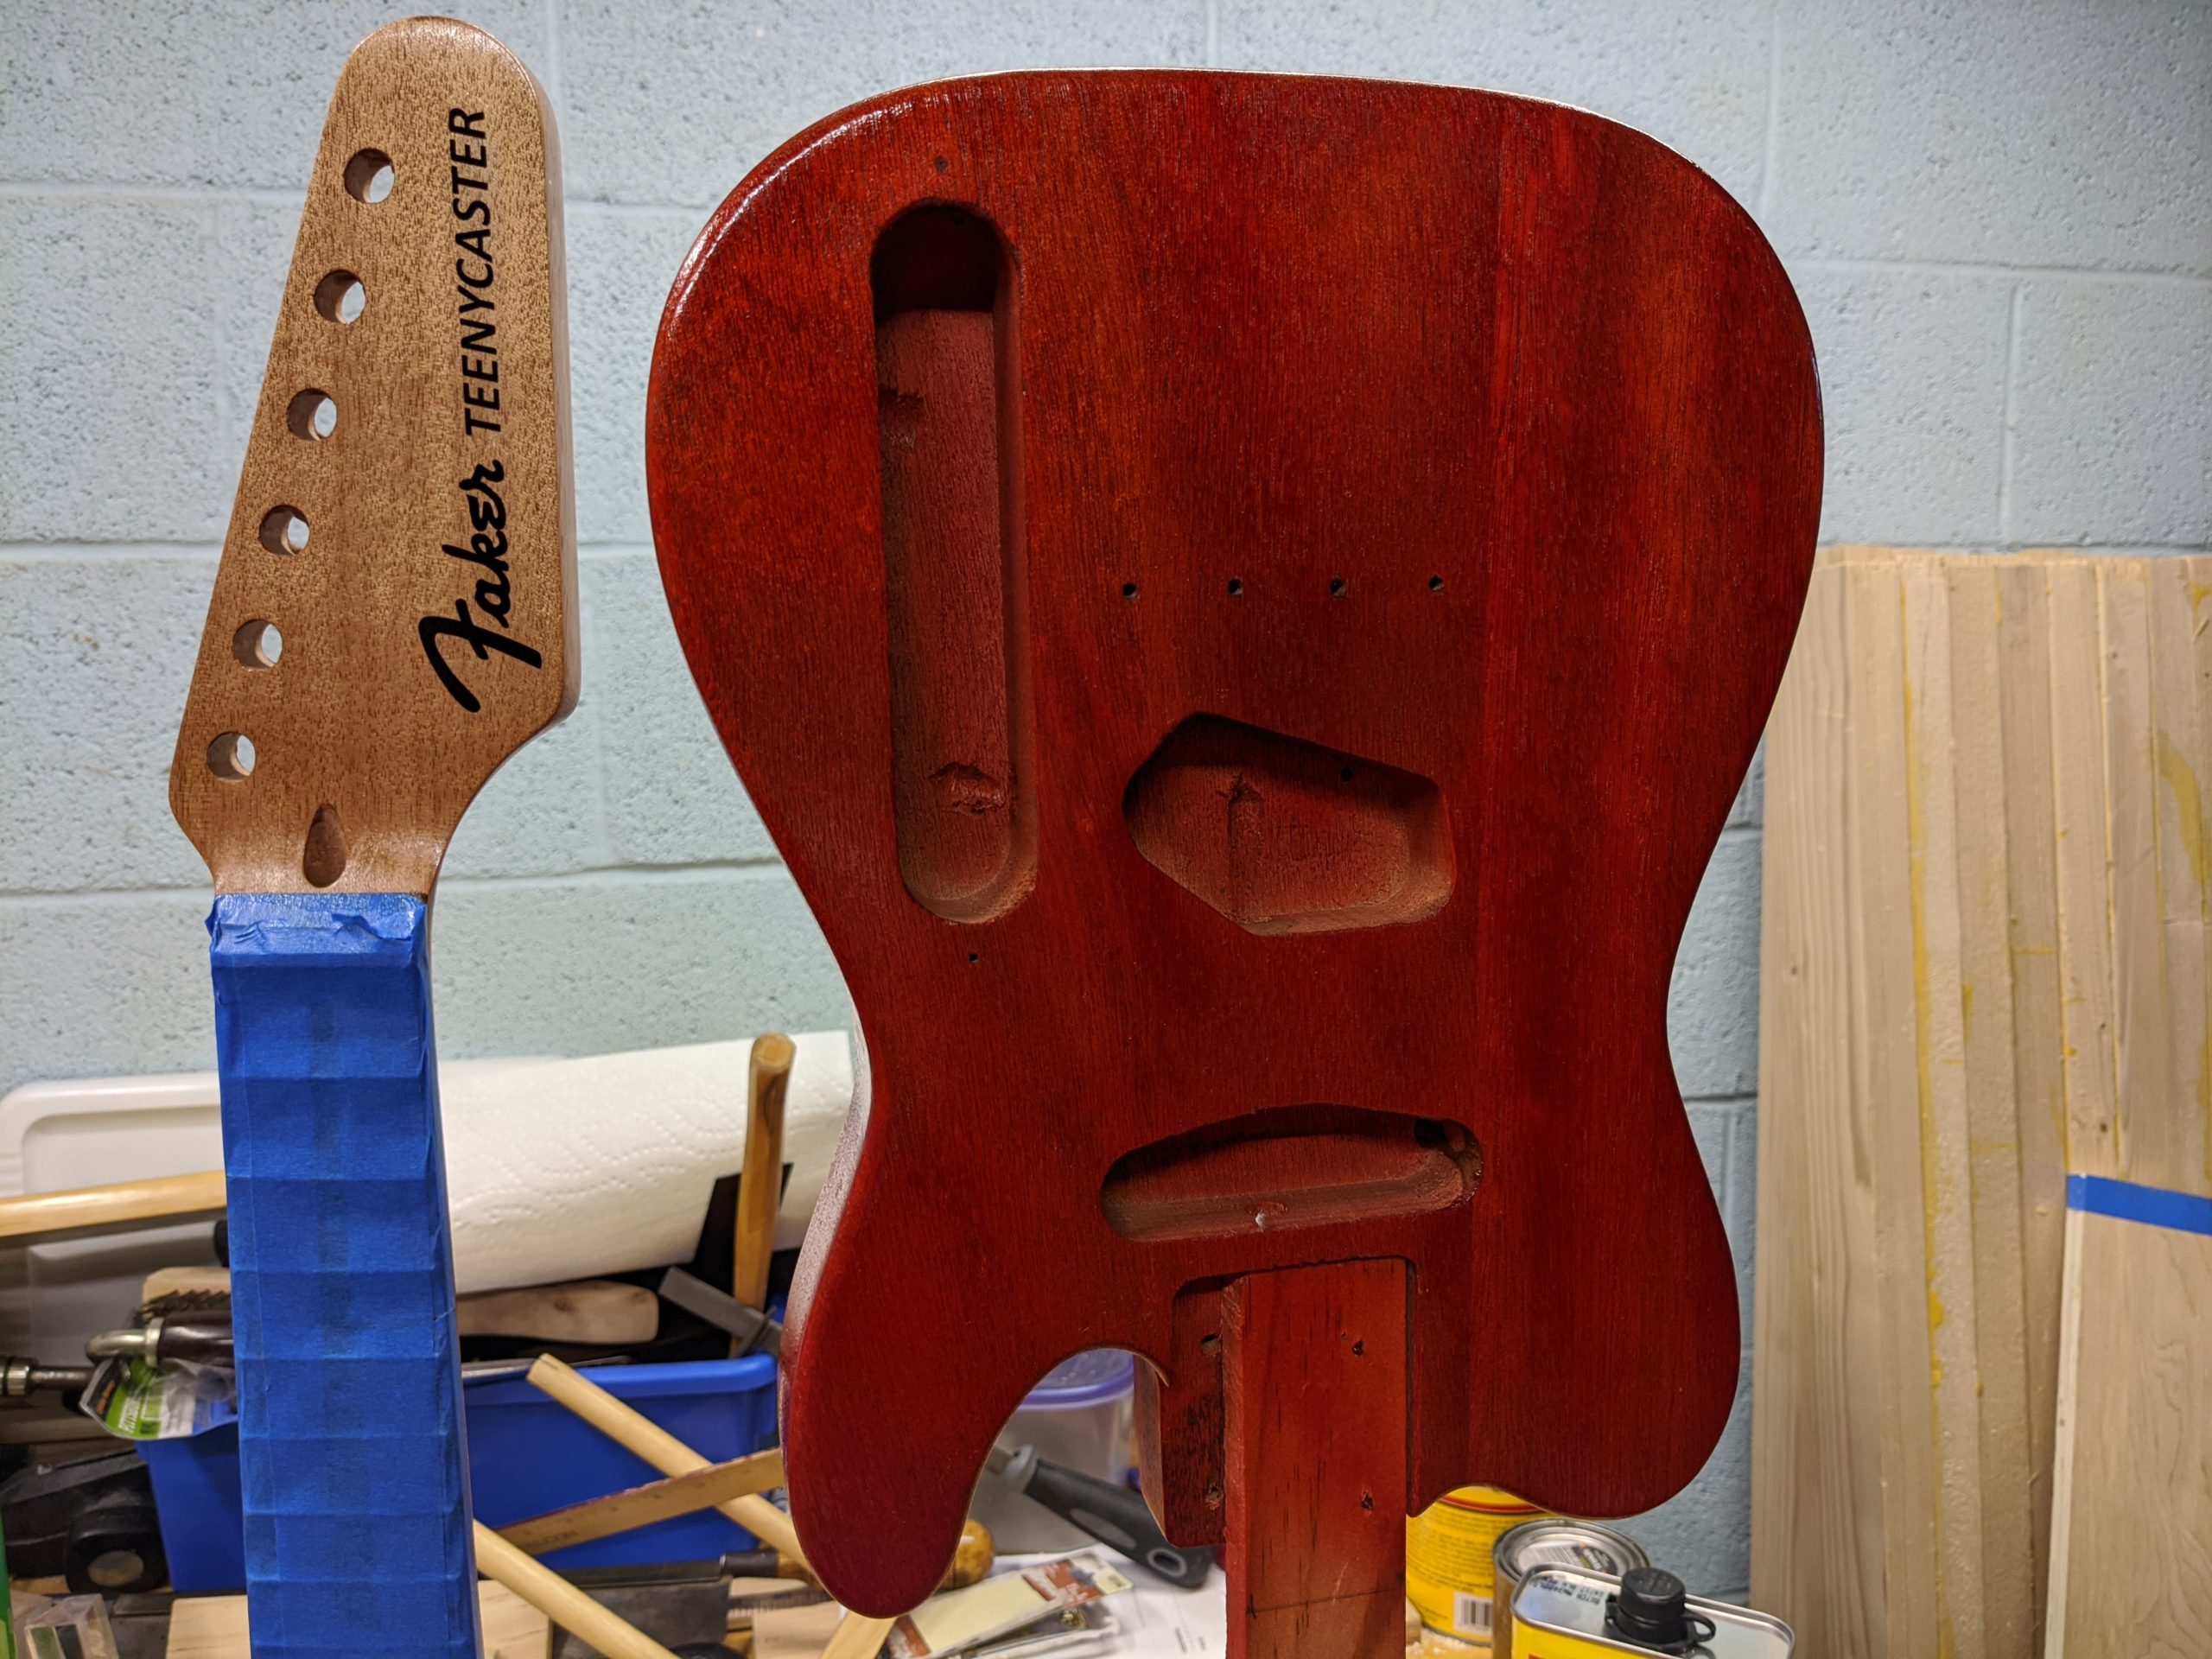
I painted the body today. I wanted to make it blue using a dye, but it didn’t work out good with the mahogany body. So back to my fallback plan: cherry red lacquer left over from the Less Paul.
I also applied some tung oil finish, which I really really like. It’s easier to apply than wipe on polyurethane, and it looks better.
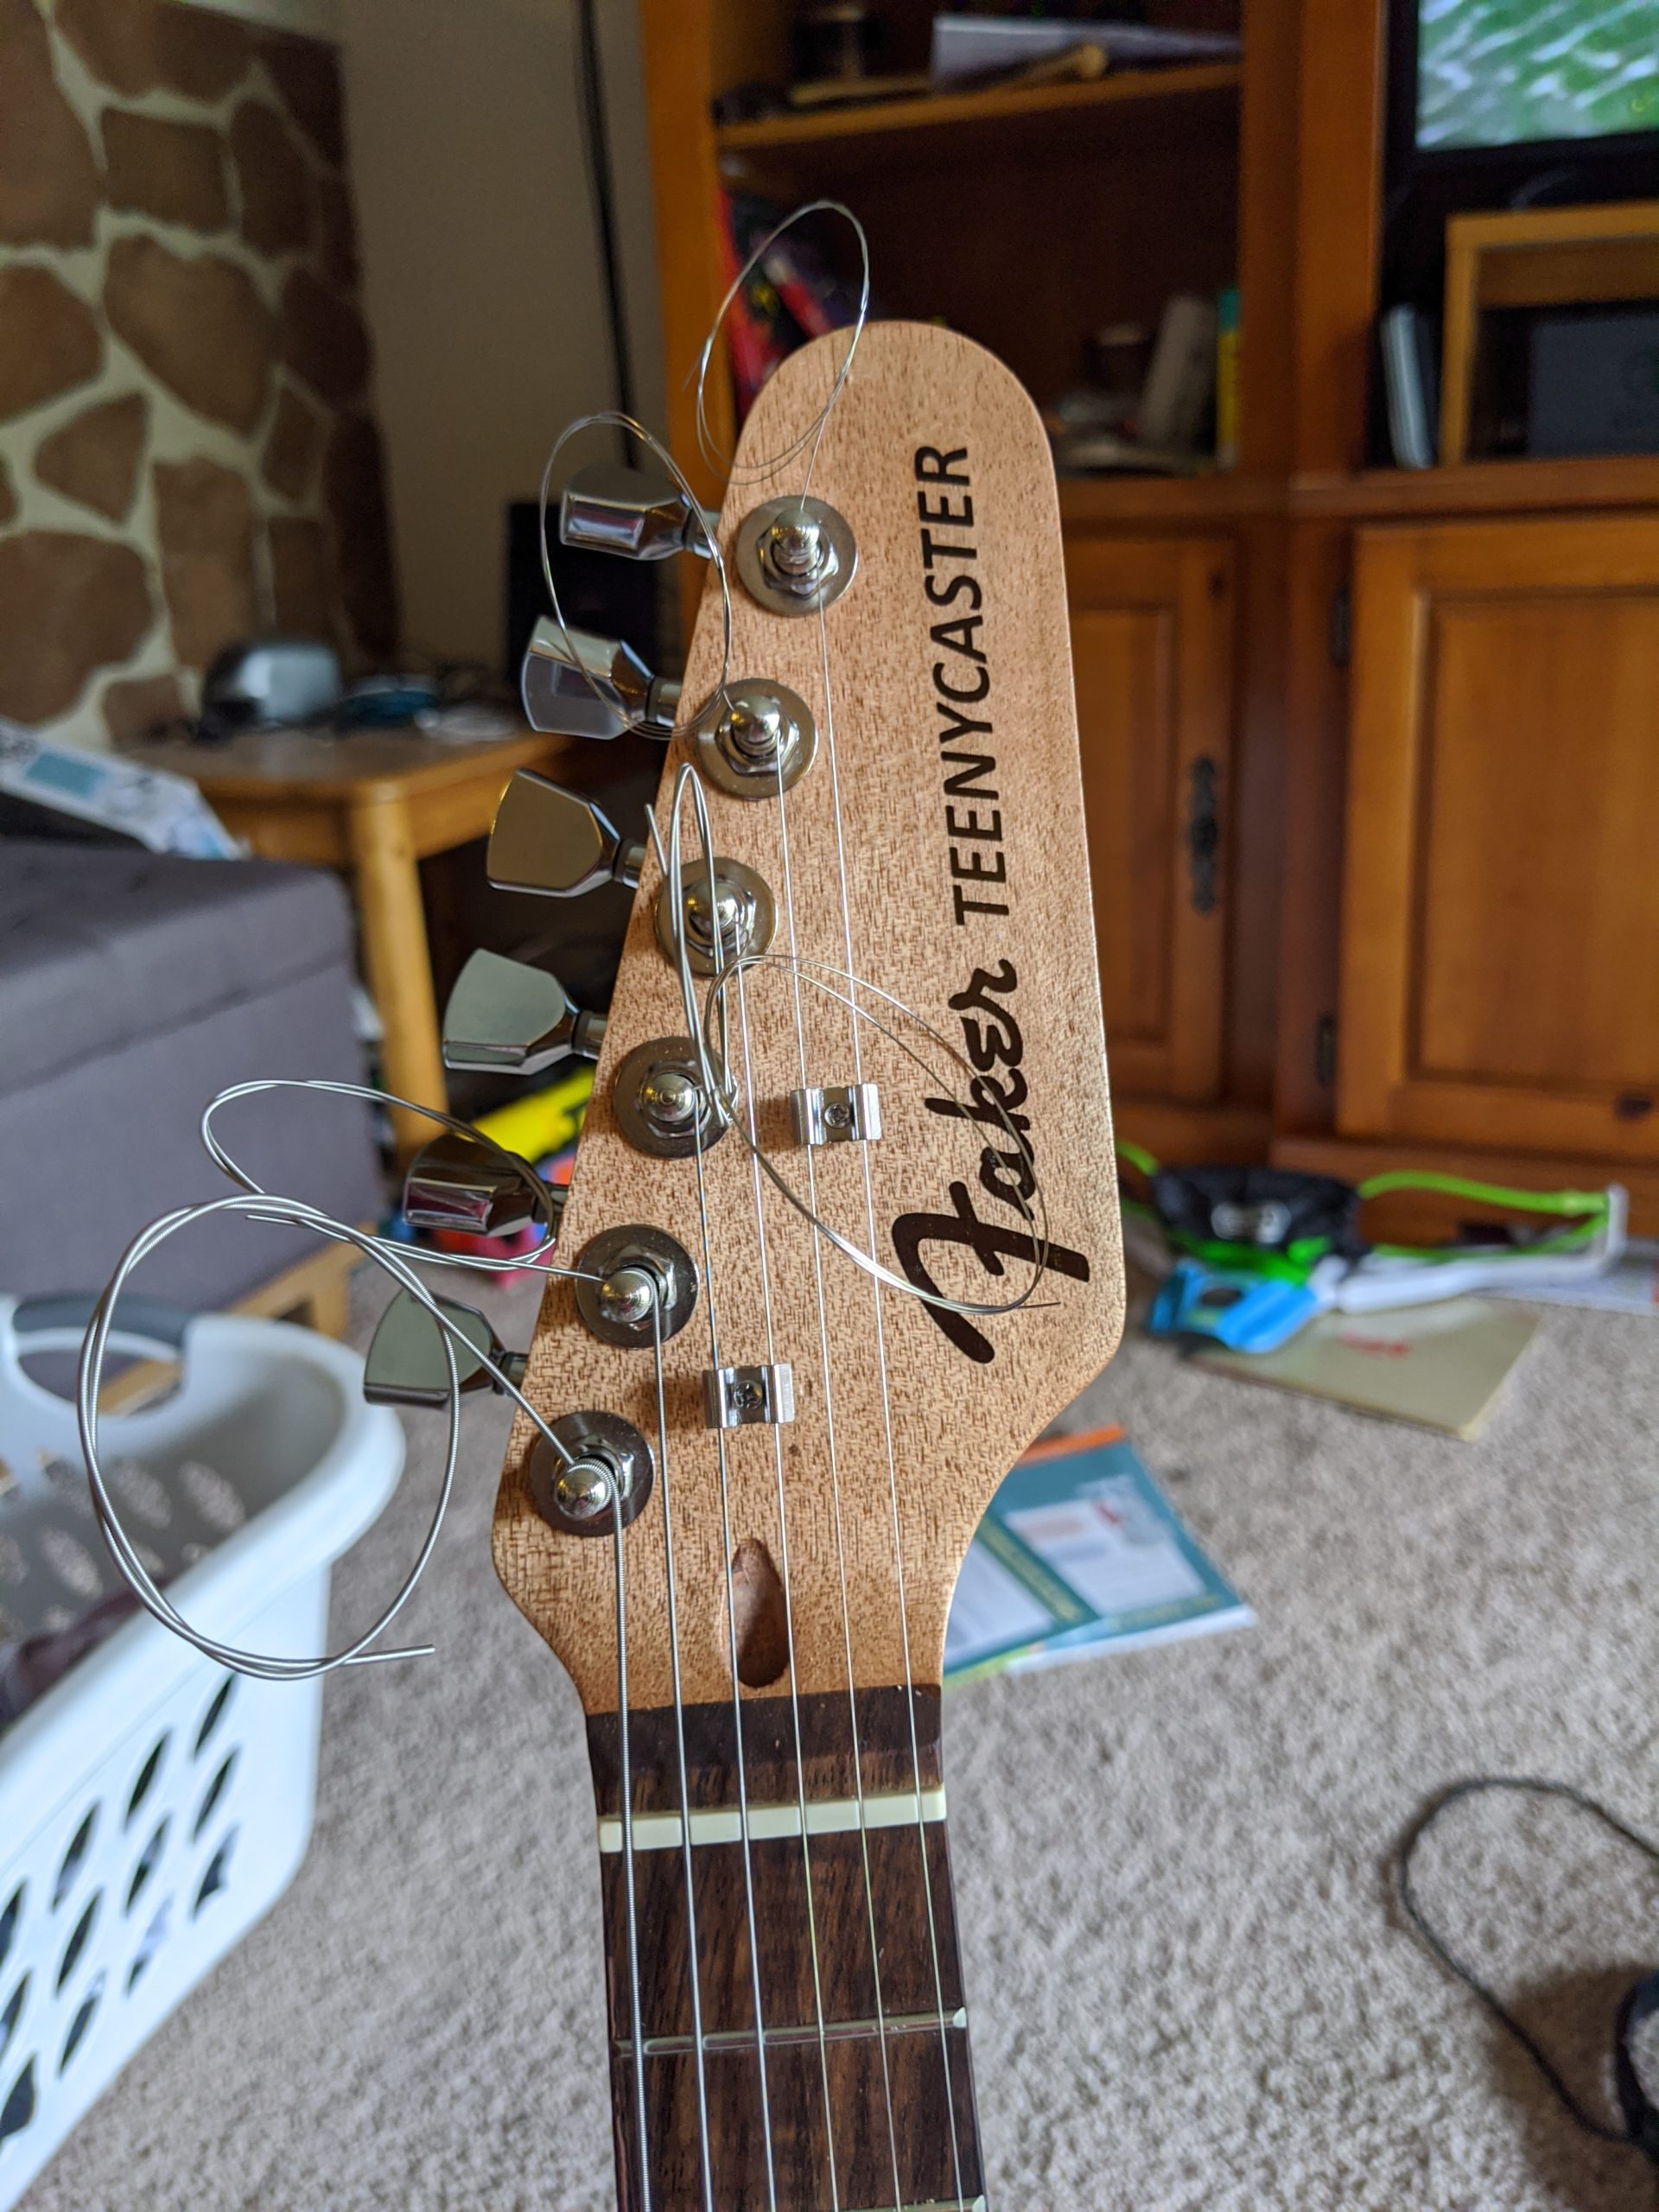
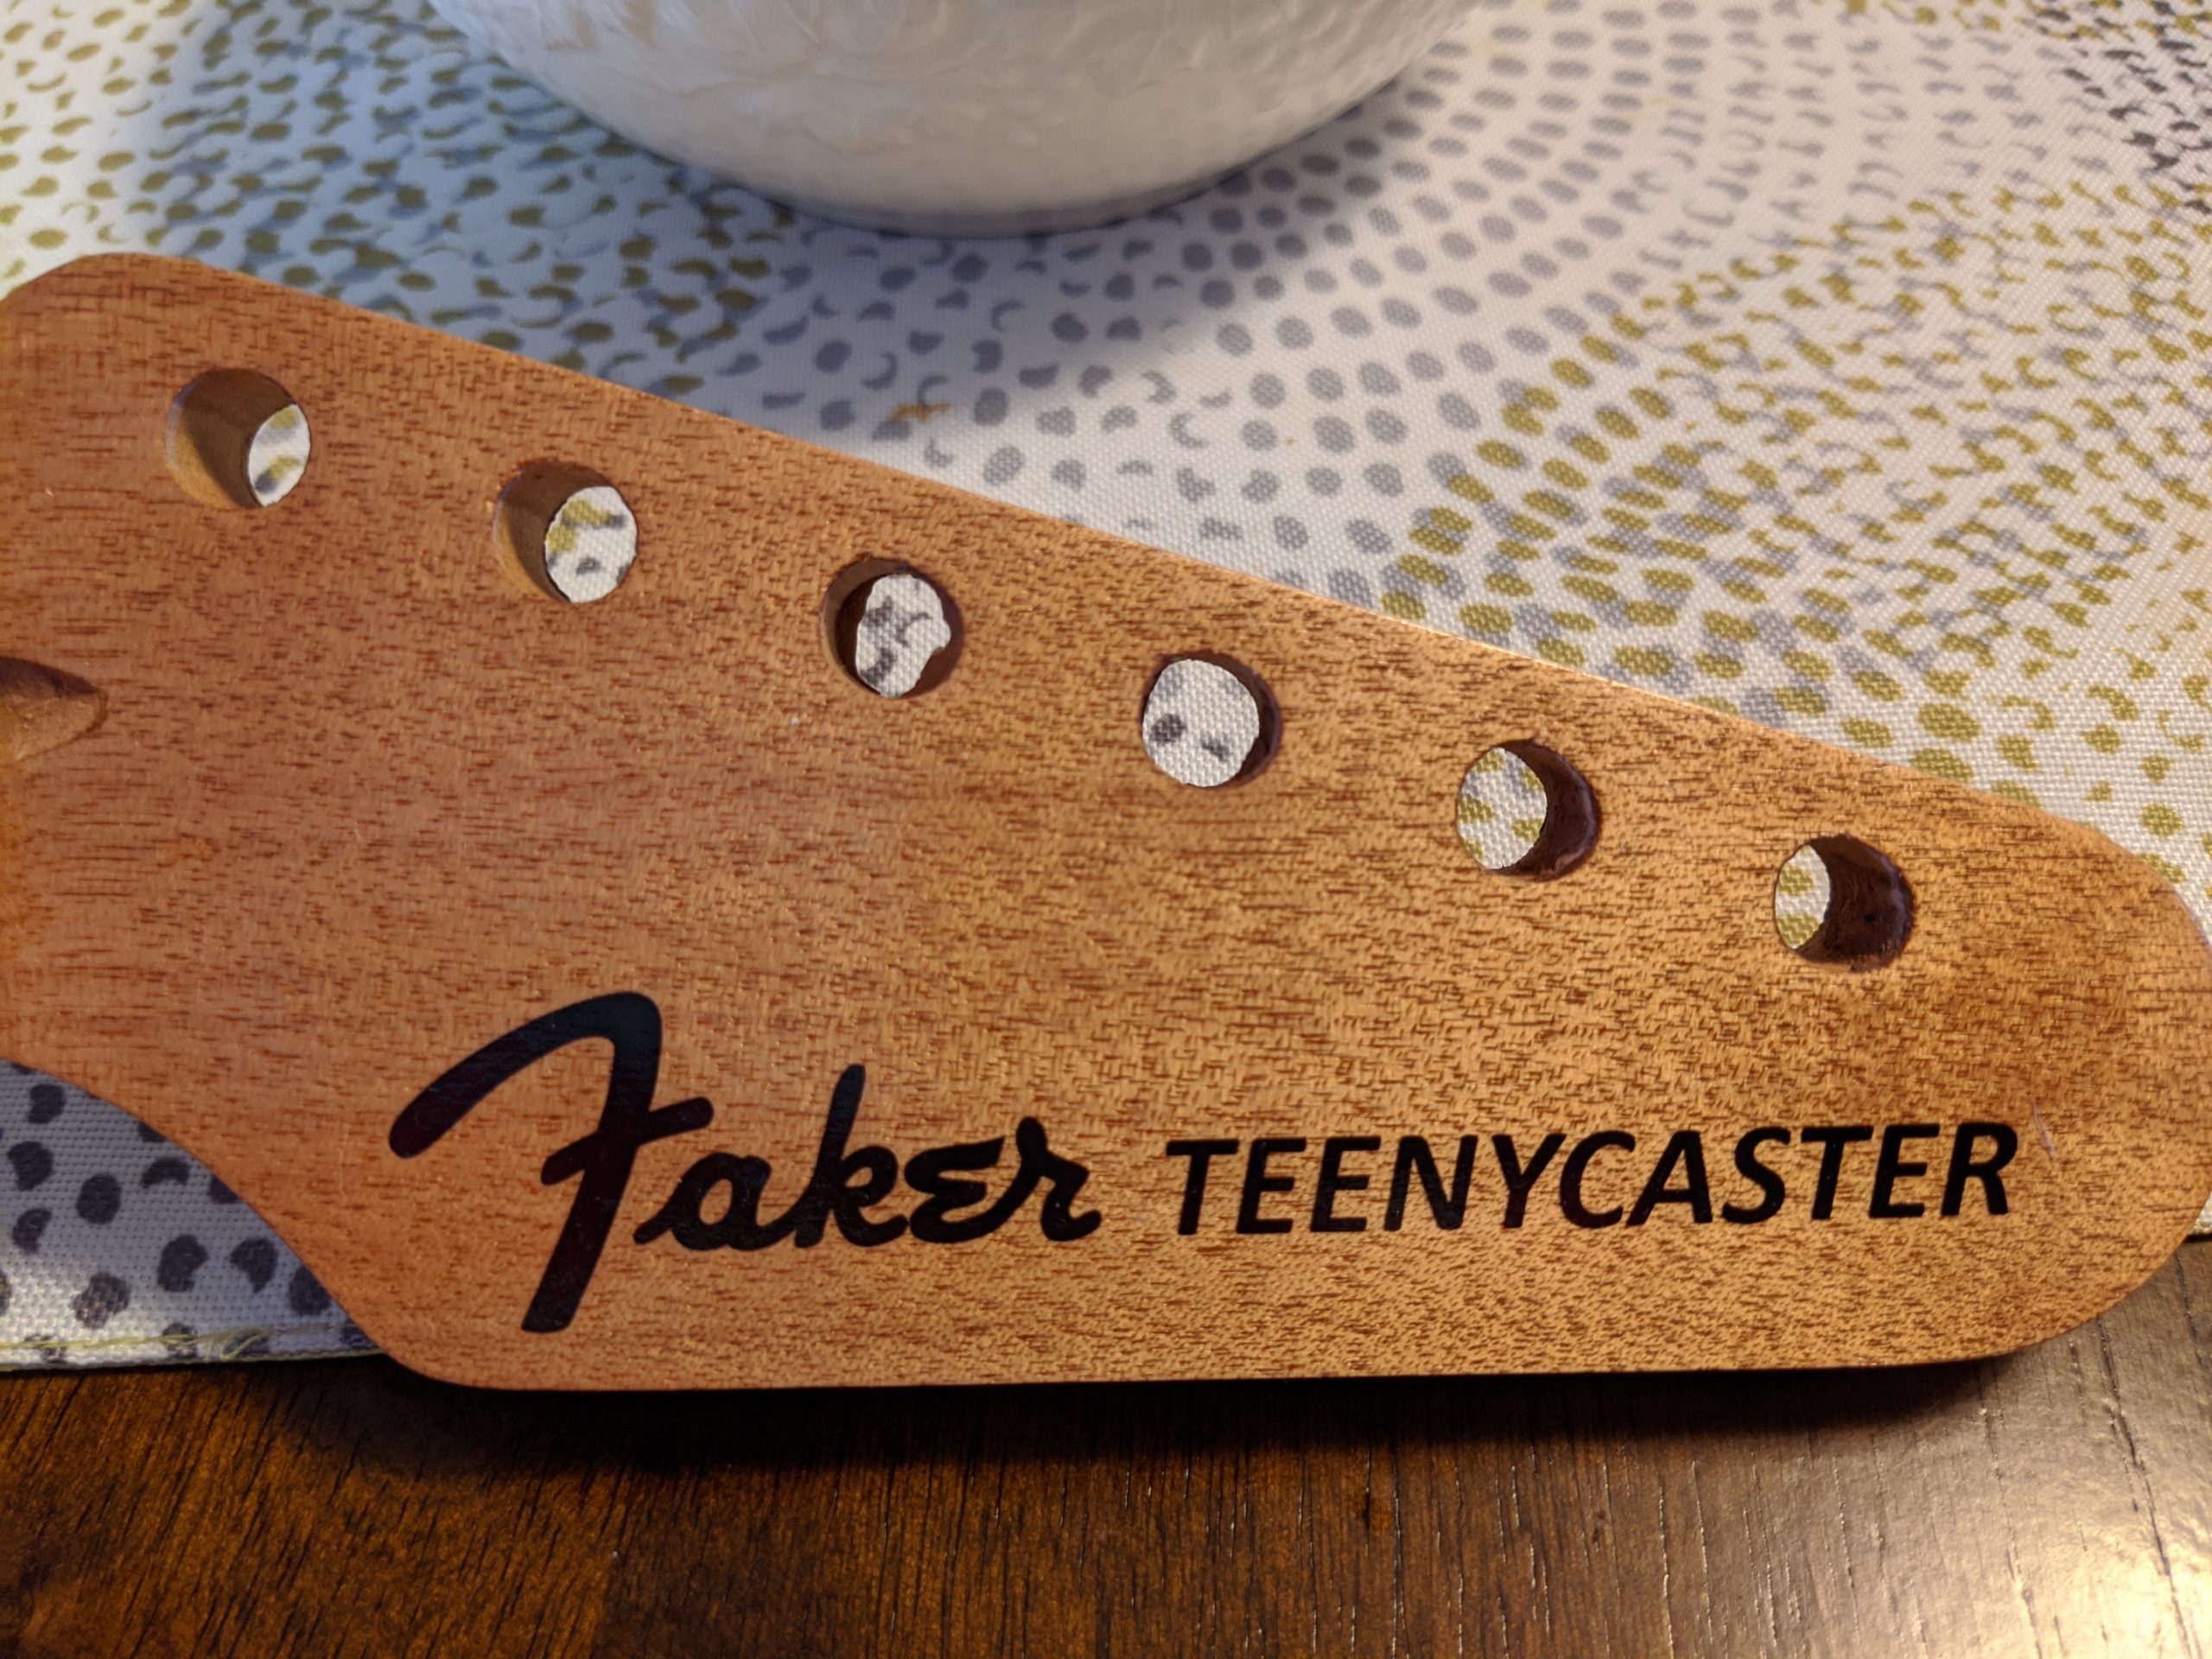
It’s time to put the logo on the Teenycaster headstock. I put a couple coats of tung oil on the neck and let it sit overnight.
I downloaded a font named Strato that mimics the Fender script logo and fired up Photoshop. I used the Calibri font for the TEENYCASTER part. This is what I came up with.

Print that out a billion times on waterslide paper and I’m good to go.

The end result looks great!
Today I sanded off the grain filler and applied a few cards of vinyl sealer. This is what the parts look like now.

I filled the grain on the Teenycaster neck and body today. I used the stewmac mahogany colored grain filler. I’m going to leave the neck natural color and dye the body blue. I’m going to finish the neck and body with Tung Oil.
The green filler is a powder that you mix with water and slather all over the wood.

It dries pretty quickly, and then you sand it down to remove most of it. All that’s left is little pockets inside of the grain.


So I haven’t finished my Less Paul build yet, so what better time to start another guitar kit build!
This one is a travel size Telecaster style guitar. I bought the kit from Stew Mac and this one is way nicer than my Les Paul kit. The electronics are mostly wired (the hard parts at least) and the pickups installed. I’m not gonna go crazy with the paint job on this one.
Here are some pics I stole from the stewmac website.


The body and neck are mahogany, and the fretboard is some kinda fake rosewood.
Today I sanded the body and neck. Next step is filling the grain with filler so it will be smoother.

You must be logged in to post a comment.