Now that the finish is done on the body and neck, it’s time to assemble. Holes are drilled in the control plate, pots and a 3-way toggle installed, strings, solder, and away we go!
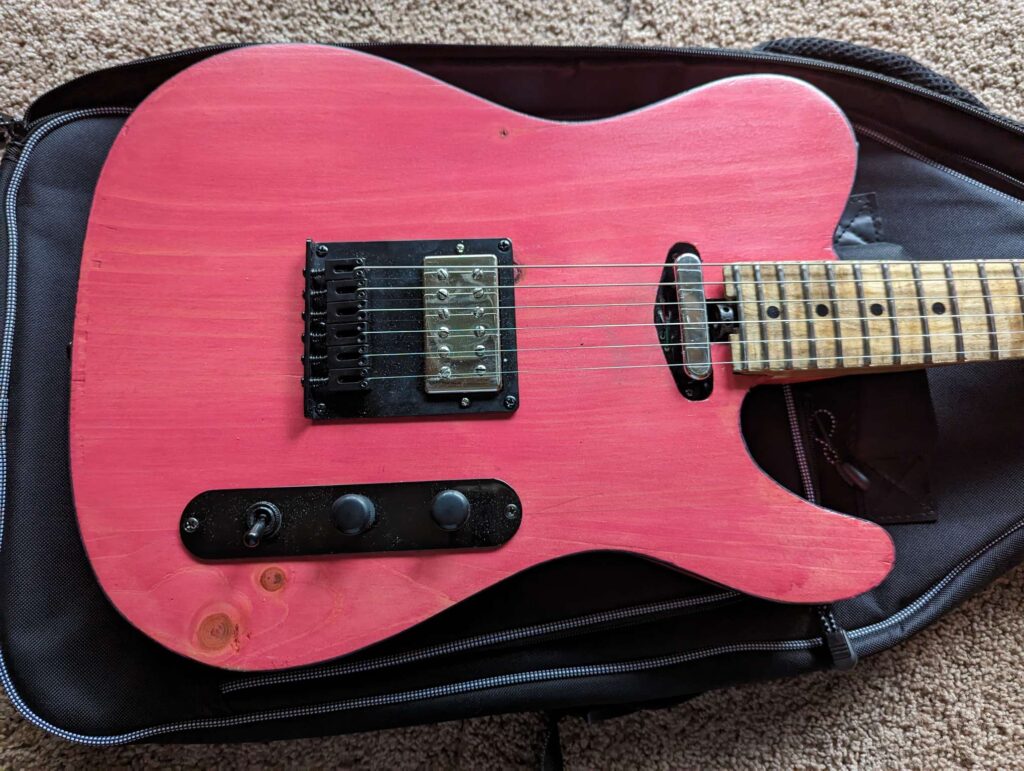
The guitar is cool as shit! It’s super light, but not neckdivey (even with locking tuners). The whole look is awesome with the pink black and wood. I’m suuuuuuuuuler happy with it.
I did install a Floyd rose style string retainer bar. It really gets a good break angle for the strings.
There is one more surprise thing to do before it’s complete.
Any music fan that is my age probably remembers the movie Crossroads. The movie was largely forgettable except for the climatic guitar battle between Ralph Macchio’s character and the devil’s guitar player played by Steve Vai (see below).
Last summer I read a copy of a guitar magazine that tracked down info on Steve Vai’s red guitar. Here is a link to the article. This is a neat read. Fans of guitars will recognize the headstock shape as a Jackson and apparently it was made by Grover Jackson himself. The guitar was one of Steve Vai’s actual guitars (before the invention of the Ibanez Jem)
I came across the scene today again and looked on the internet for some info on the guitar battle. Apparently the guy who did the music for the movie (Arlen Roth) is a bad ass blues player. The guy who played Ralph Macchio’s part of the guitar battle (Ry Cooder) was originally supposed to be the “bad guy” instead of Steve Vai. The original battle was supposed to be a blue on blues battle. Arlen Roth actually released a recording of the original guitar battle recording on Soundcloud and it’s cool.
I’m at the point where final polishing starts, and parts start to go on. Now is the most convenient time to check things out and give myself one more opportunity for surgery.
The neck required some tweaking because of the finish. I had to sand off some of it at the heel so it fit the pocket good. Also a couple of the tuner holes needed opening up (also because of the clear coat).
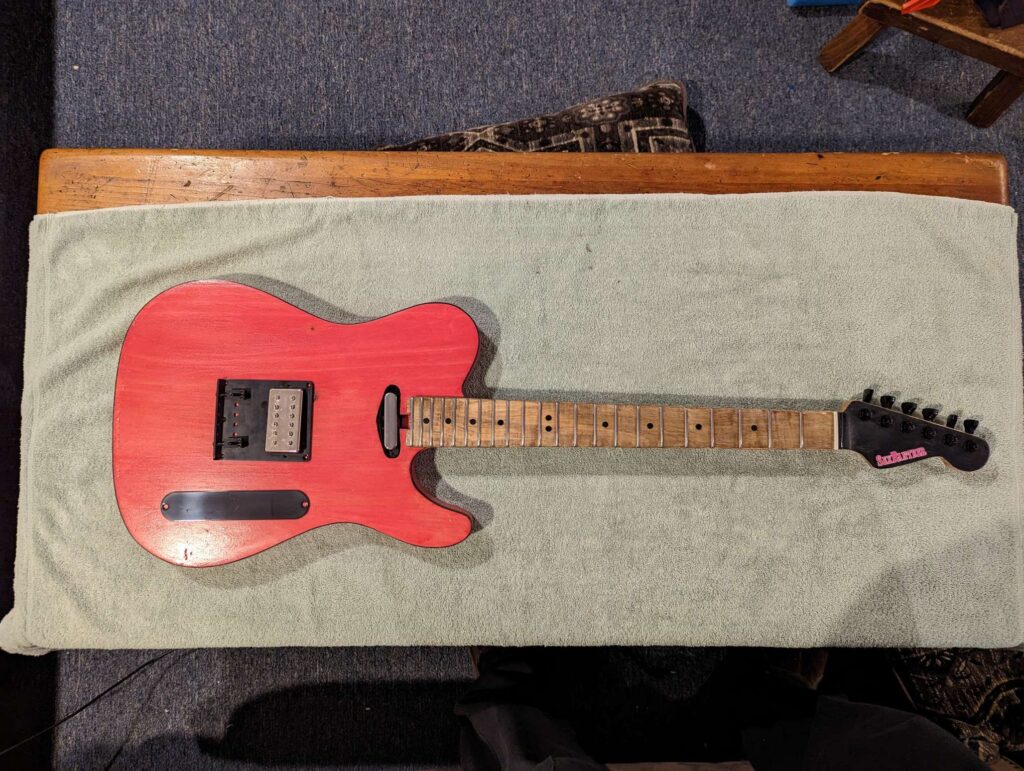
Everything else fit good, and it gave me the opportunity to see the overall look.
Yeah, that’s a cool fucking guitar.
Now it’s time to polish. The headstock and neck should be pretty easy, but the fretboard will be a PITA.
While texting with my friend, I came up with a way to describe the “vibe” I am going for.
It’s like a barn, an upscale barn, but the barn has a dark side. The kind of barn where the cows wear a monacle and speak with a British accent. But also the kind of barn where the cow is going to hit on your wife before the night is over and you should worry about her taking him up on it. The kind of barn where things that don’t make sense, make sense. The kind of barn where the guitar player in the band plays a Telecaster with a humbucker in the bridge.
I think if I said that, you could pick this guitar out of a lineup.
2 hours later…. I needed to do a couple things.
The hole for the neck pickup wire was a bit weird. The wire kept interfering with the plate for the pickup. I had to lower the opening for the wire so it could stay under the pickup.
This neck has a truss rod adjustment wheel in the heel area. When I put the wheel on, it wouldn’t fit. I had to open the area up a bit and took the opportunity to paint everything black.
I’m finishing the neck with nitrocellulose lacquer. This is an old school clear coat that gets hard and can be polished real smooth and shiny. It also feels good for a neck.
This finish is built up using multiple layers so they can be sanded level and then polished. To save time and material, it’s good to make the wood as smooth as possibly blue before the lacquer. For this, I’m using an epoxy product.
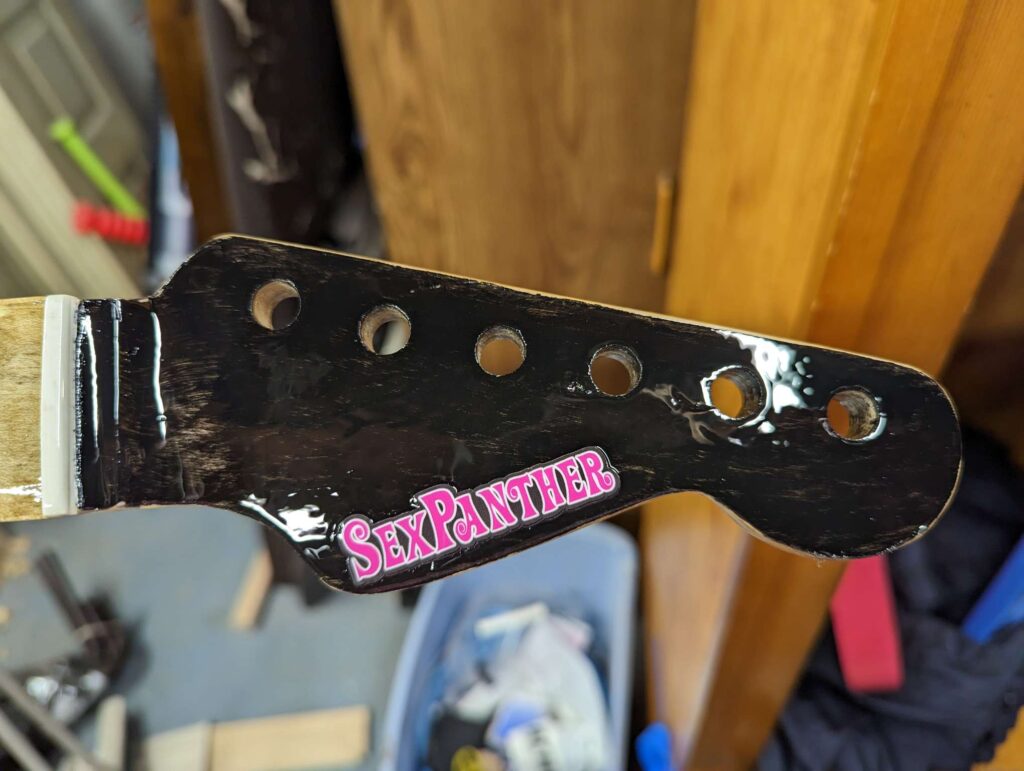
The headstock face is going to be black with a car ol sticker. I’ll prolly use polyurethane to finish the sticker (it builds up faster, cures faster, and dries harder).
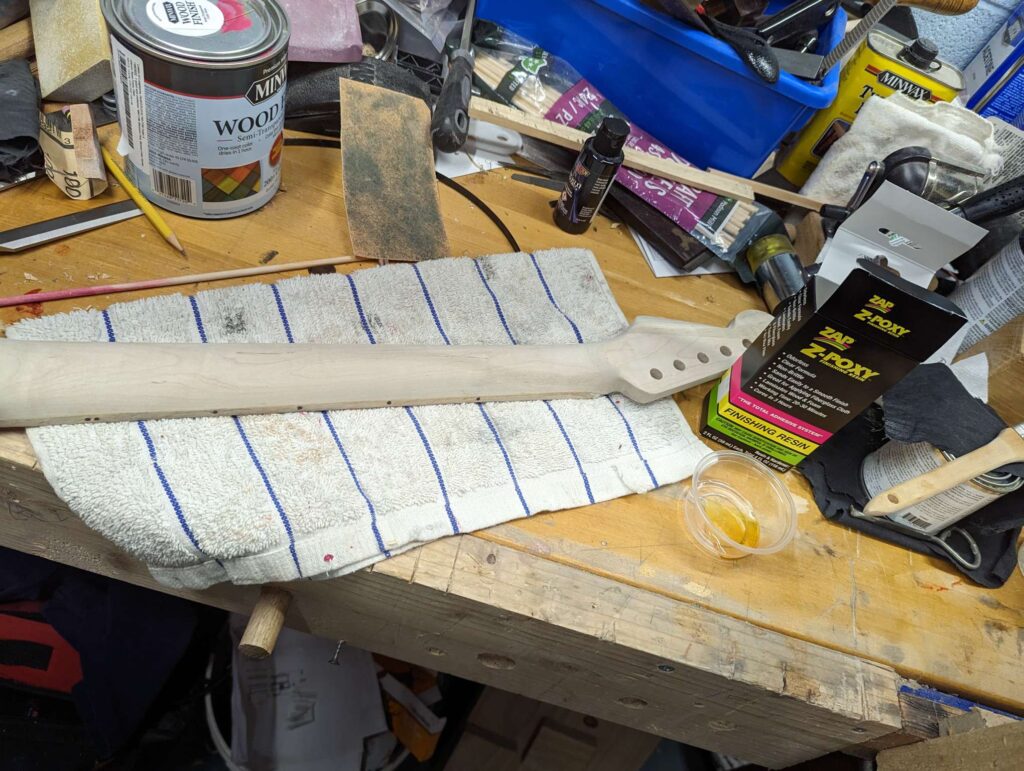
First step after sanding is to fill the pores in the grain. I’m using Epoxy for this which is a thing 2 part epoxy that is easy to work. You basically mix it up, smear it on with a spatula and scrape as much off as you can. Then some sanding and reapply a second coat.
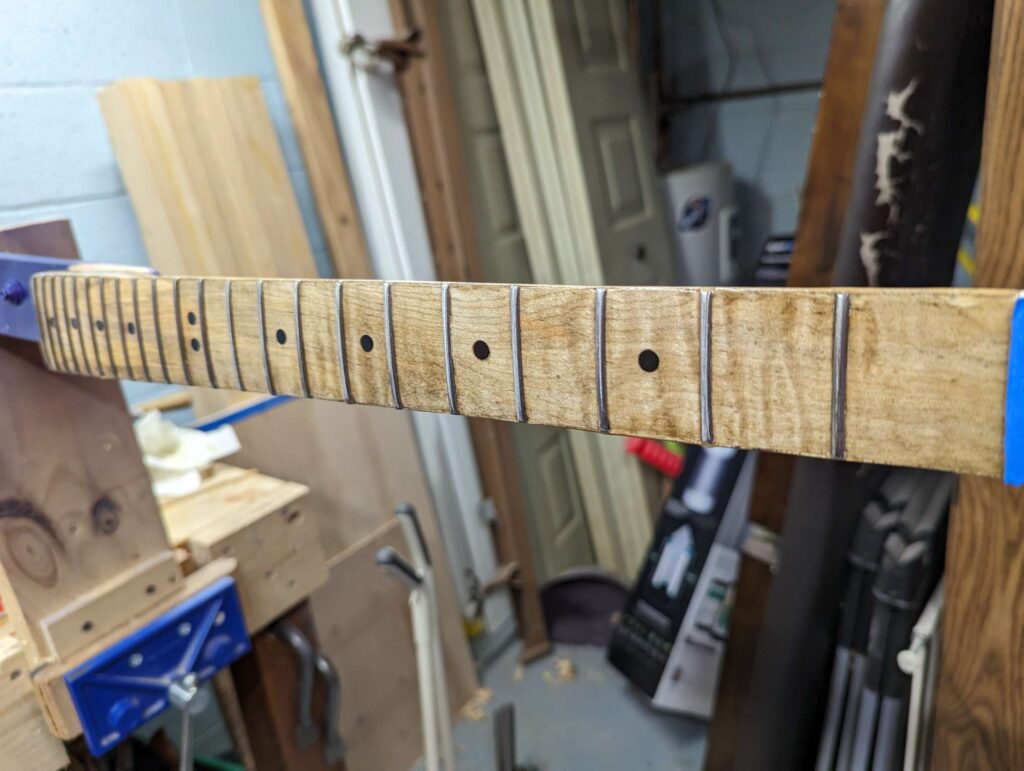
All ready for ZpoxyThe neck looks cool with the Zpoxy on itFretboard looks cool too.
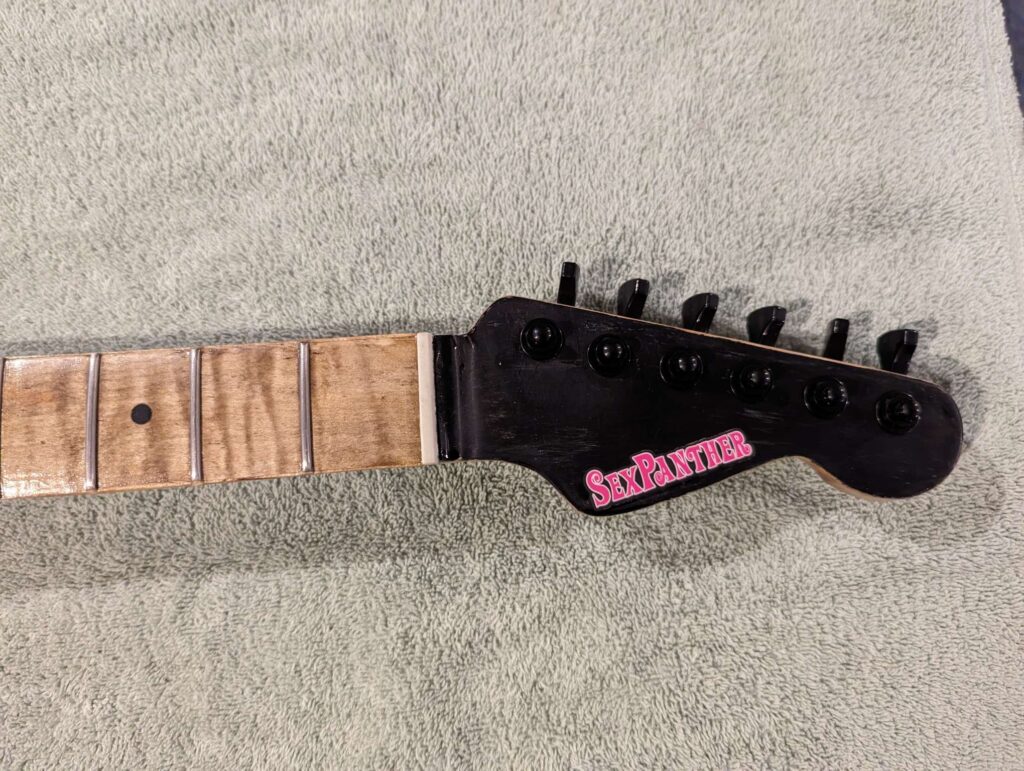
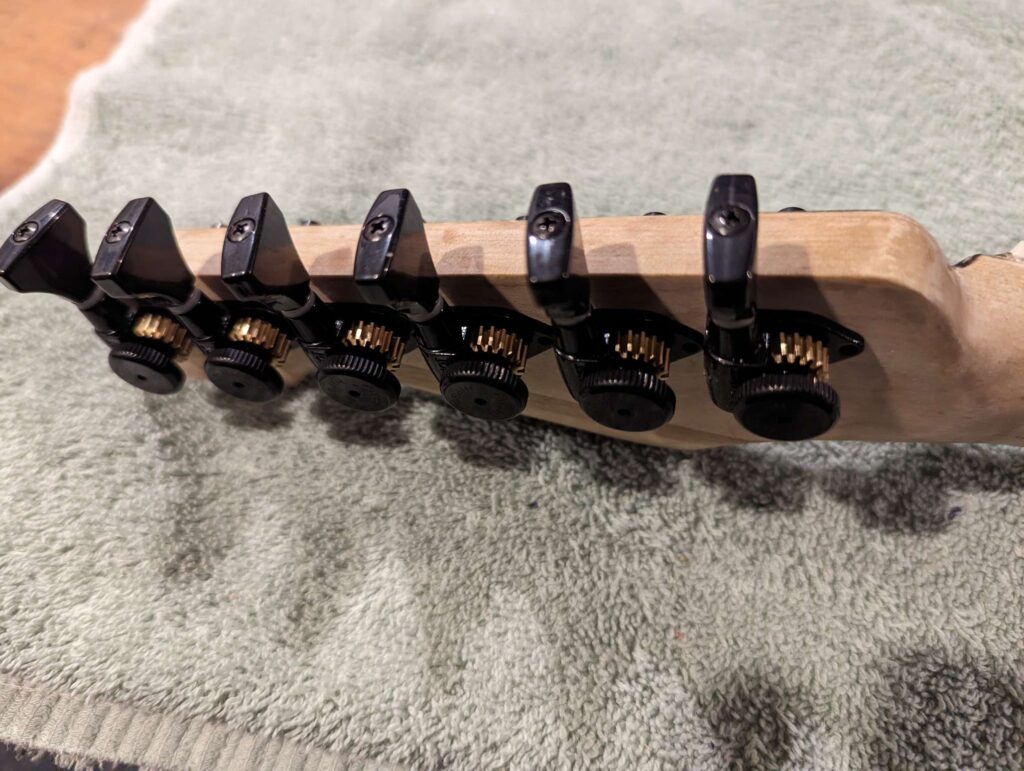
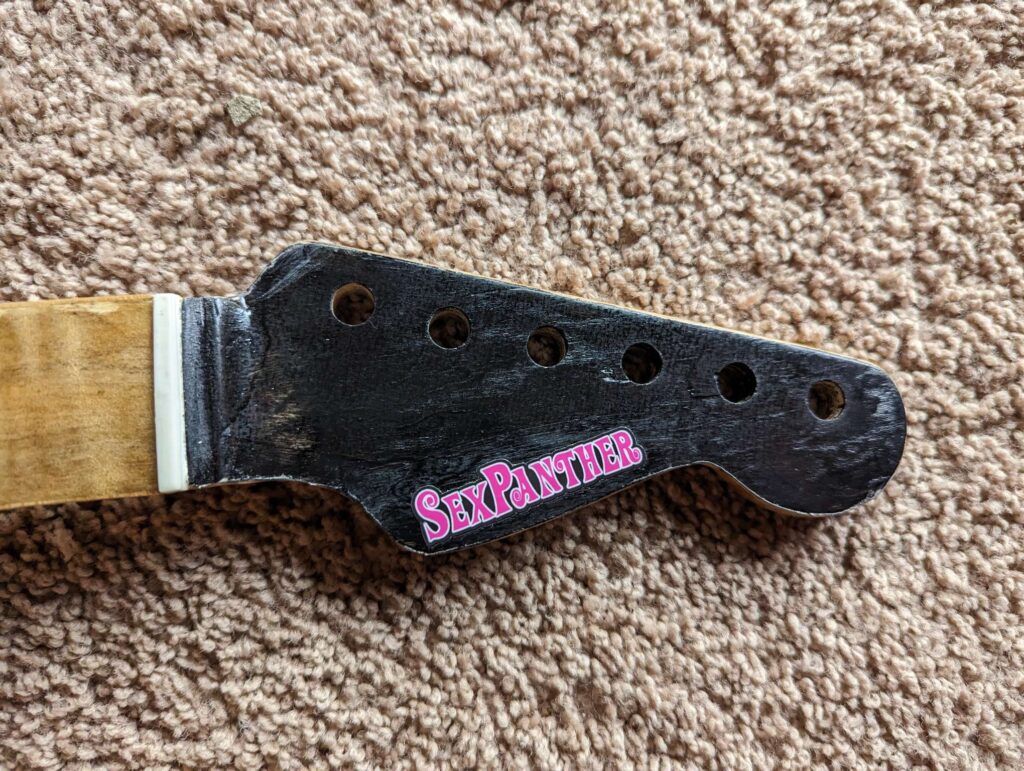
Headstock is black (will be glossy), tuning machines are fit, logo looks awesome!The gears on the tuners look cool as heck.
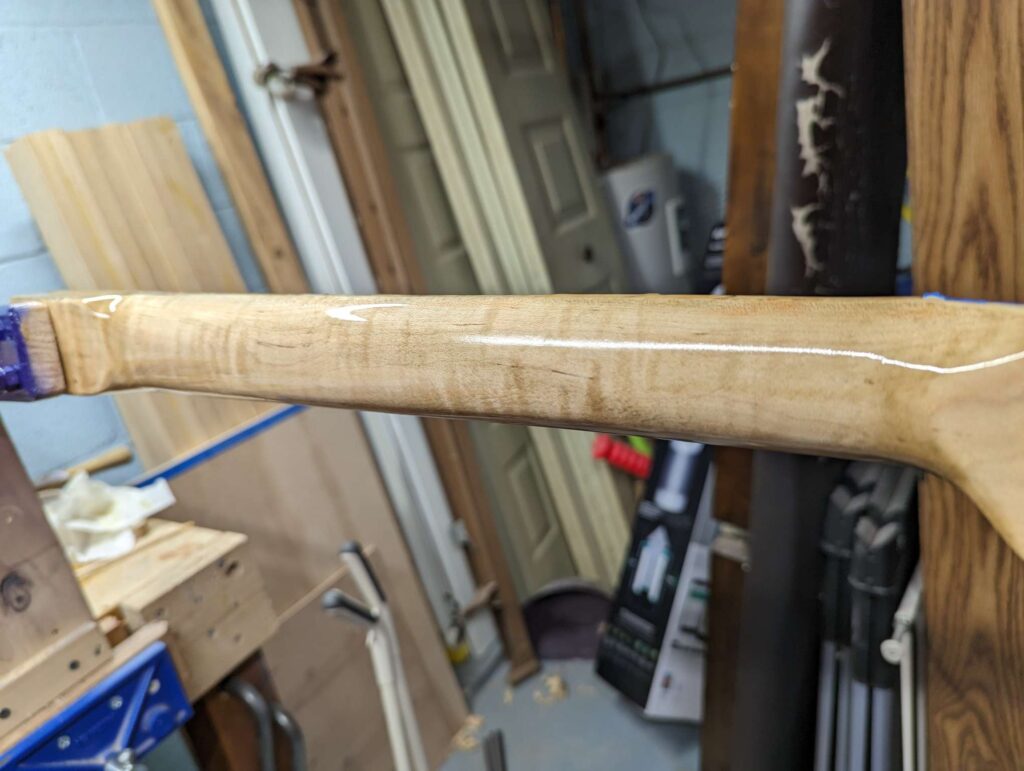
I decided I wanted to have the neck a darker color so I stained it with some minwax stain from the hardware store. It looks awesome!
Some stain on the neck. The flame pops out more now.
Next I will spray a couple coats of gloss polyurethane on the headstock to give the decal a good smooth place to stick. Then I will start to spray the nitrocellulose lacquer on the neck and fretboard.
The flame in the fretboard pops out!The back of the neck looks awesome too
I’ll put some more coats on the neck and then let it harden a couple weeks.
Now time for the headstock! The sticker is applied to the clear coat from a while back. Then spray a bunch of clear on top to “bury” the sticker. I’m aiming for enough clear to completely cover the sticker and make the whole thing level and smooth.
The sticker is applied.After a few coats of clear.
Now about 10 billion more coats of clear and let it harden for a week or so.
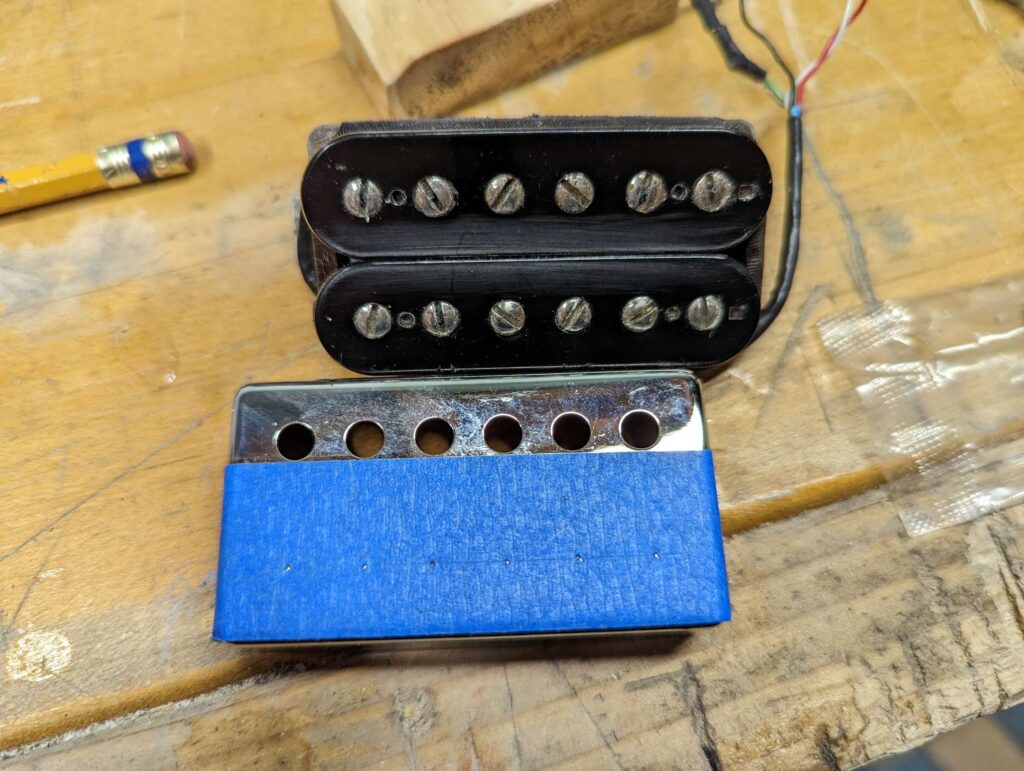
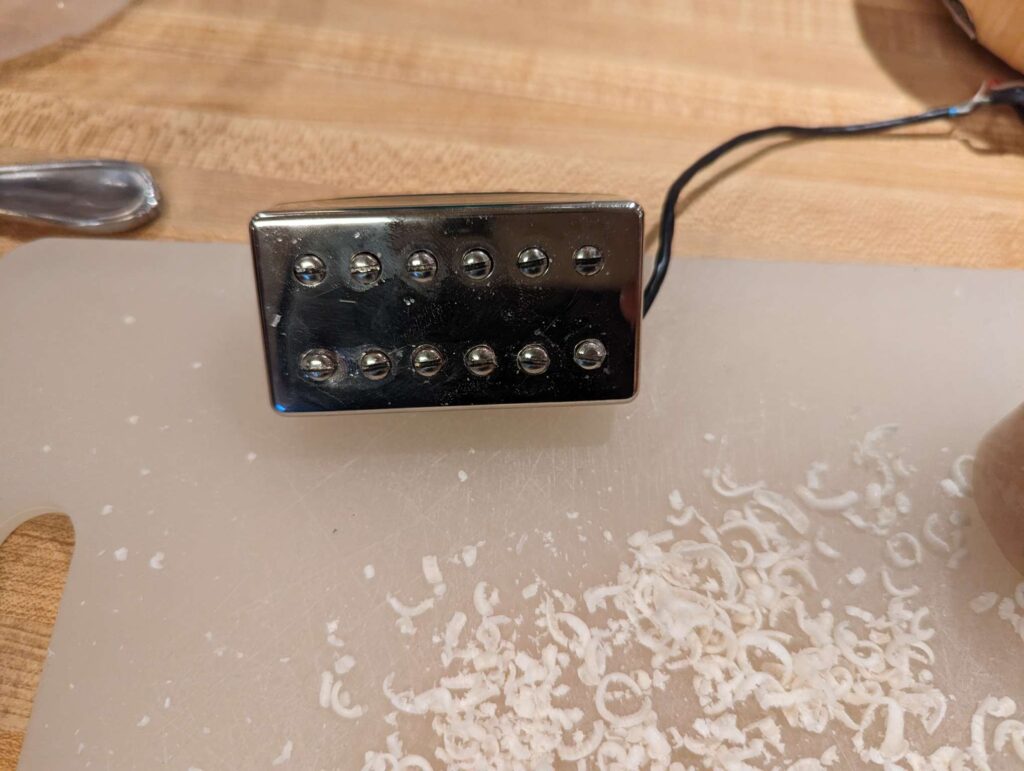
The pickup is black and I wanted to have chrome cover pickups. Santa brought me a cover and I installed it.
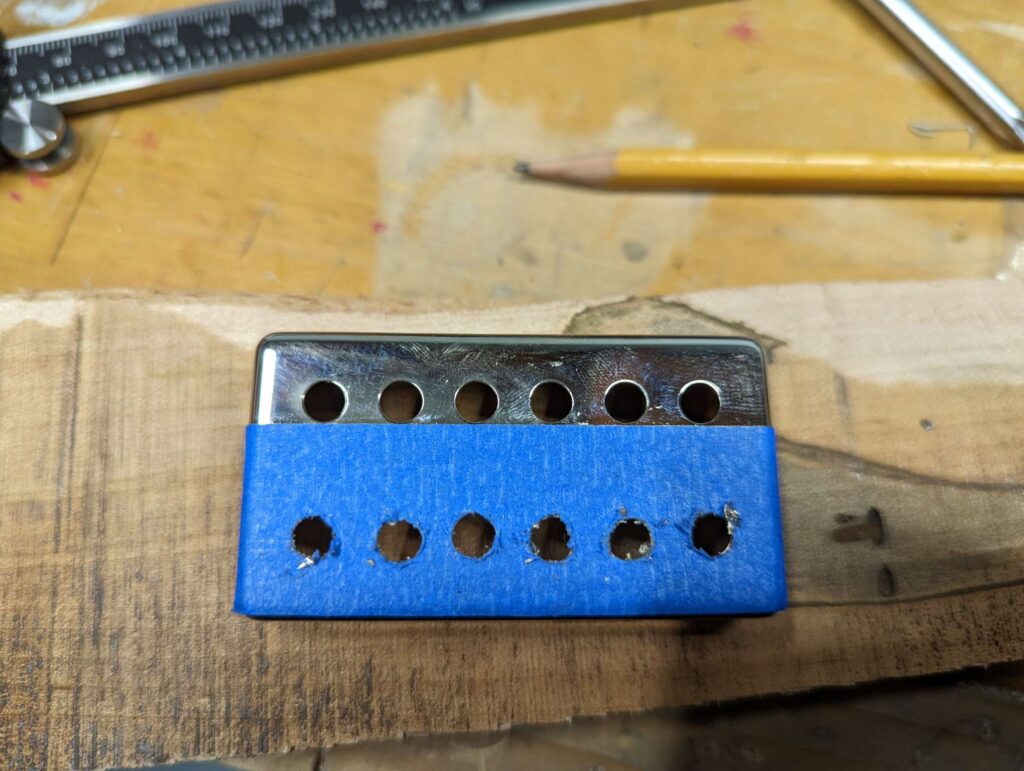
It needed some modifications to fit right. I drilled a second row of holes so the screws will peek out. I had to file some corners on the pickup and flatten it a bit.
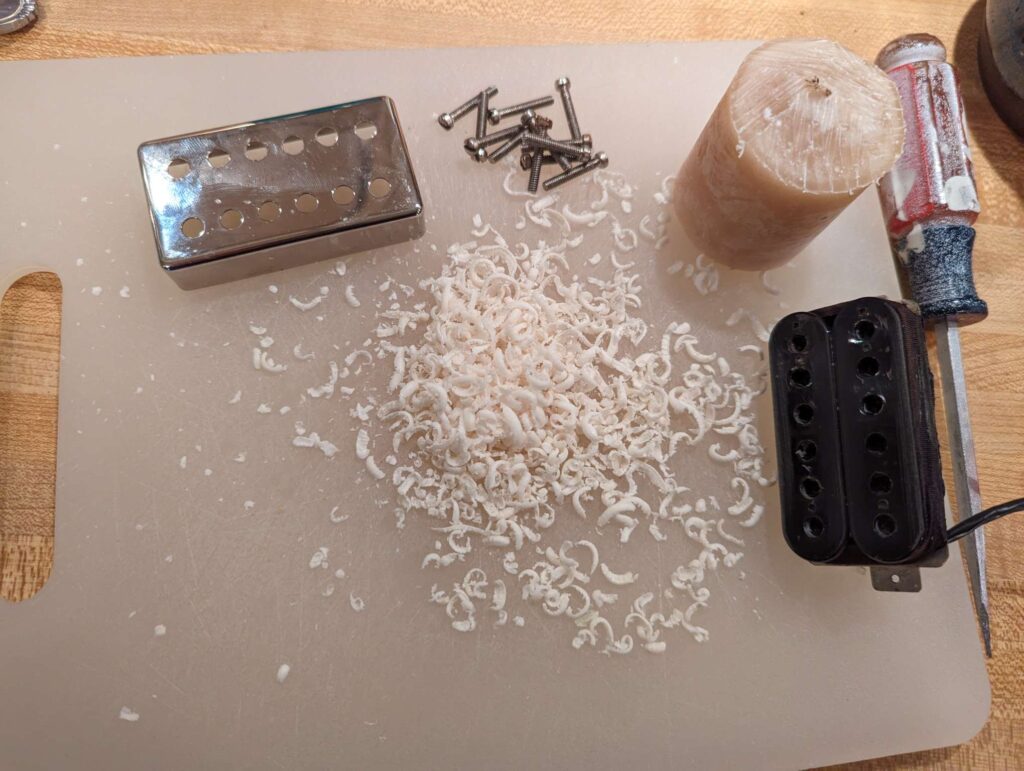
Marking out locations for new holes.New holes!I removed and polished all the screws and got some wax to pot the pickup.I melted the wax using my stove.
Now the pickup is ready to install. It also smells really nice. I’m not sure if I have ever seen a pink guitar with nice smelling pickups.
Now that the pink and black are dry, it’s time to put some top finish on the body. I’m going for a half glossy finish. Shiny, but not glassy like my Vanguard. I’m using tung oil for this.
Tung oil is a traditional wipe on oil finish that is used on furniture and guitars. You can wipe on many coats and after it dries, it hardens up a bit. The exact stuff I’m using is polymerized tung oil. This stuff has some polyurethane mixed in that makes it dry harder and more durable.
The finish I’m usingFirst coat of finish.
The first coat gets sucked up by the wood. The subsequent coats add layers of shine.
This is about 5 or 6 coats in. It’s pretty slow going but starting to get the shine I want.After the last coat dried overnight, a light sanding made everything smooth while keeping the topcoat intact.
A few more coats of oil, a very light sanding, and one more very light coat of oil will finish this for now.
I’ll let this sit for a week or so to cure and harden. Then buff it a bit to make it shine!
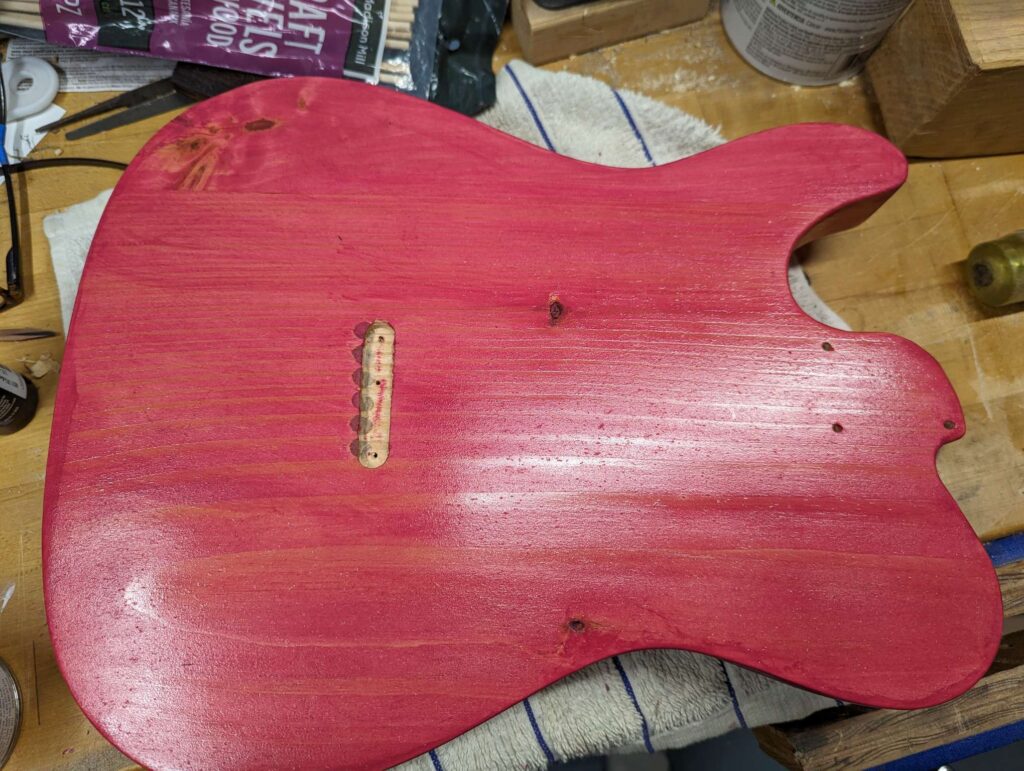
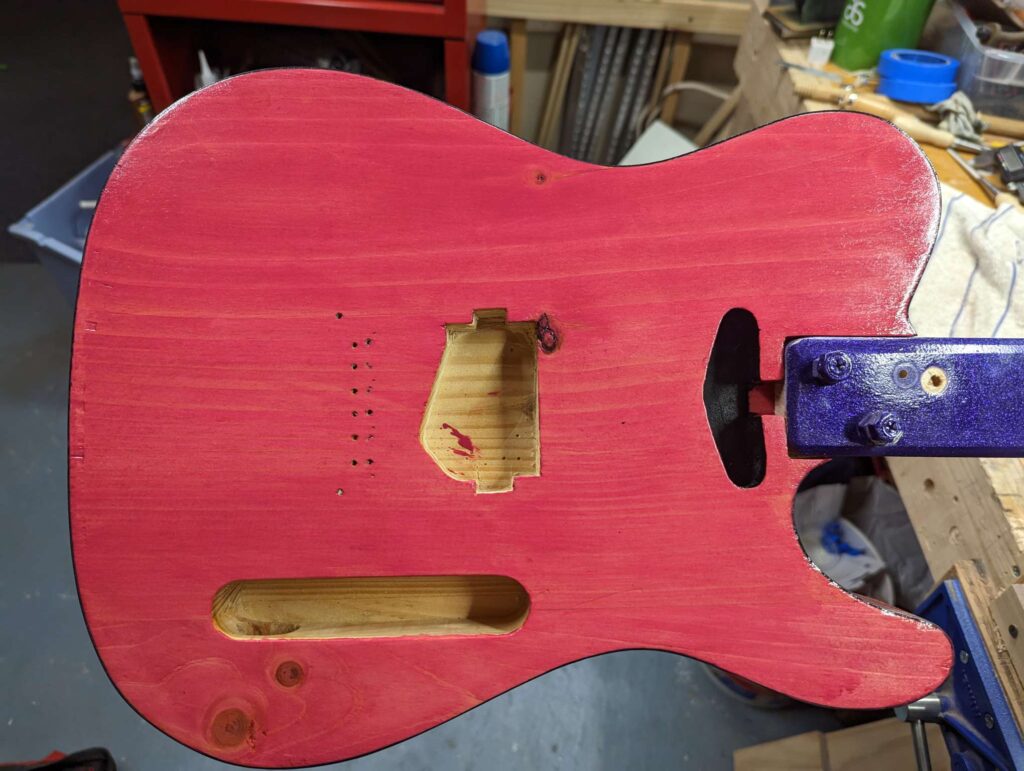
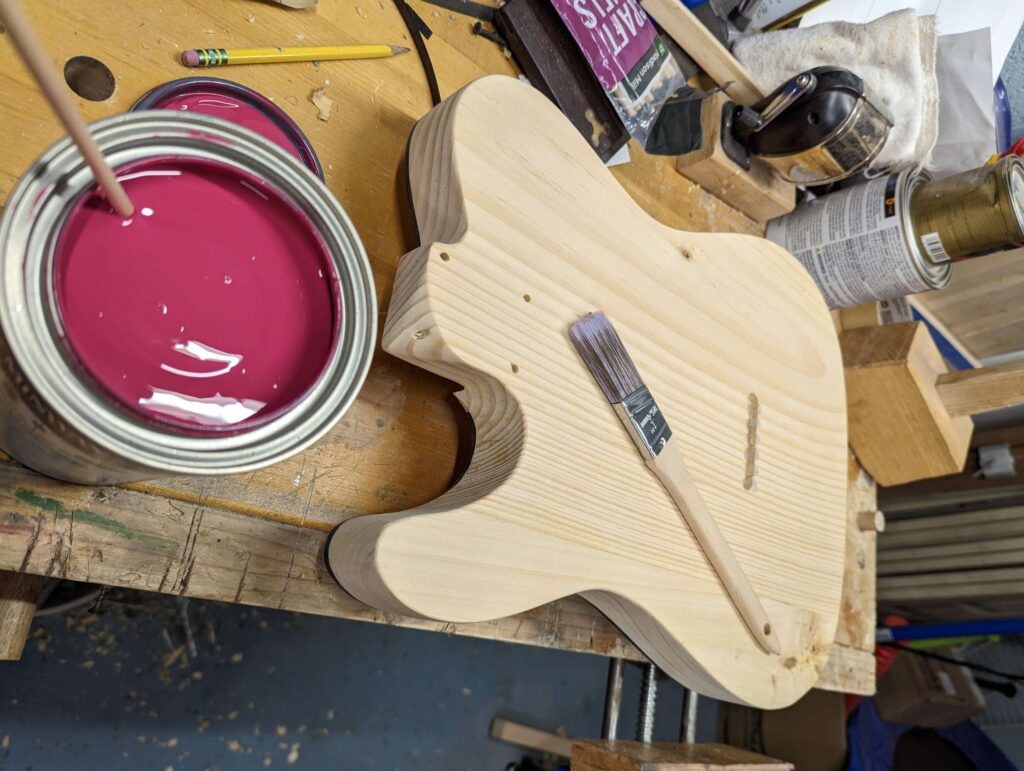
I put the pink stain on the body and it looks suuuuuper sexy. I used a water based stain from Minwax. I got it from Lowes and they mixed the color for me.
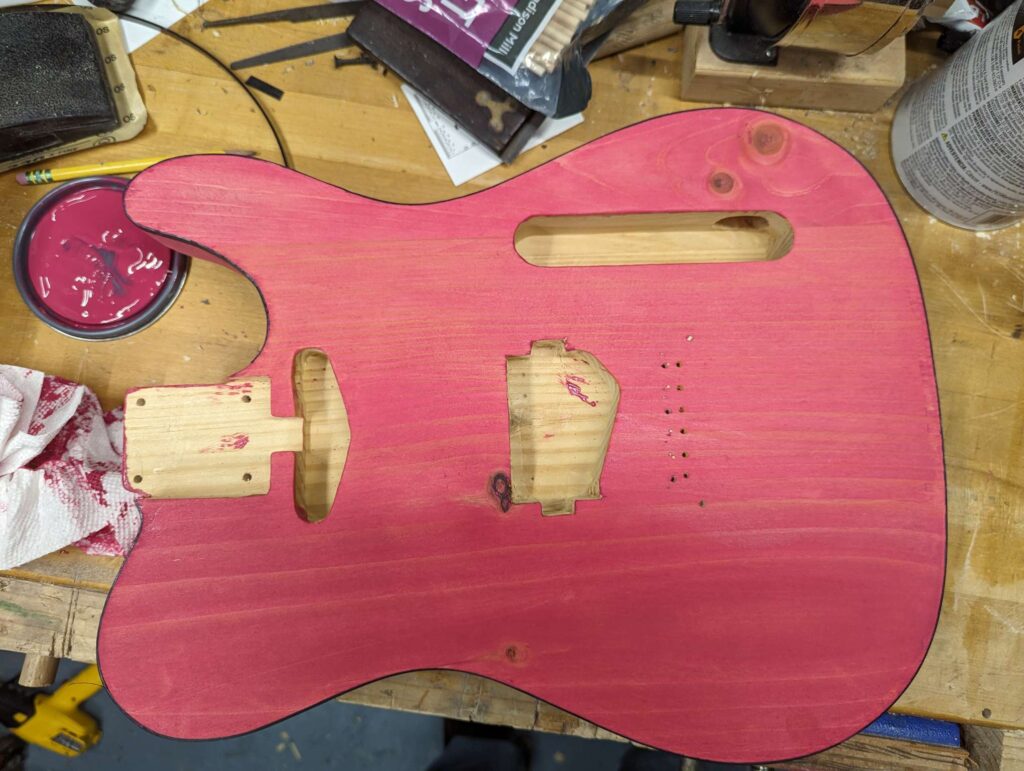
Here goes nothing!Oozing with sex appeal. I LOVE how the knots in the wood look.
Front looks wicked!
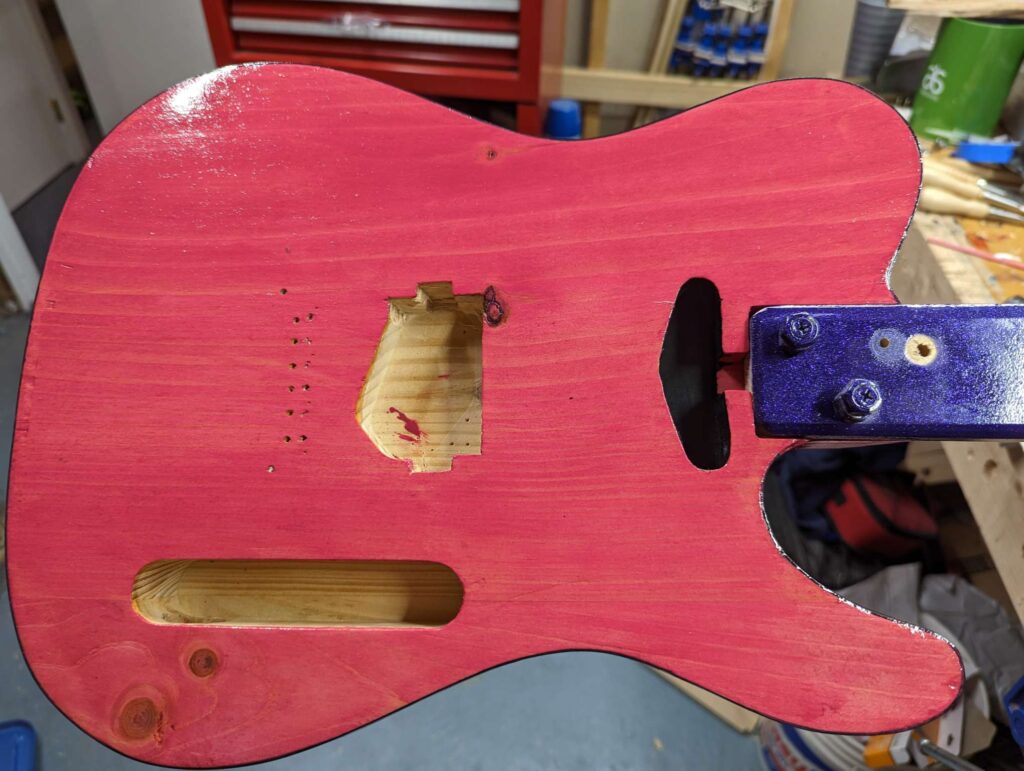
I also painted the neck pickup cavity black. Since I’m not using a pickguard, the inside will show.
After this dries, I’m going to put some polymerized tung oil on it. That’s some old school tung oil mixed with some new school polyurethane to make it more durable. I can build up as many coats as I want until I get the level of shine I like.
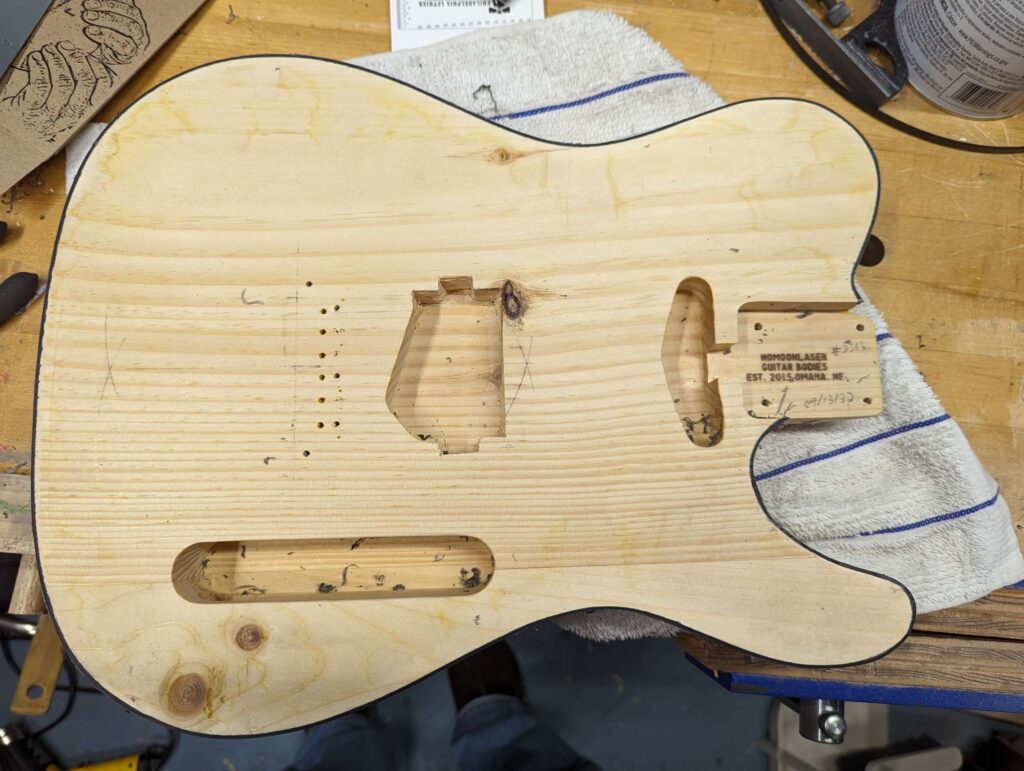
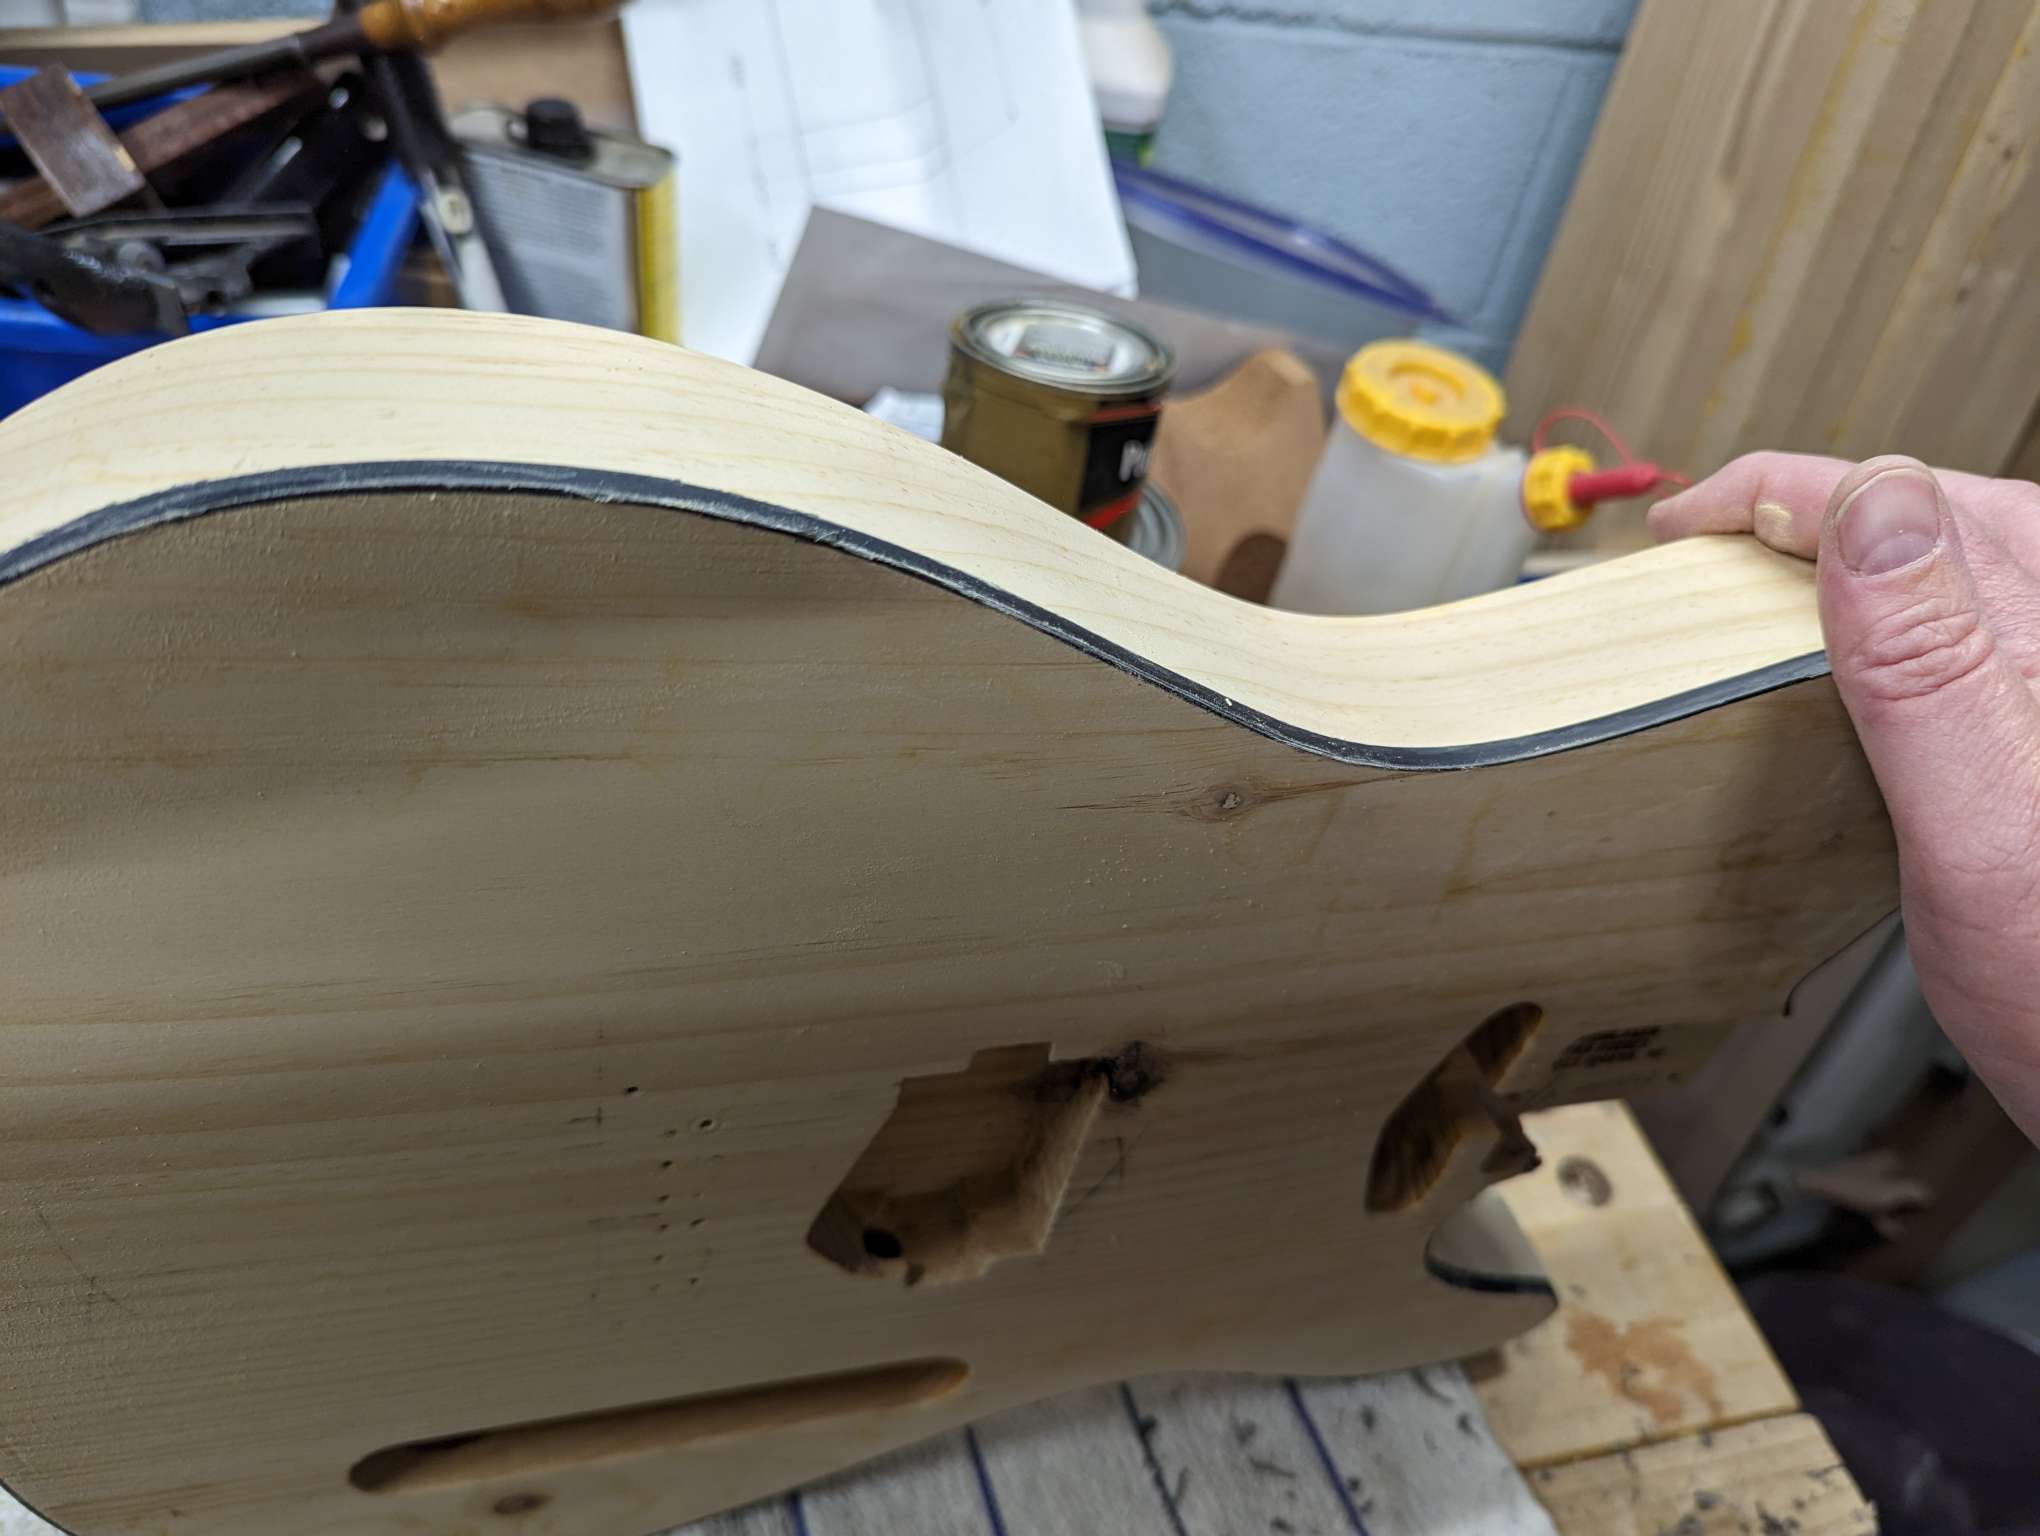
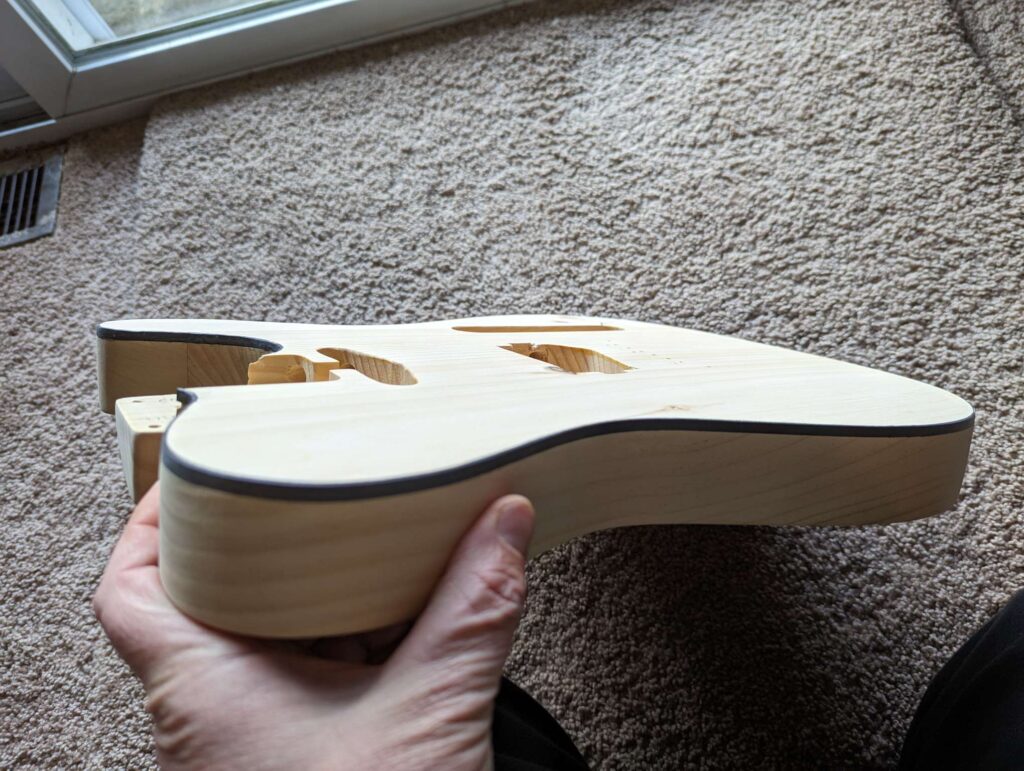
Now that the binding is attached to the Tele body, I needed to scrape it flush with the surface of the body (so you can’t feel it). Then some final sanding of the whole body. After the sanding was done, I found another small mod to make.
To smooth out the binding, I used a card scraper. This is a piece of thin steel with a straight/smooth edge and a burr added to one edge. The burr is a small sharp hook that scrapes off incredible thin pieces of material and leaves a nice smooth finish.
One area scraped. You can see the scraper in the background.It looks much nicer now!Nice and smooth. The fuzzy stuff will come off during sanding.
NGL, this was a royal pain and very tedious! I broke a small piece off near the neck pocket that will need to be glued back on.
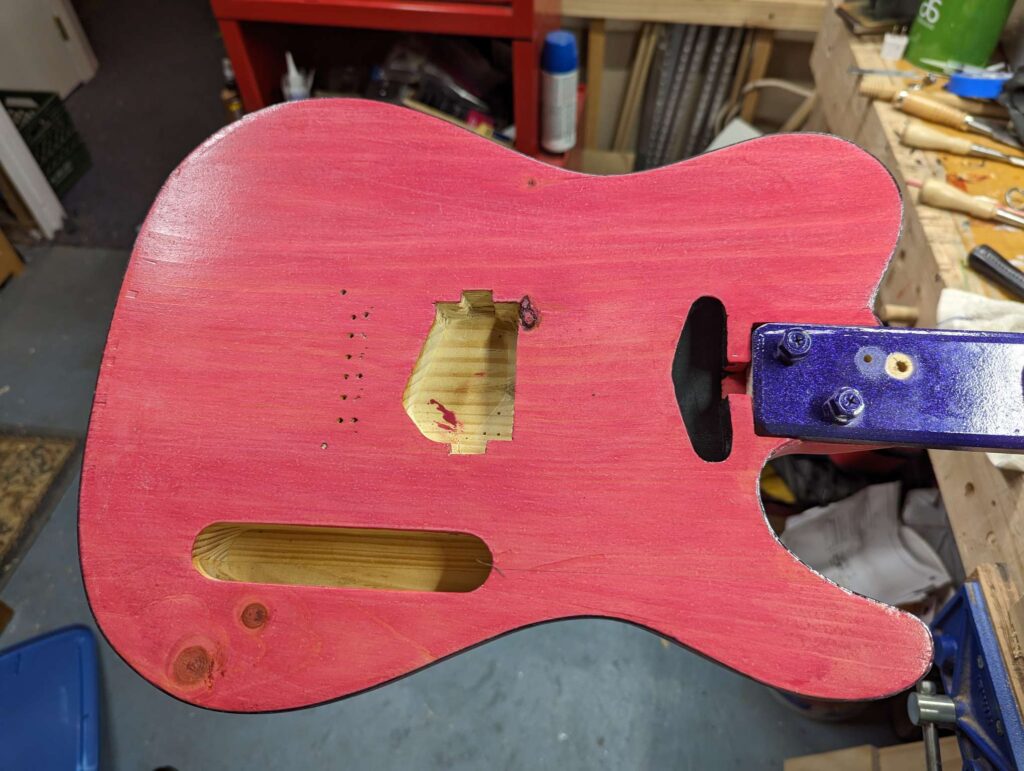
Next step is sanding. I use 220 to sand everything nice and smooth. Then wipe it with water to raise the grain and sand it again after it dries. Then some light sanding with 320.
Sanded with 220 and then wiped with water.Sanded all smooth likeThis thing definitely wants to be touched
The binding and sanding came out great! I left a few “apprentice marks” in there that will add to the character.
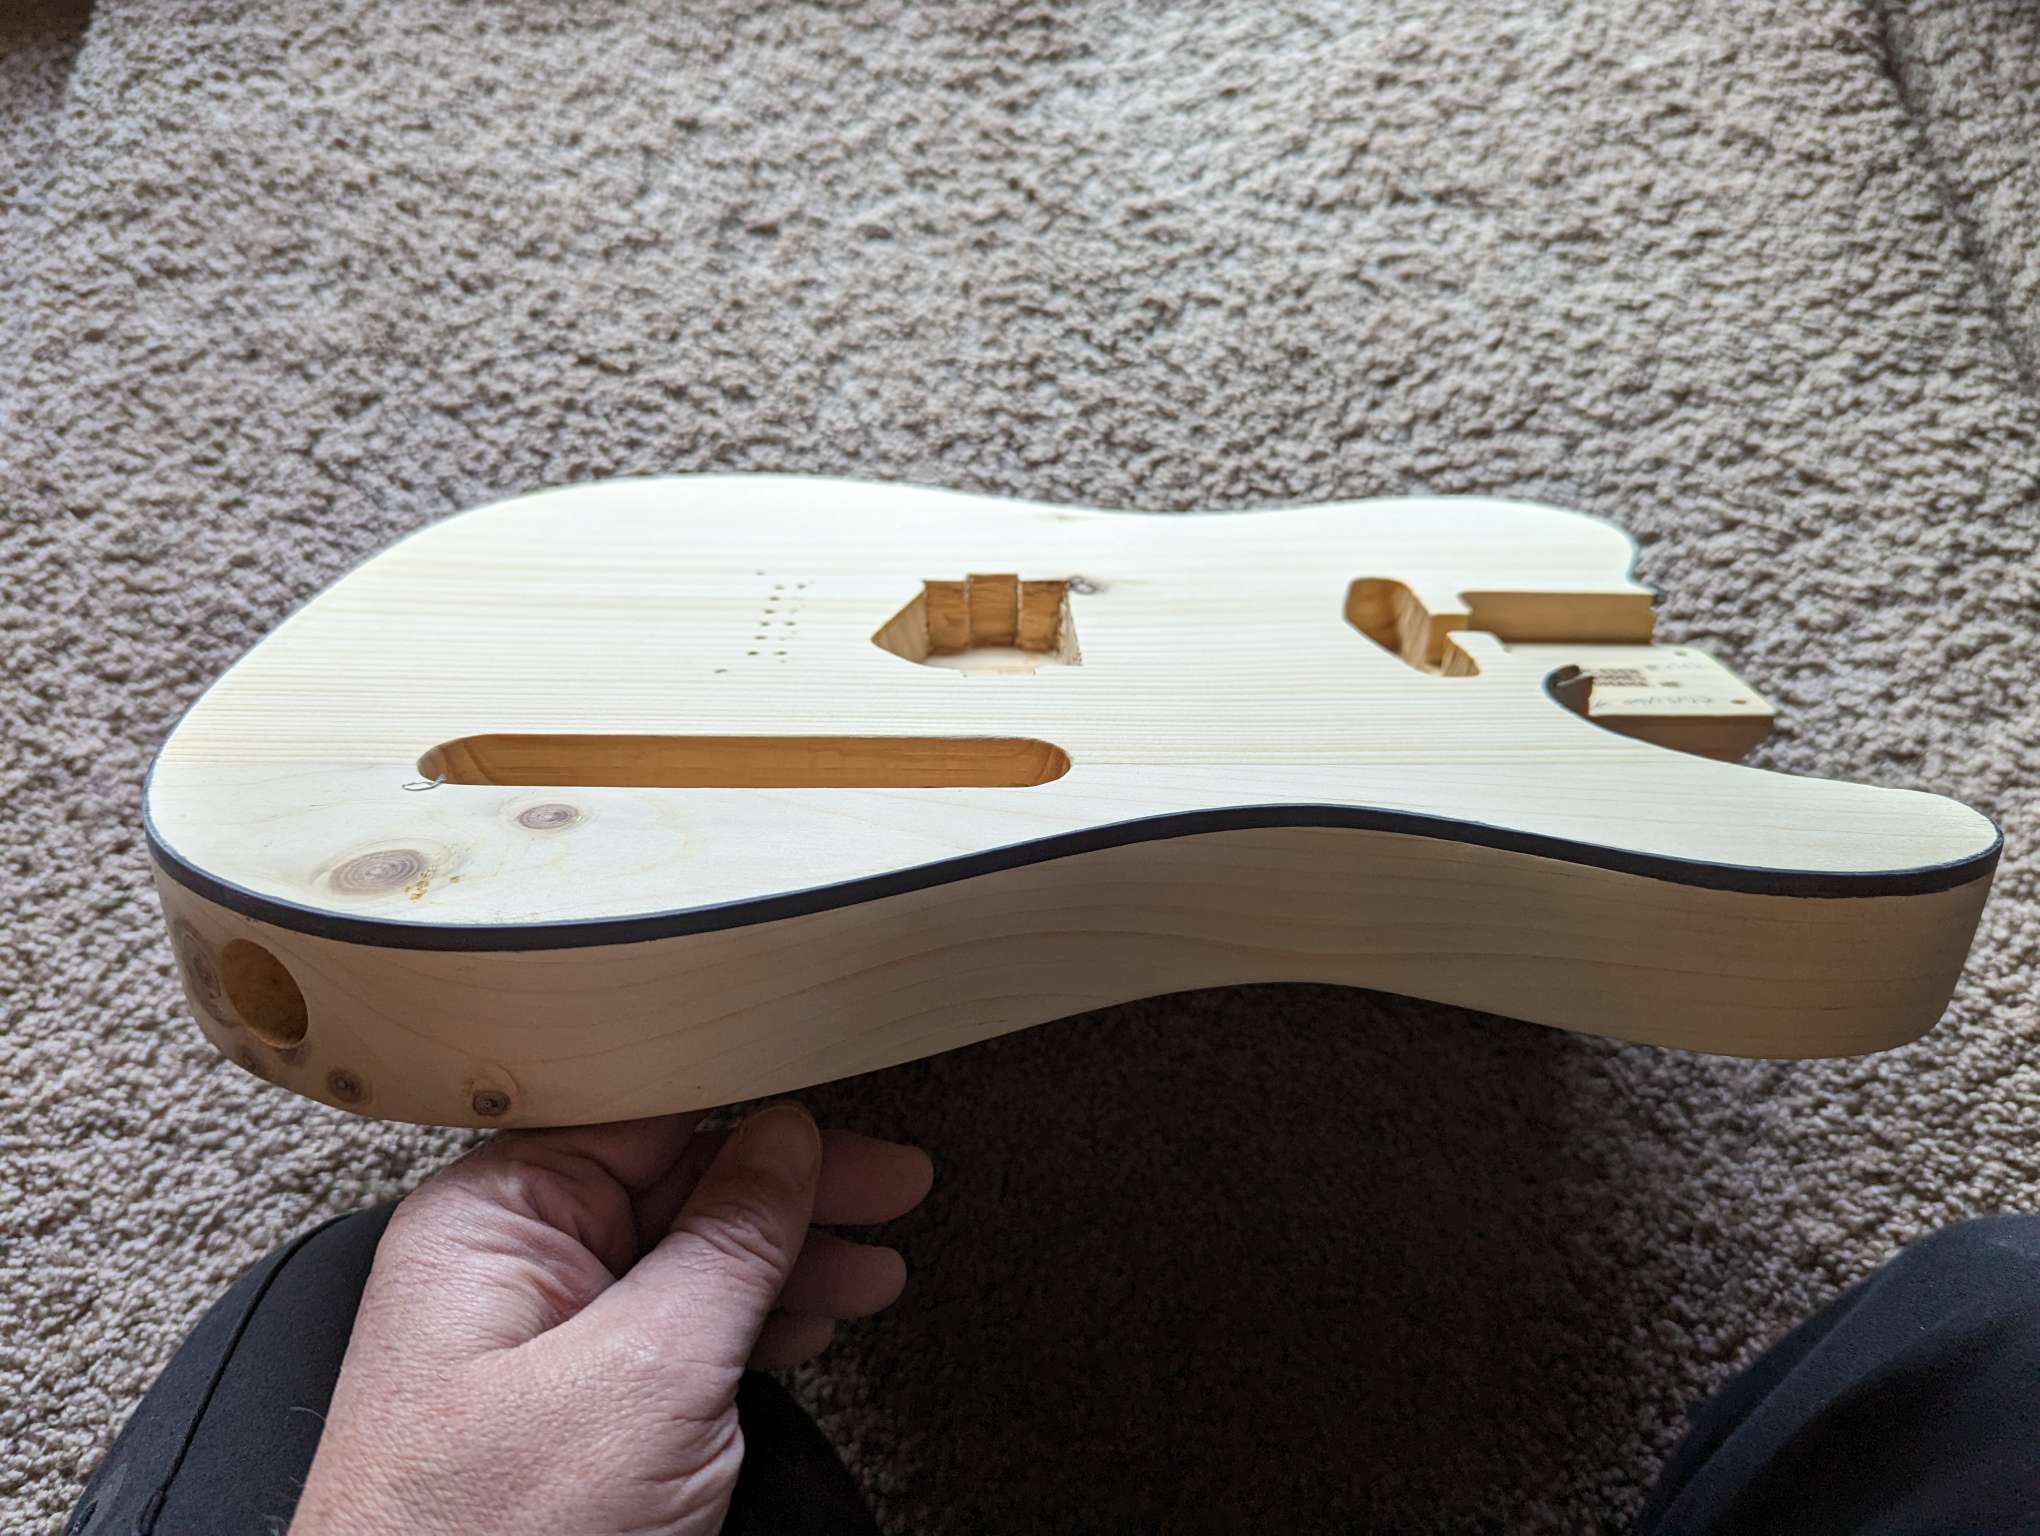
I got the neck on and noticed an adjustment I wanted to make. The fretboard was a bit high off the body for my taste, so I decided to make the neck pocket deeper by 3/32″. This means I get to use my favorite tools again!
I marked off the new neck pocket depth with a marking gauge. Then I got to work with my router plane.
Hogging out some pine. You can see the depth mark on the heel.All done nice and smooth like I also wanted to square off the corners a bit so the neck bottoms out.Some sharp chisels made short work of that.


You must be logged in to post a comment.