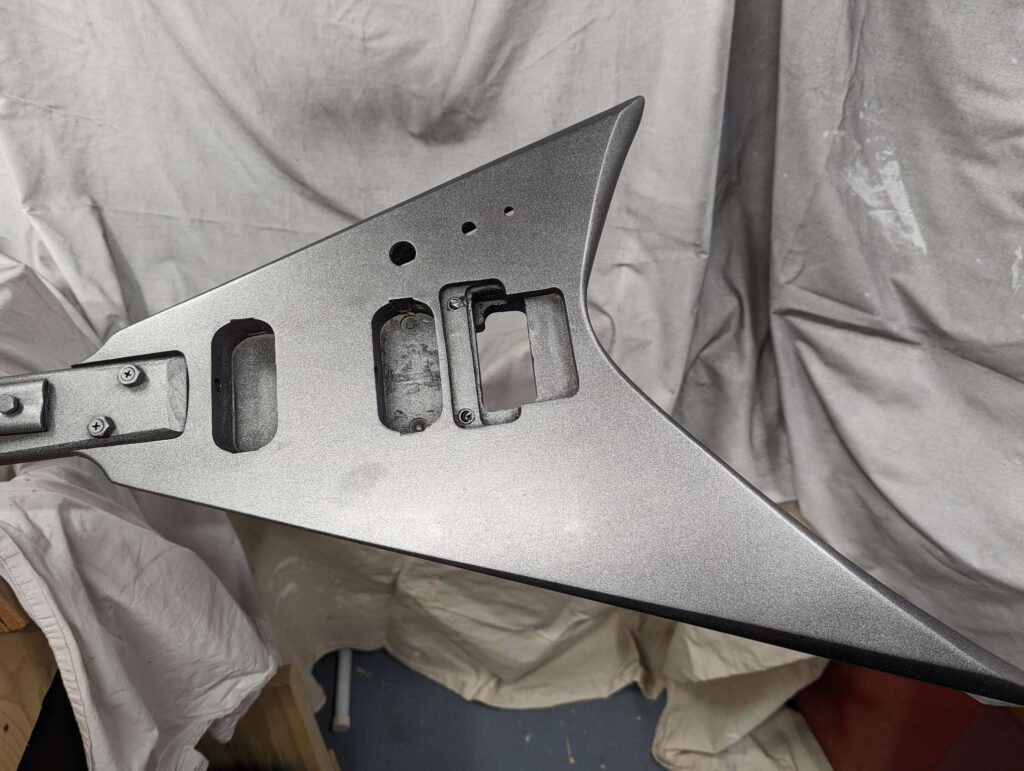
I was too excited and decided to spray the next color. The next step is the metallic color. I used Createx Wicked Charcoal Metallic W359. This paint is also water based and easy to clean up.
It took a few passes to get the coverage right, but hole shit it looks cool!
Whoa!My pants are tight right now!
Here is a quick video of what it looks like outside.
The next step is to spray even coats of candy orange until is looks sexy as shit. I’ll use Createx Candy20 Grabber Orange 4654 for that.
The black and metallic are the easy parts of the paint and I’m pretty nervous about the candy. I’ve only ever sprayed candy color on plastic models.
I sprayed the guitar with a black sealer coat. This is the first of four colors.
This paint is Createx Autoborne Sealer 6002 Black. It’s nice because you can get small amounts of this stuff and it’s water based so it cleans up nice and easy with warm water.
I’m spraying out of a Harbor Freight HVLP detail gun and using my awesome friends compressor and advice.
I was pretty nervous about this. I’ve never used a spray gun on anything I really cared about. Luckily the paint manufacturer has good instructions.
Bye bye wood!
The next color I’ll spray is Createx Wicked Charcoal Metallic 359, followed by Createx Candy2o Grabber Orange 4654, and then lots of 2k clear.
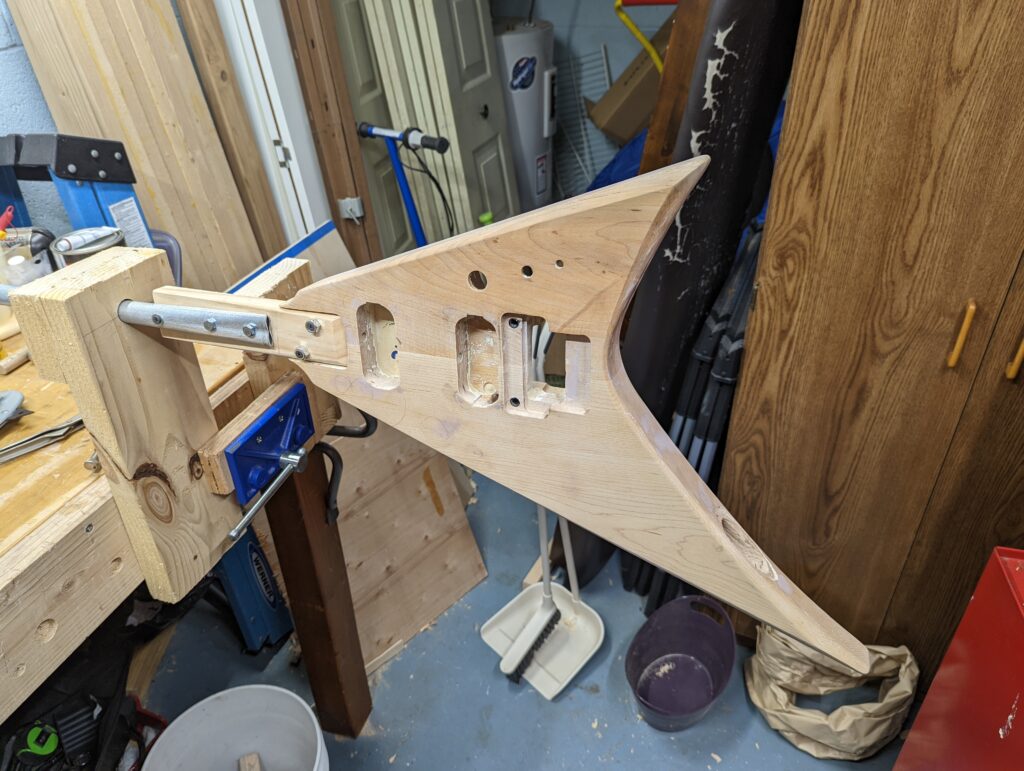
I need to do some final stuff to get ready to paint the guitar. I needed to make some fixture to hold the guitar while I paint it and still allow me to paint all the sides. And I need to find a way to hold it without me actually holding it.
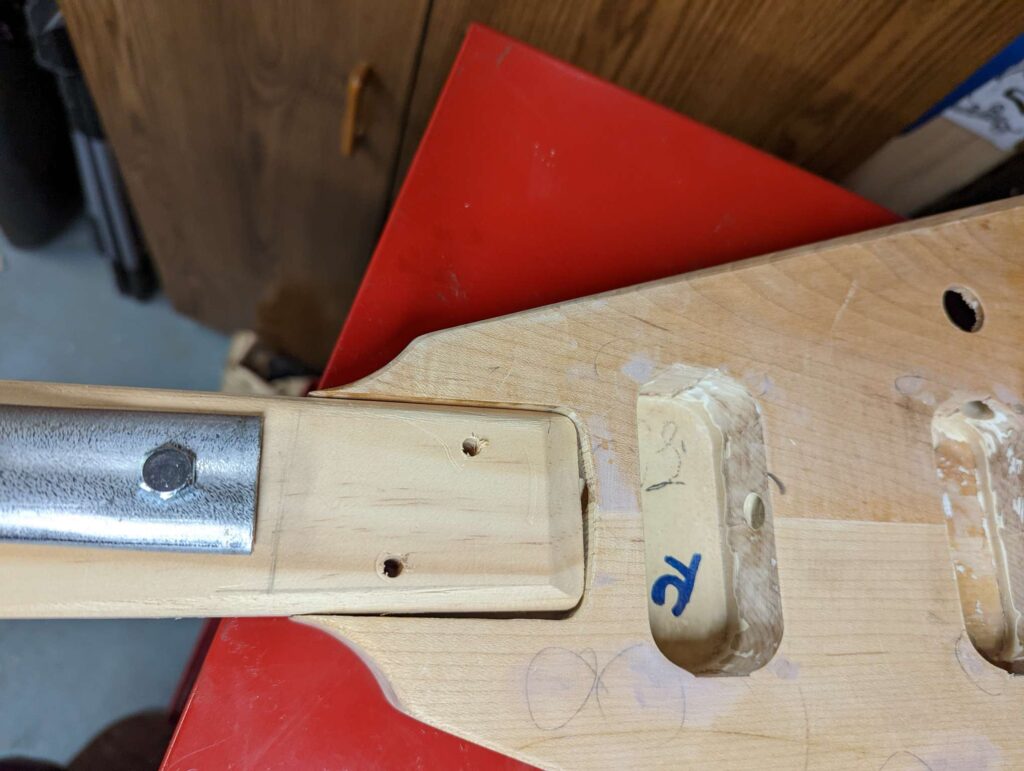
I used some scrap pine to make a fake neck that I can attach to the body. Then I used a piece of 3/4″ galvanized conduit (the stuff used to run wires in places the wire can’t be exposed). I flattened one end of the conduit in my vise and drilled some holes to mount it to my faux neck. The conduit was bolted to the pine neck thingy and voila!
My superdeedupiter body holding jigamabobber.The business end
To mount this to my workbench, I drilled a 3/4″ hole through a couple thicknesses of 2×6 that are glued and screwed together. This makes a solid 3″ long bearing surface to hold the overhang weight of the guitar body. This thing has to be strong enough to hold the guitar without me worrying (I’ll still worry). Luckily the conduit is slightly less than 3/4″ so it’s easy to turn and it does not have too much slop. I’ll use the tag team of my workbench vise and some screws to hold the fixture nice and solid.
The whole shebang in action
I’ll do some final cleanup around the workshop and put drop cloths everywhere around the guitar.
For the neck, I’ll just hang it from the ceiling and paint the headstock.
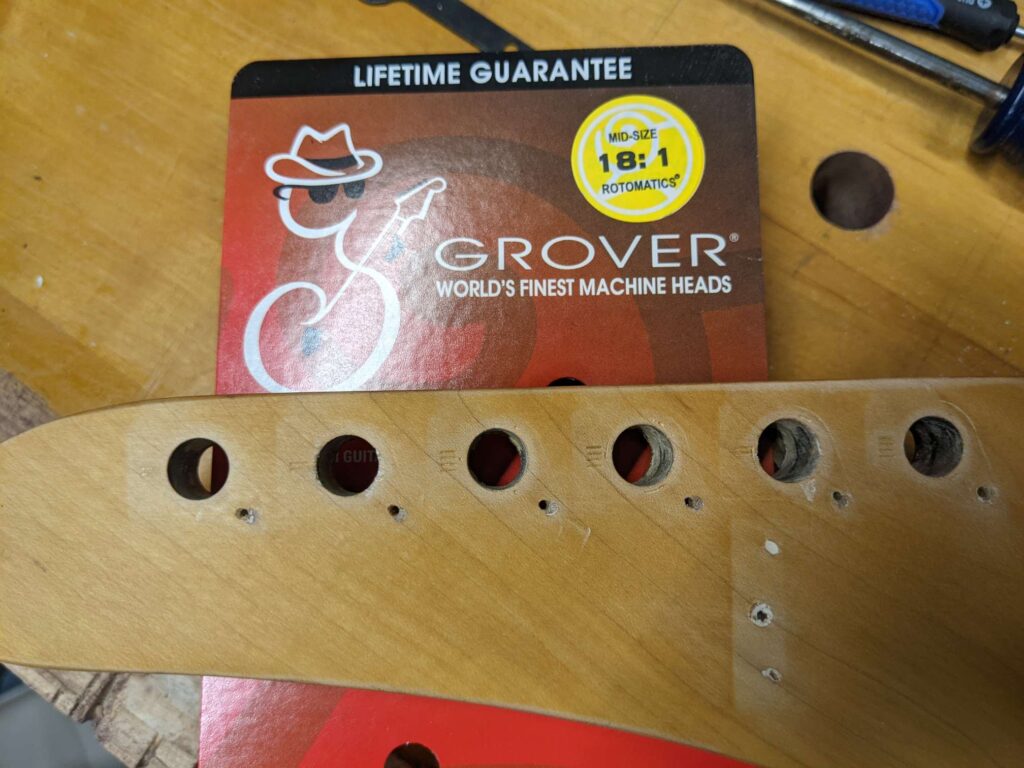
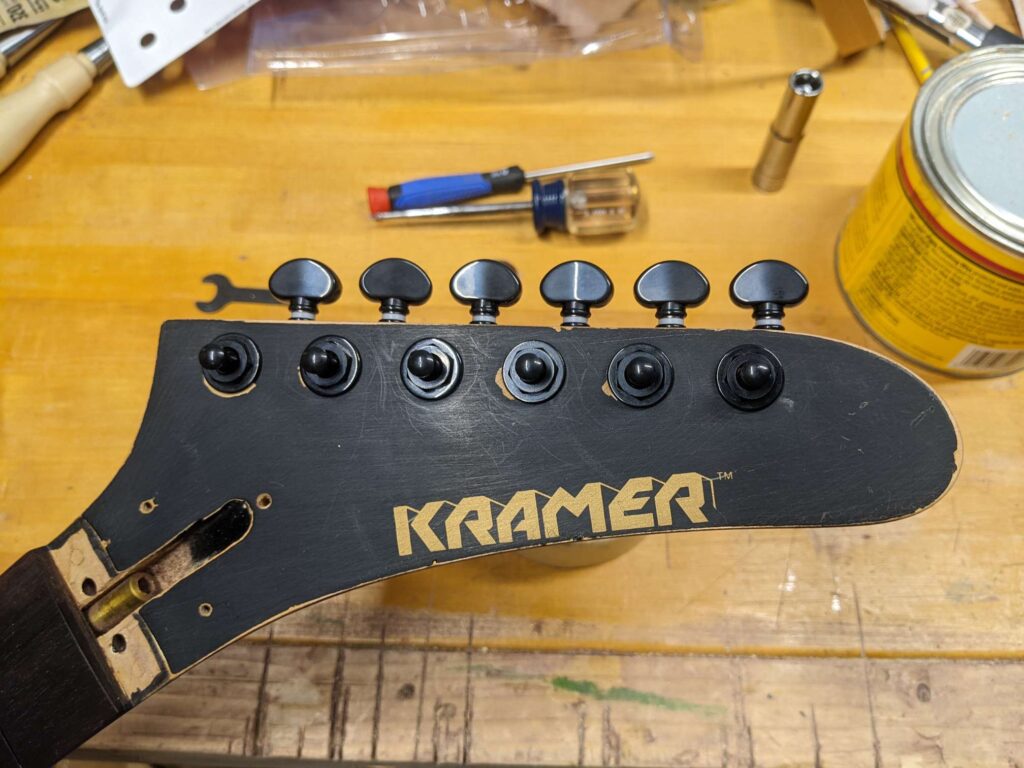
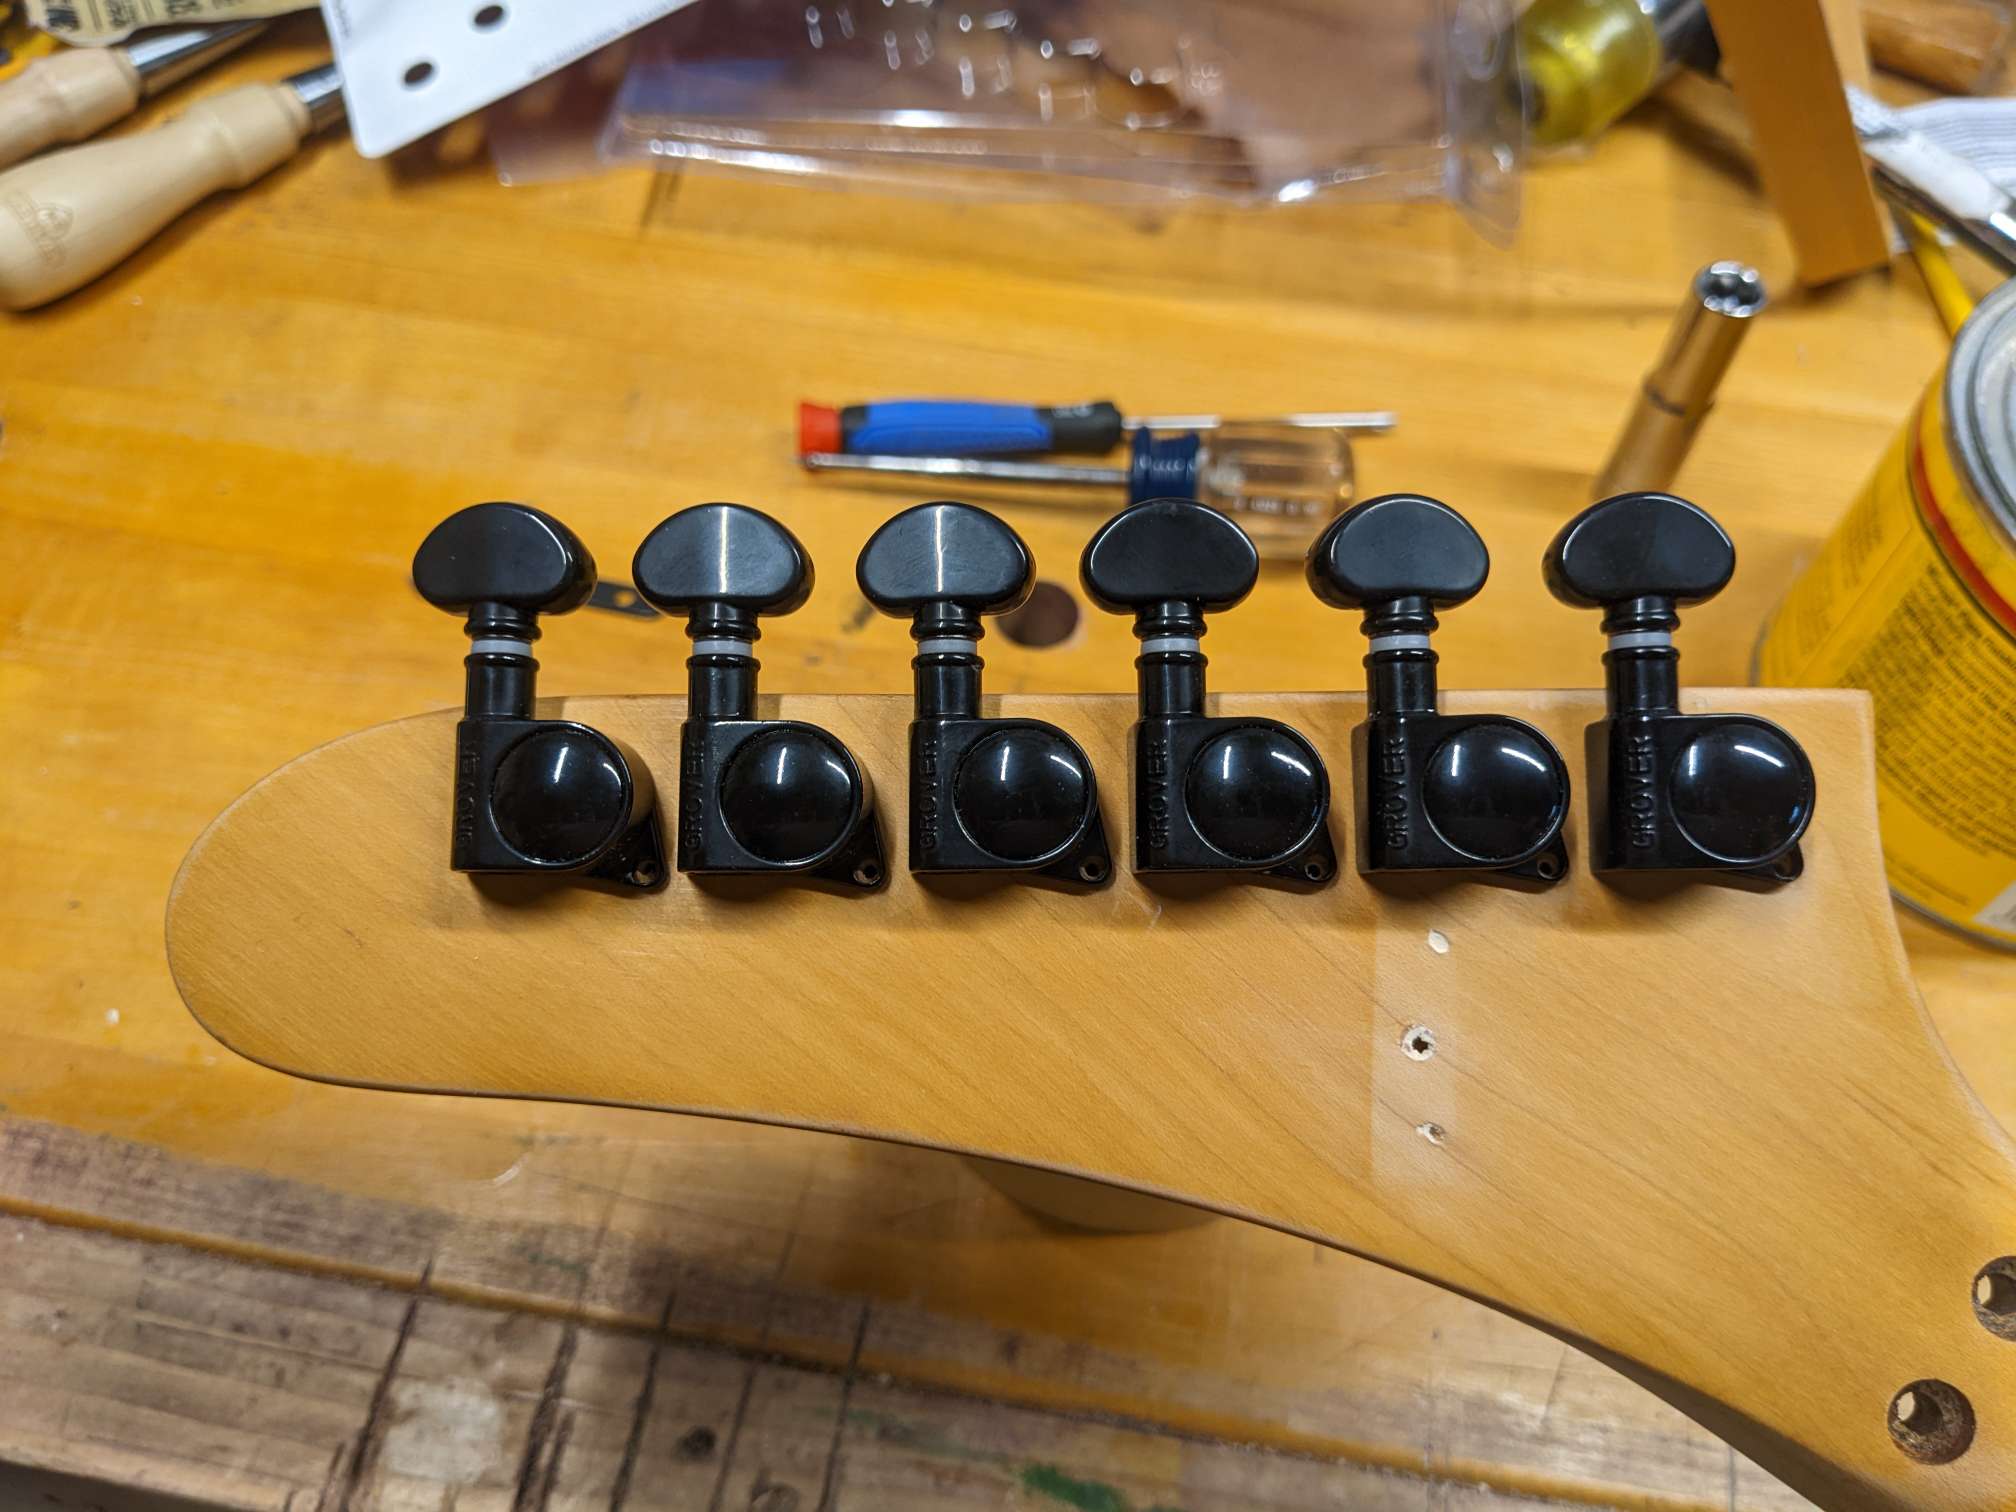
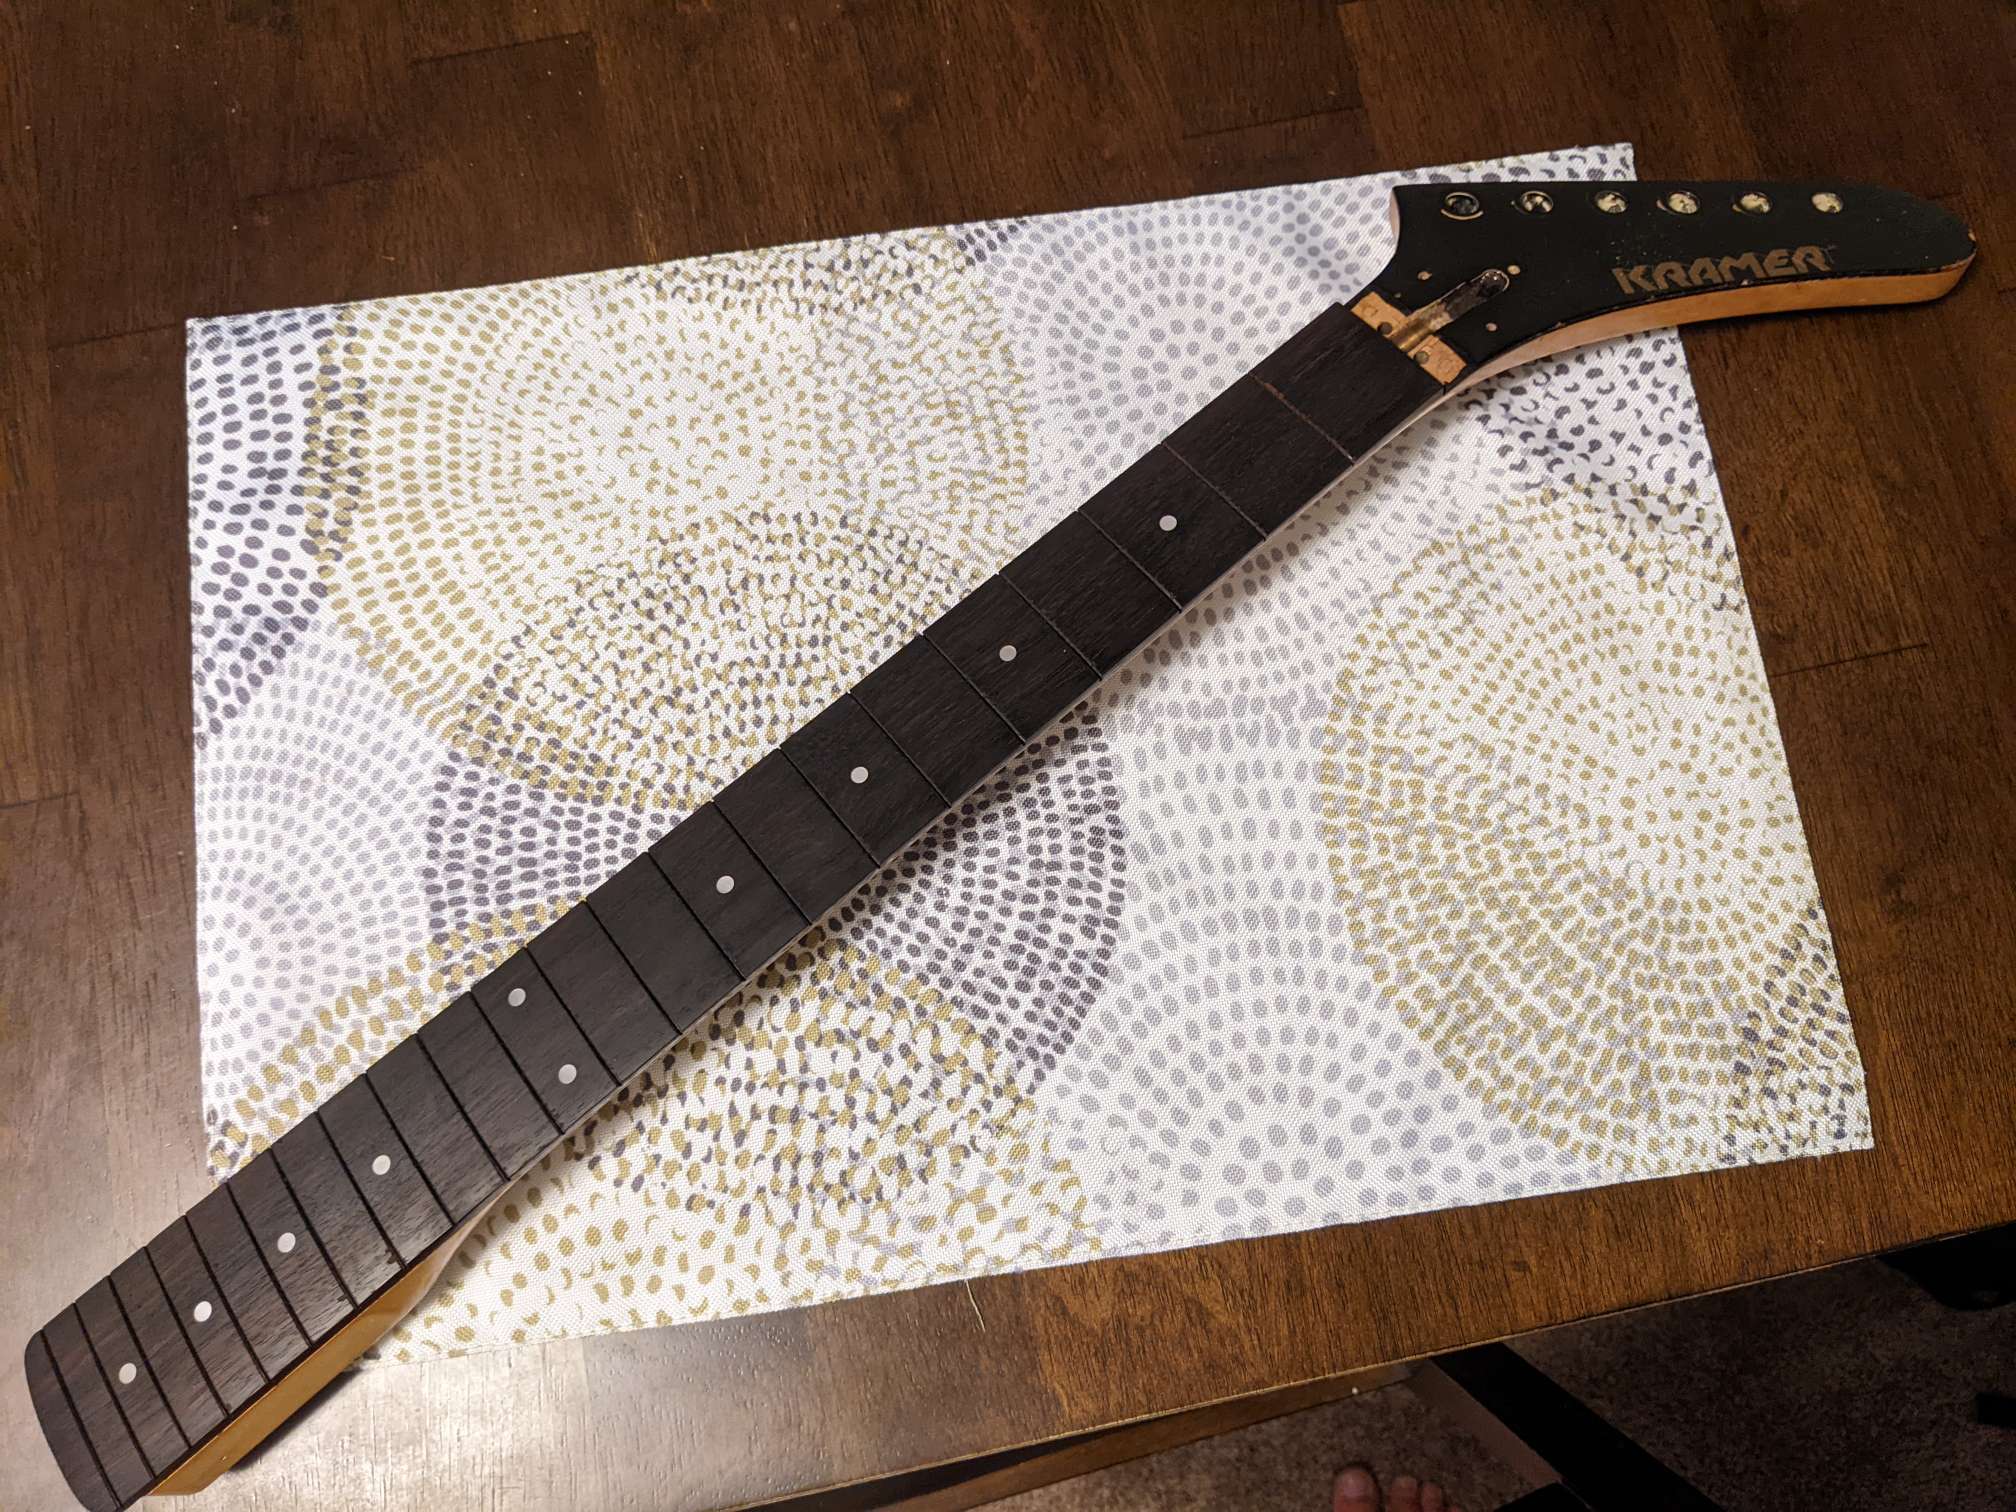
After filling the old screw holes, I installed the new tuning machines to make sure they fit right. I also drilled pilot holes for the screws.
The tuning machines are Grover Rotomatic 18:1 tuners. They are the non locking type cause I have a locking nut for this guitar.
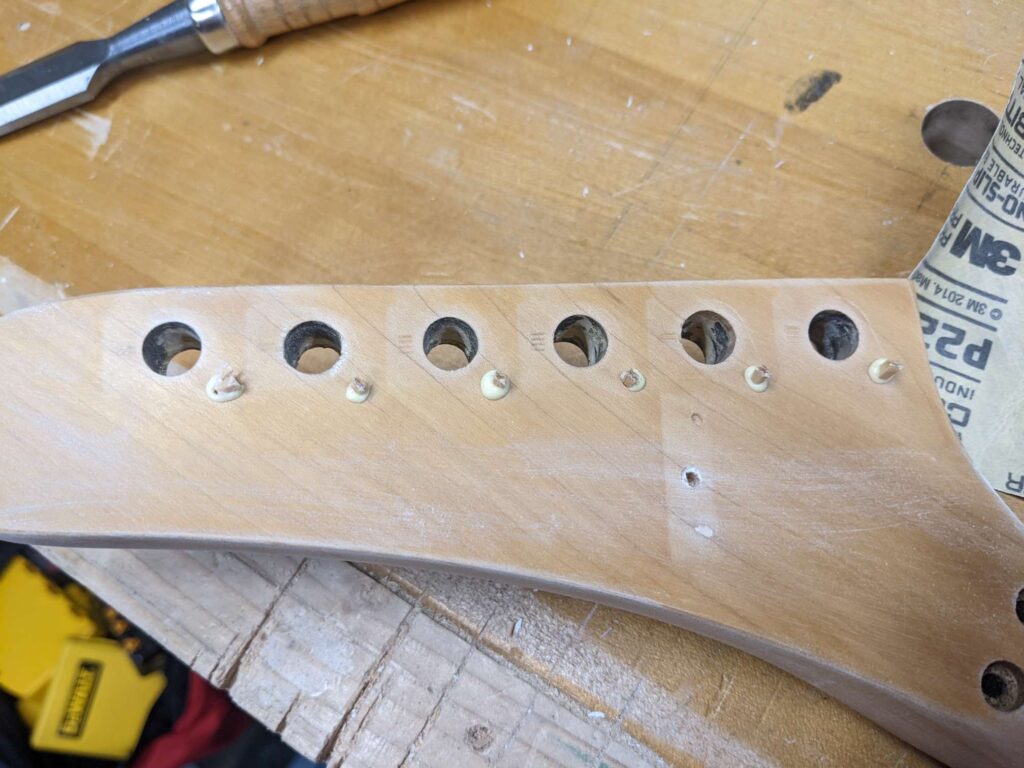
These pretty much fit the old Schaller ones from the 1980s. The only thing that didn’t line up was the screw holes. They are all 1/32″ or so off which is why I filled the old screw holes.
You can see how close the screw holes were.New ones from the front.New ones from the back.
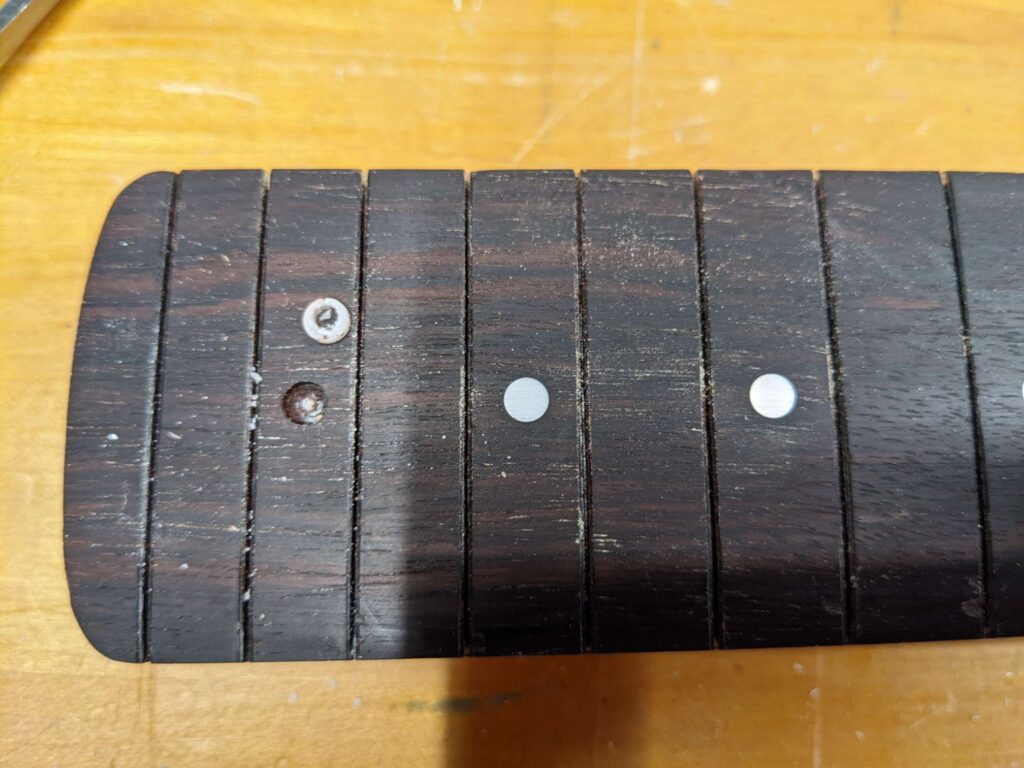
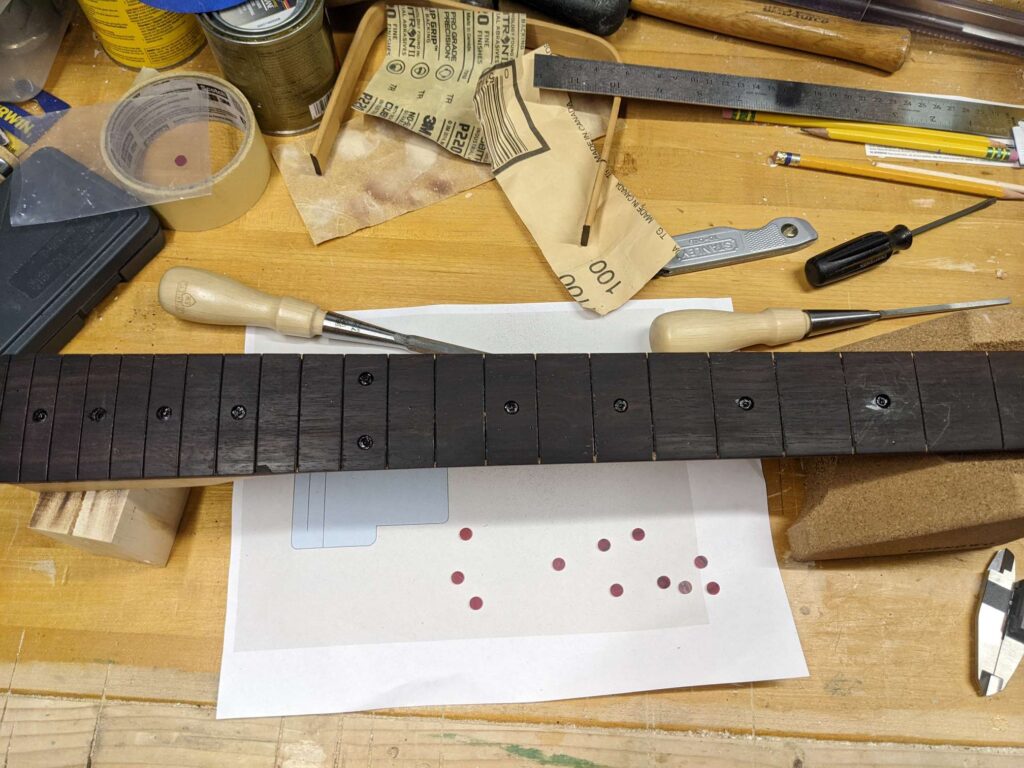
I gave the whole neck a good sanding to smooth things out and remove some age marks. I also sanded the headstock where it will be painted to rough up the paint (I’m not going to strip it). I filled the timing machine screw holes with toothpicks. I pulled out the old plastic fretboard dots and put in some cool red jasper stone dots. Then sanded the whole shebang and put a coat of oil on.
Glued in some toothpicks. I’ll trim them off later when the glue dries. The new tuner holes are a teensy bit different.A small drill bit and a small chisel pops the old boring plastic dots out.
The new dots are a bit larger than the old ones (a good thing). Opened up the hole using increasingly larger drill bits. The drill is in reverse so it doesn’t dig in. Then I filled the holes with CA glue.
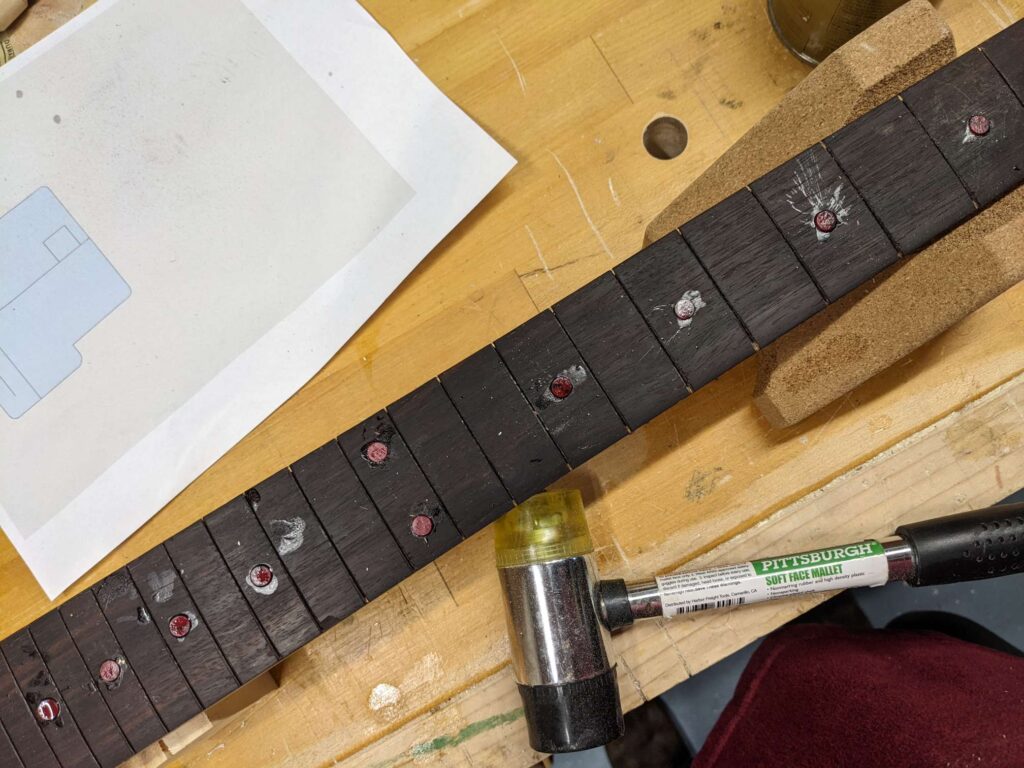
The holes are opened up and filled with some CA glue to make the holes a bit more shallow.The new dots are glued in! I’ll send them down and polish them later.
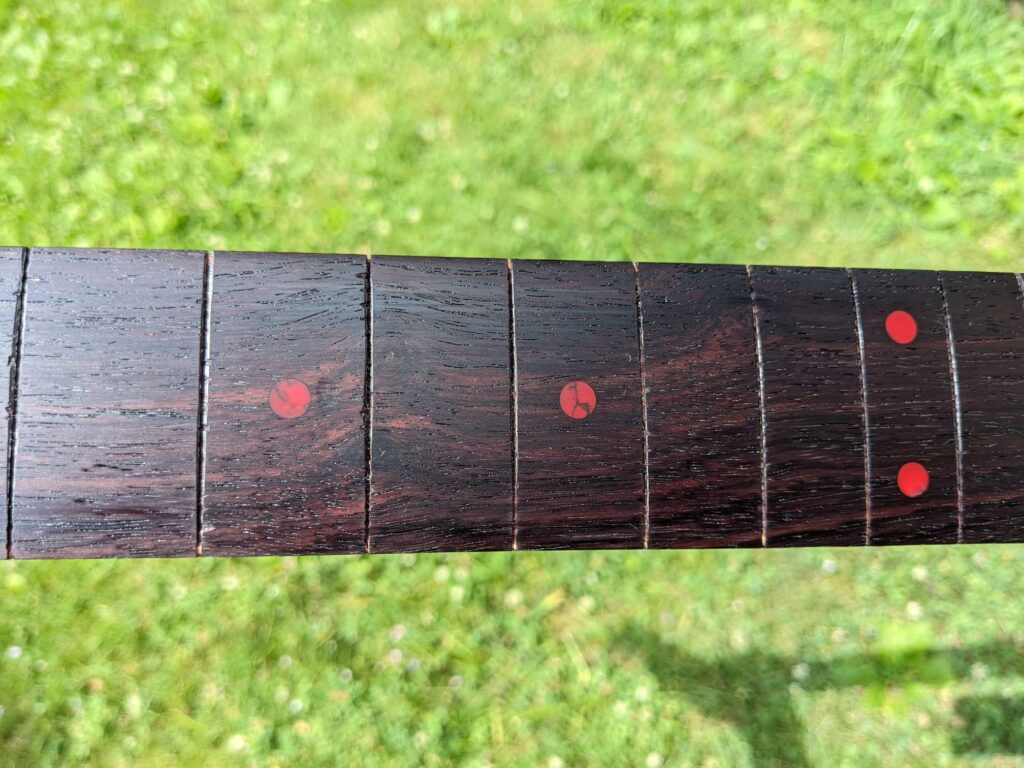
After some sanding, the dots are nice and smooth! After a coat of lemon oil, the fretboard and dots look awesome!
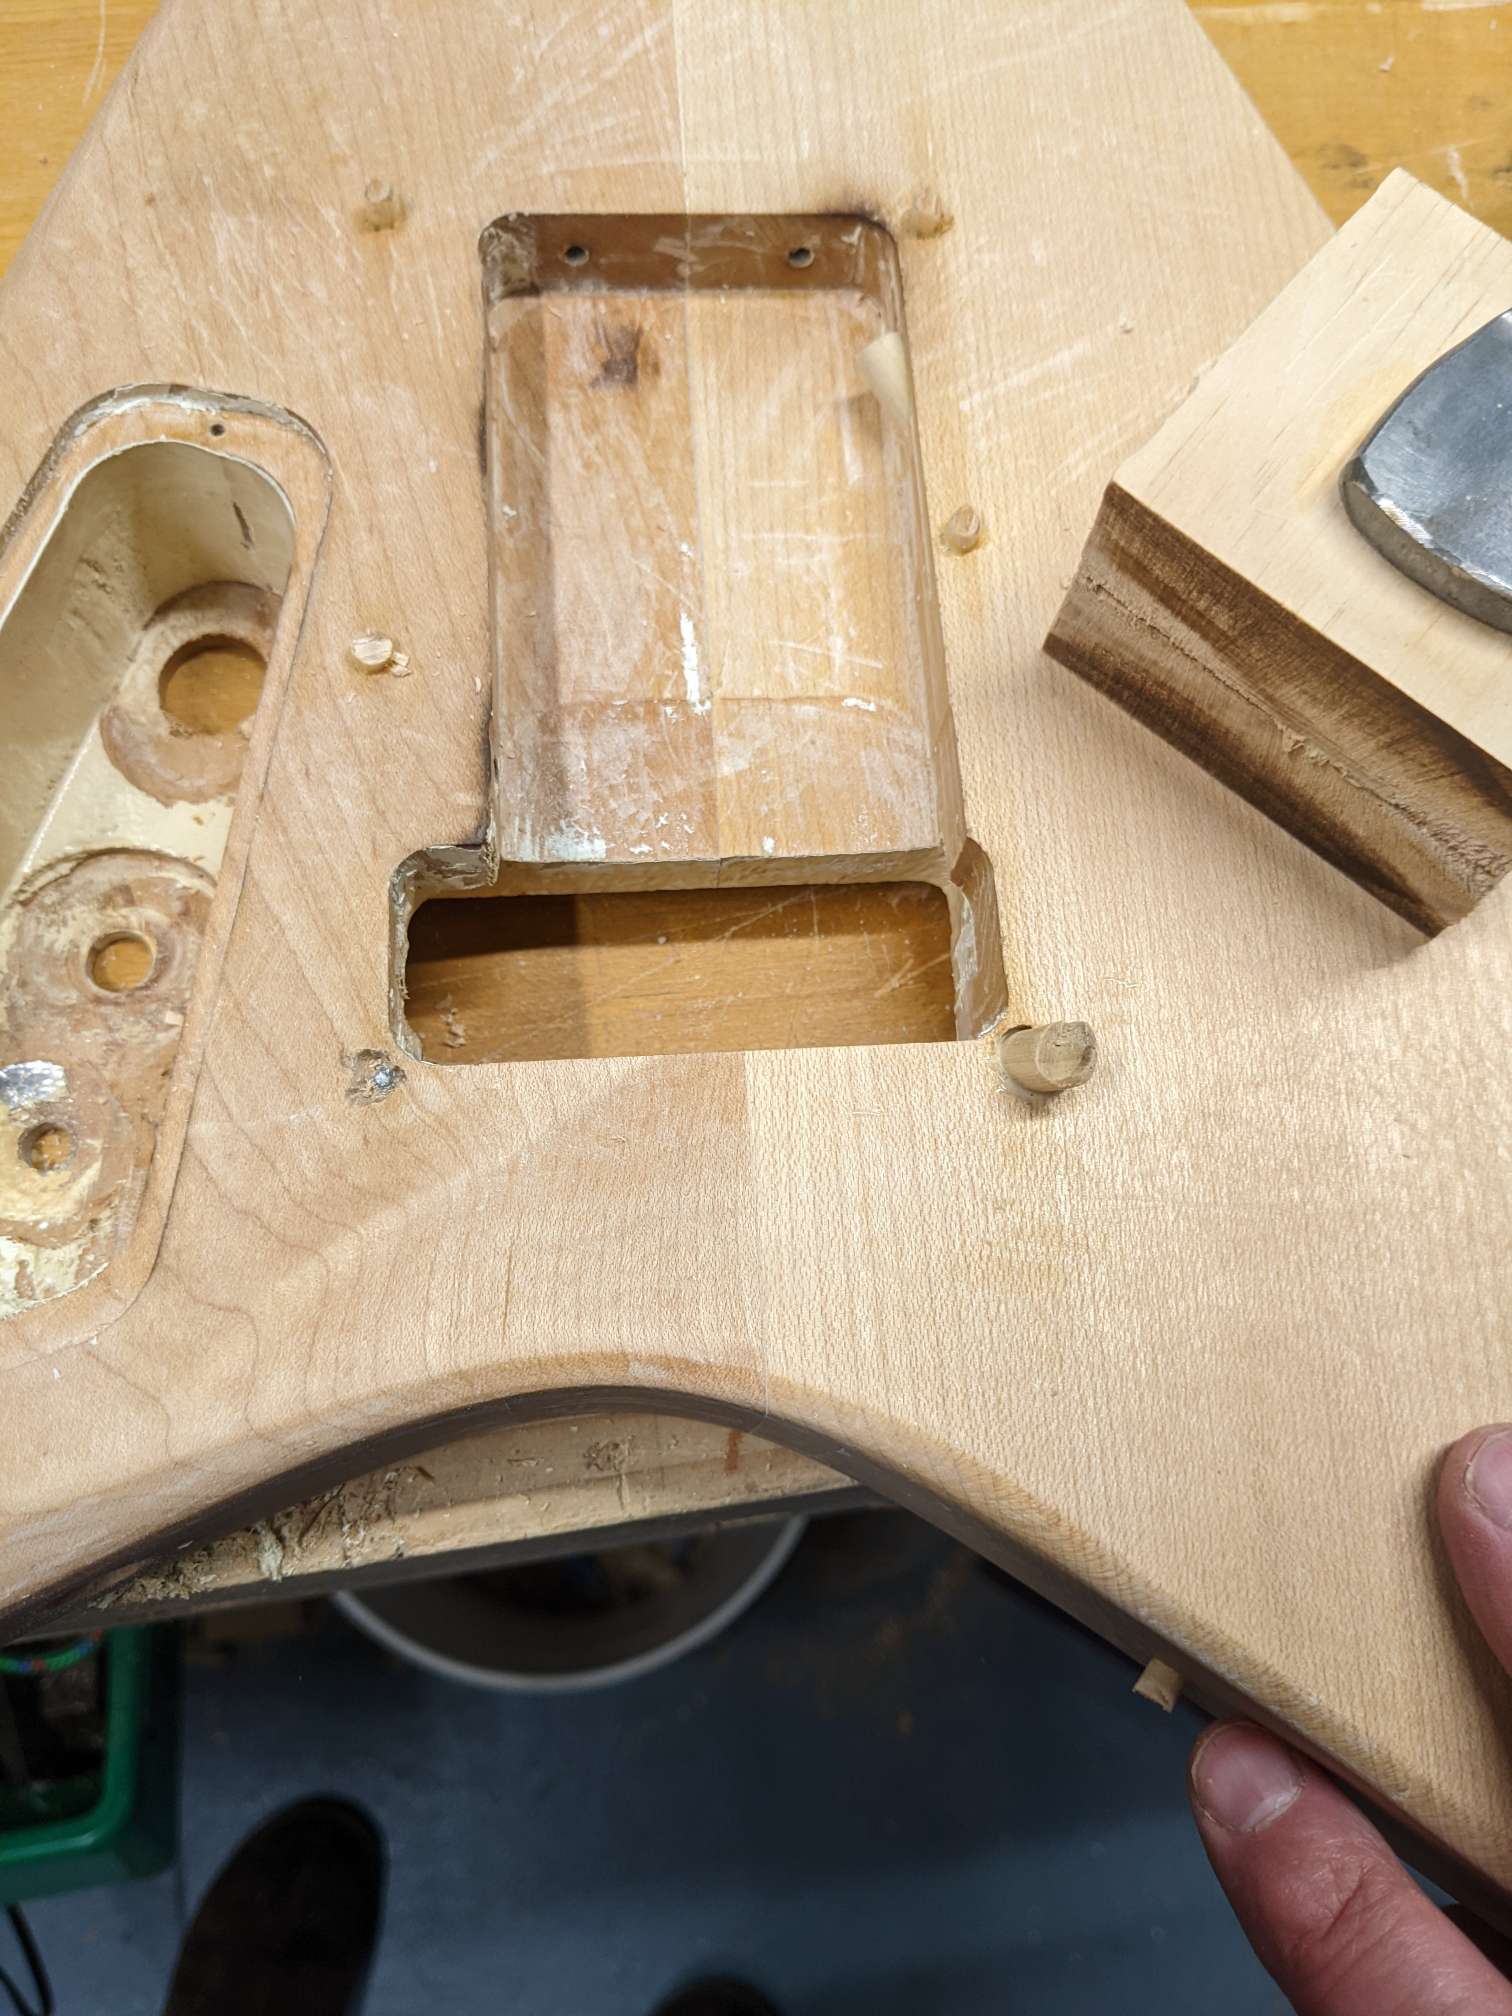
Now it’s time to fill all the bumps and bruises with Bondo to level them out.
I felt the body to find any dips in the wood and sanded them a bit to make rough and circled them with pencil. Then mixed up some Bondo and schmear it in.
Next it sanding off the Bondo to make everything smooth again.
Marked off areas that need to be filled.Fill the areas with a dollop of Bondo.After a couple hours to cure, the Bondo is sanded and suuuuuper smooth.
Next step is some final fitting /adjusting and then starting the paint!
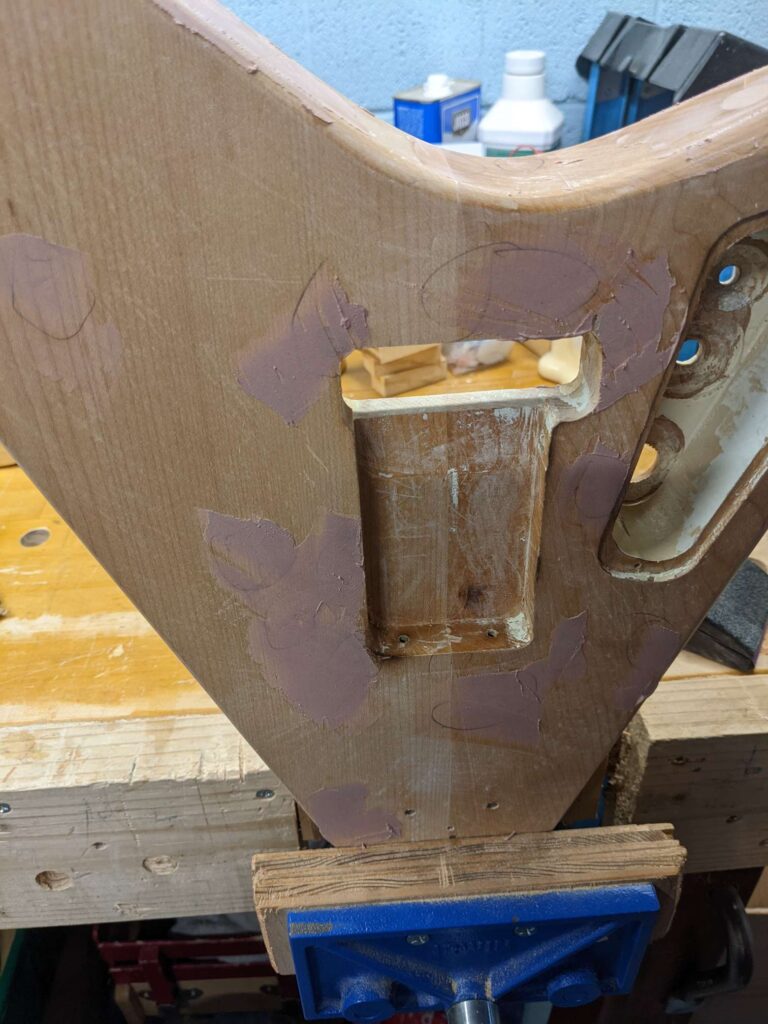
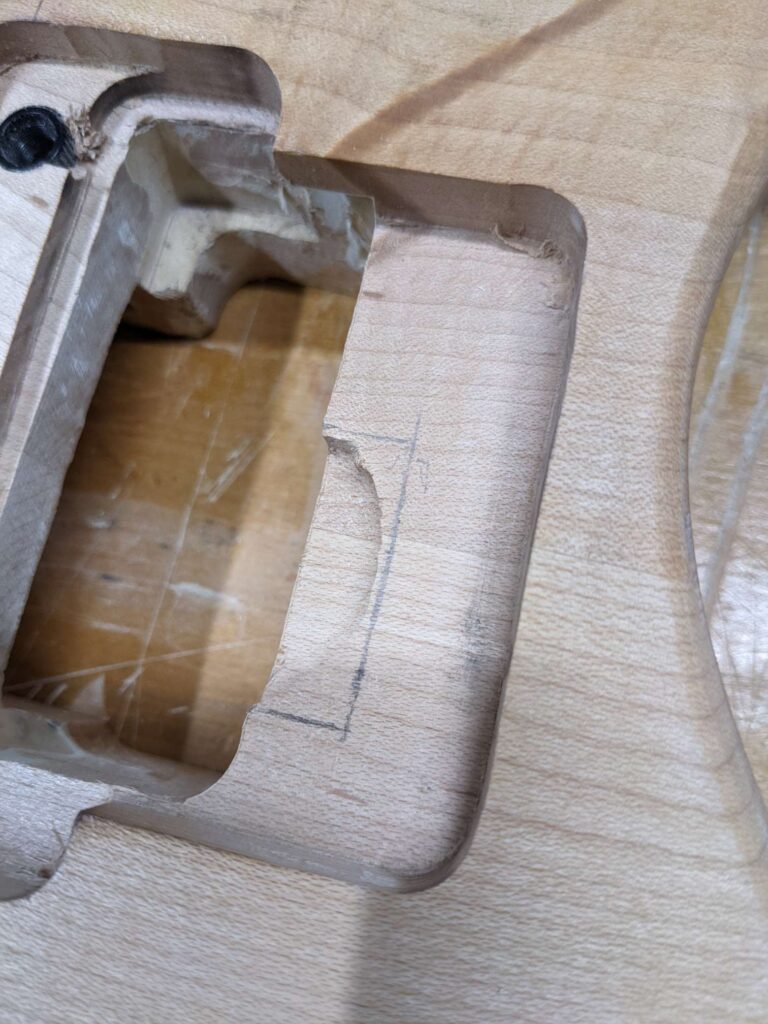
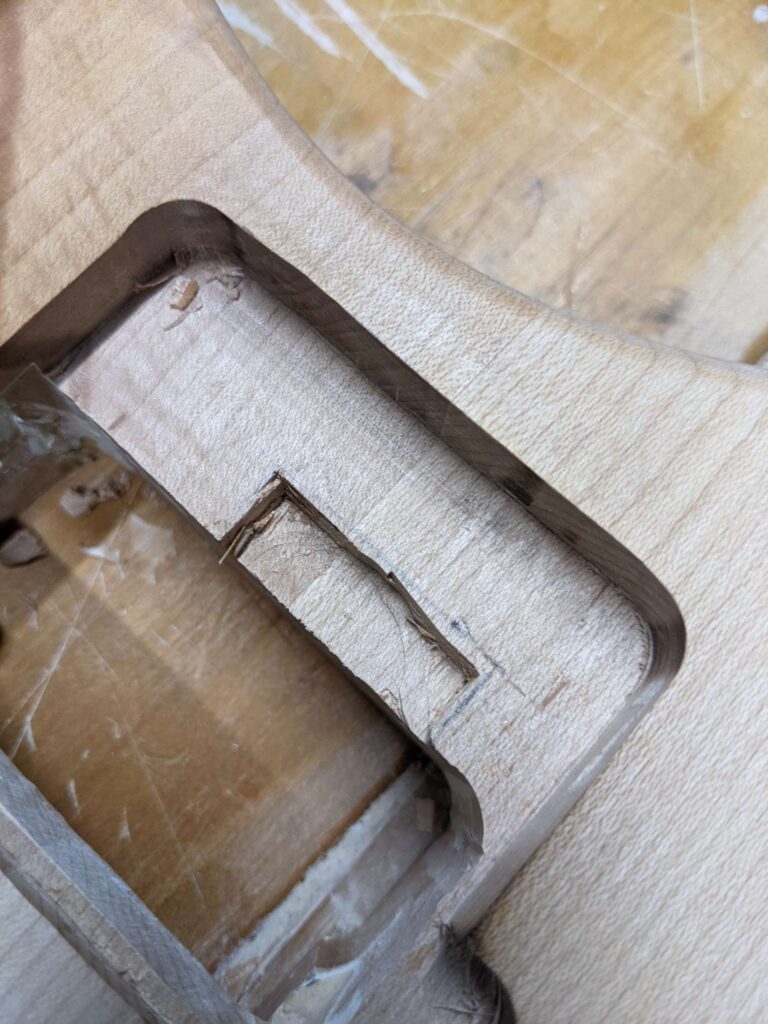
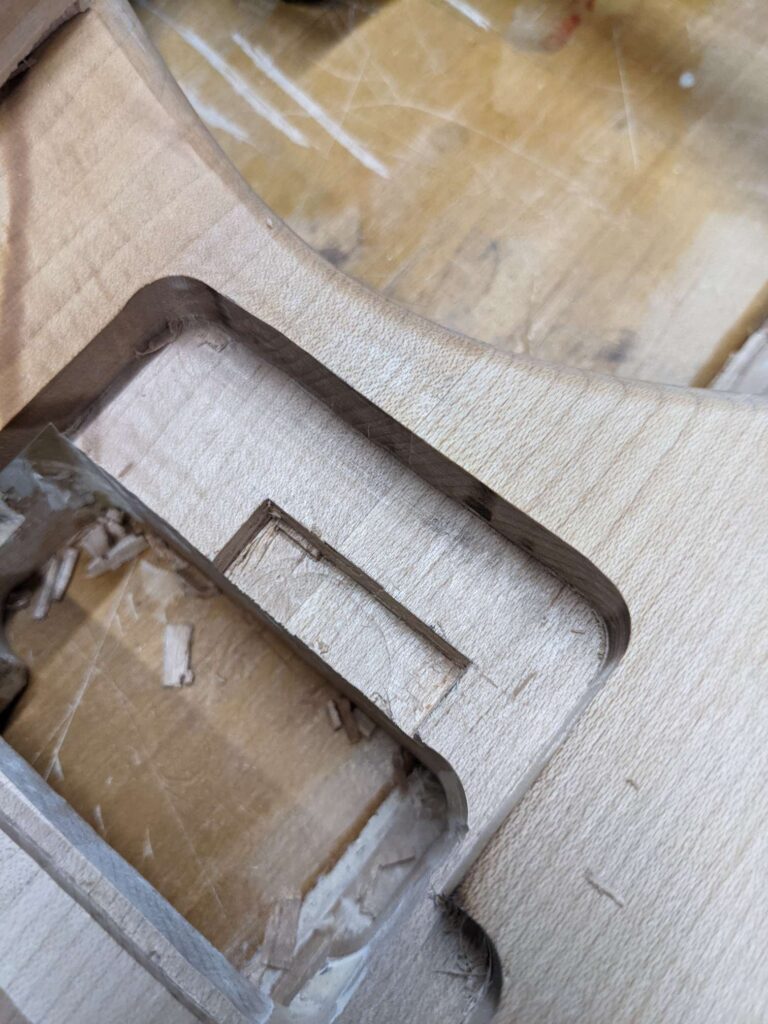
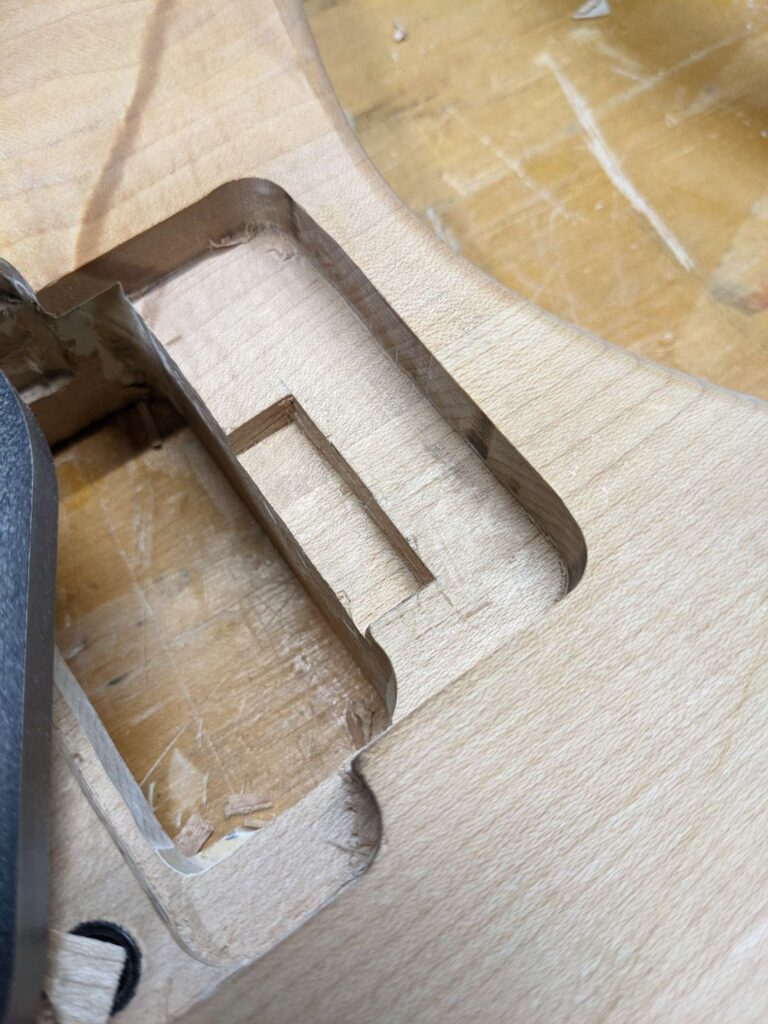
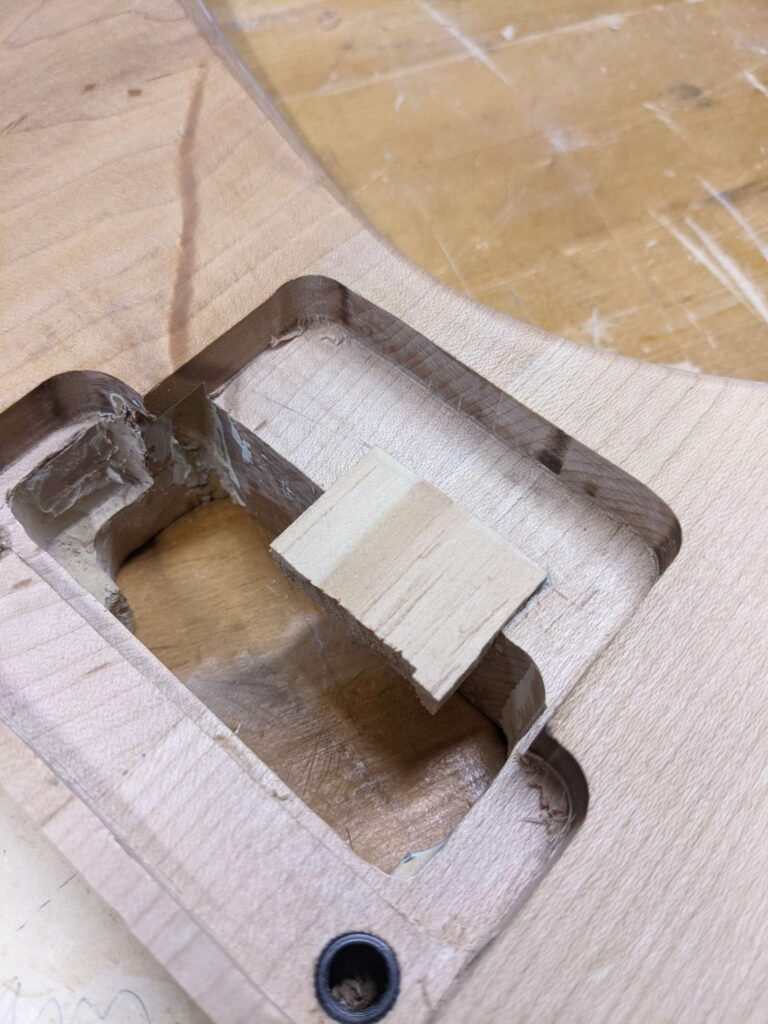
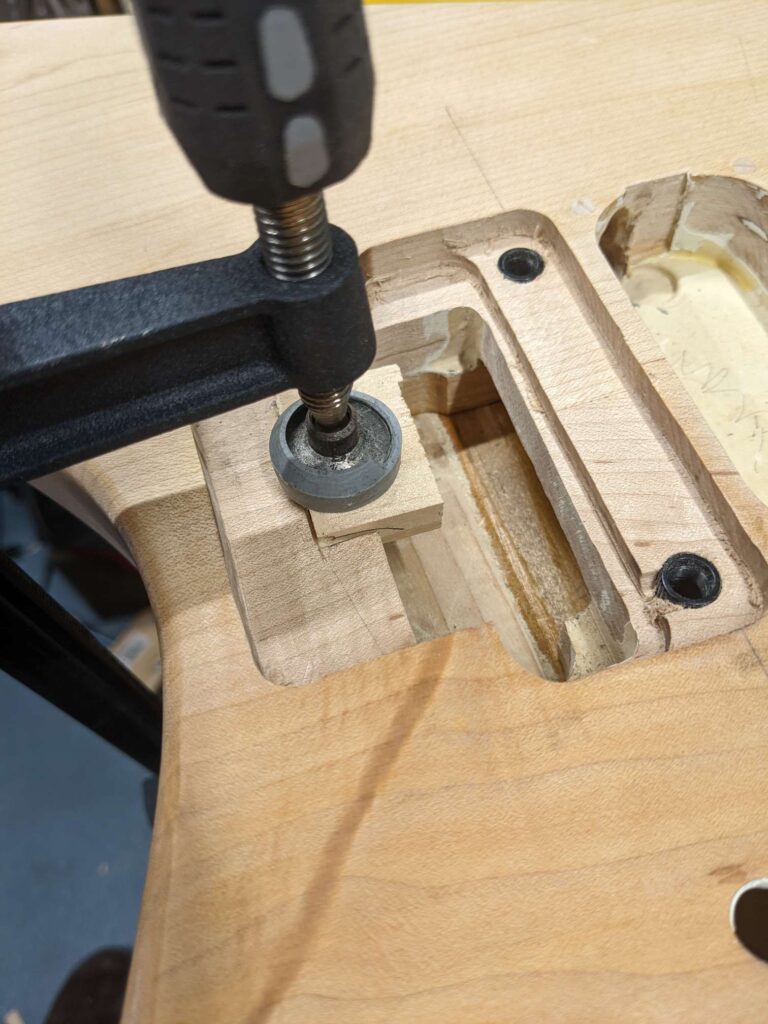
While I was routing the body for the Floyd Rose tremolo, my router bit slipped out of the chuck and dug in too far. It went in about 1/4″.
The boo boo was in an area that is not functional and wouldn’t be seen, but I wanted to fix it anyway. My plan is to…
Square up the boo boo
Level the bottom out
Make a piece of wood to fit
Glue in the block
Trim it off and smooth it out
Fill any cracks or gaps with bondo
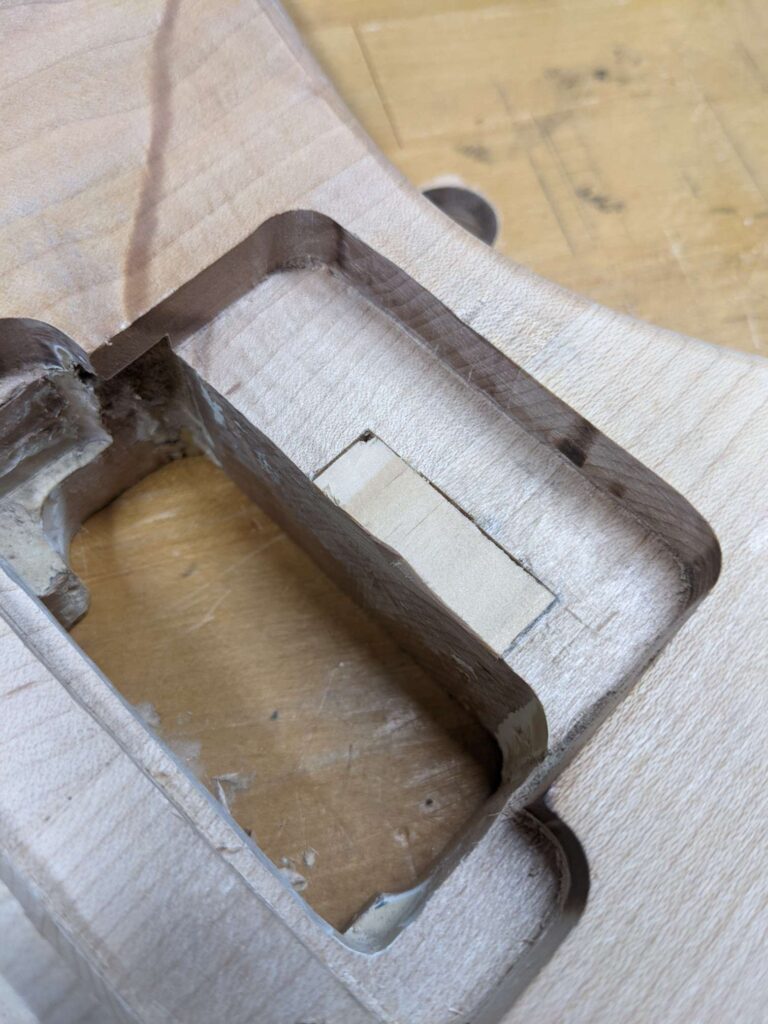
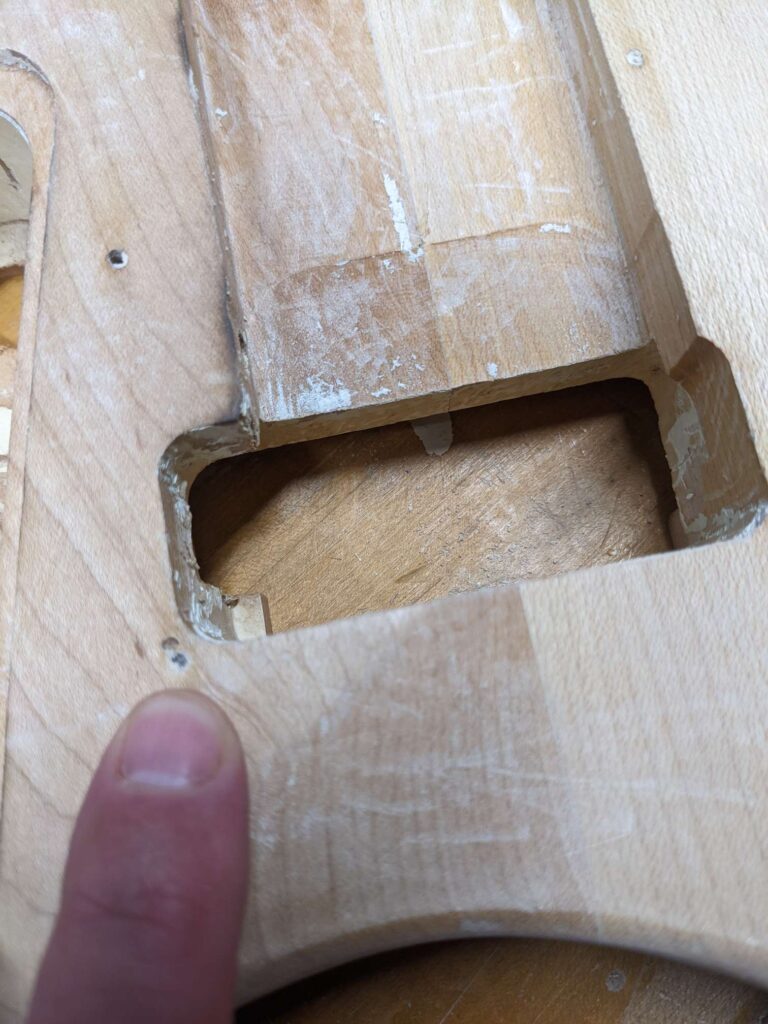
The boo boo with pencil lines drawn on to square it up.I used some sharp chisels to remove the bulk. I stayed away from the lines so I can come back and shave it down.I cut right up to the lines.I used my router plane to smooth out the bottom for a nice flat glue jointI fit a small hunk of pine into the recess. I used pine because it’s easy to work with and it’s in a hidden area.Some glue, a clamp, and a few hours will make it permanent.A few minutes with chisels and the router plane and it is good as new. Well not like new, but a lot better than it was.
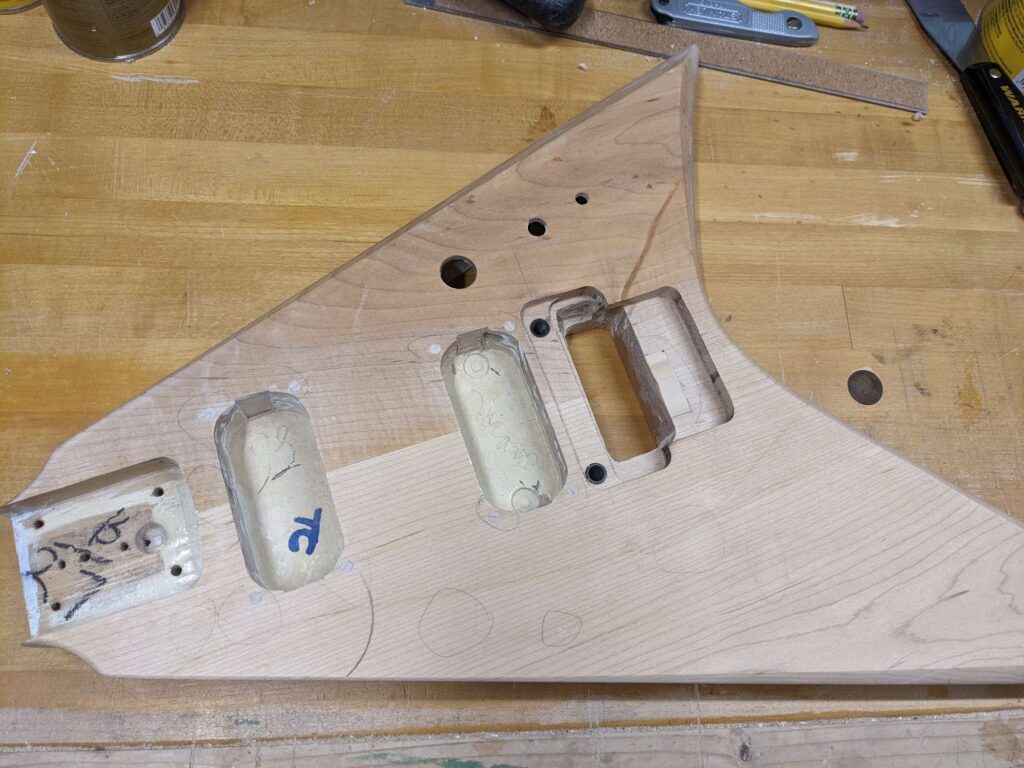
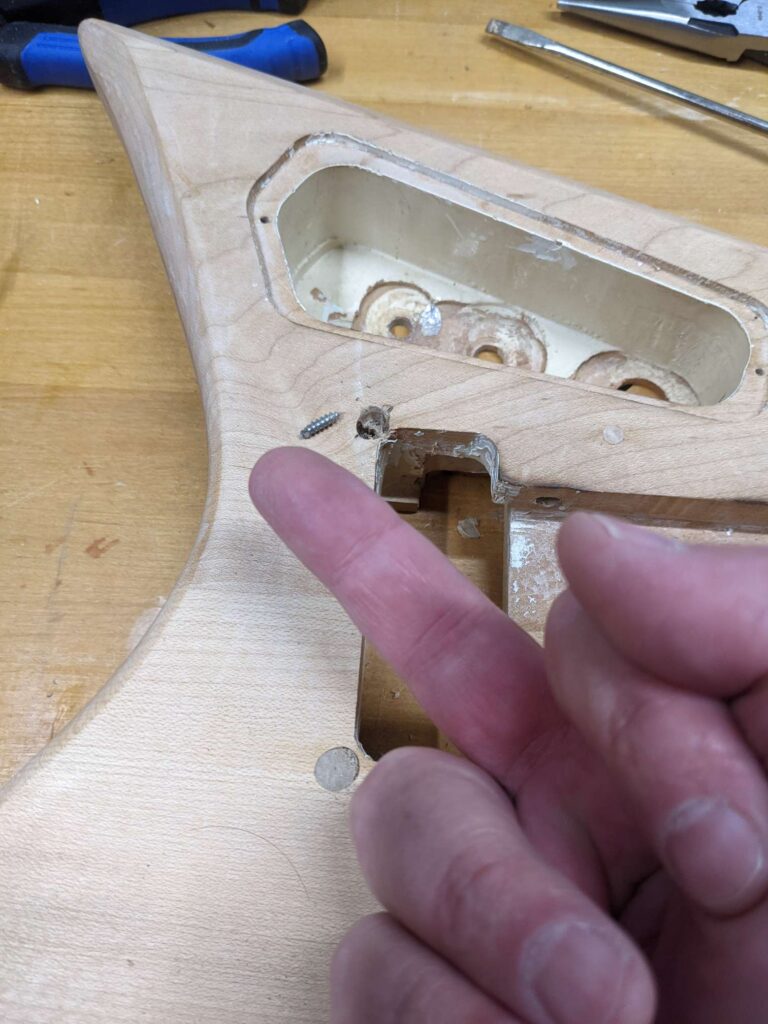
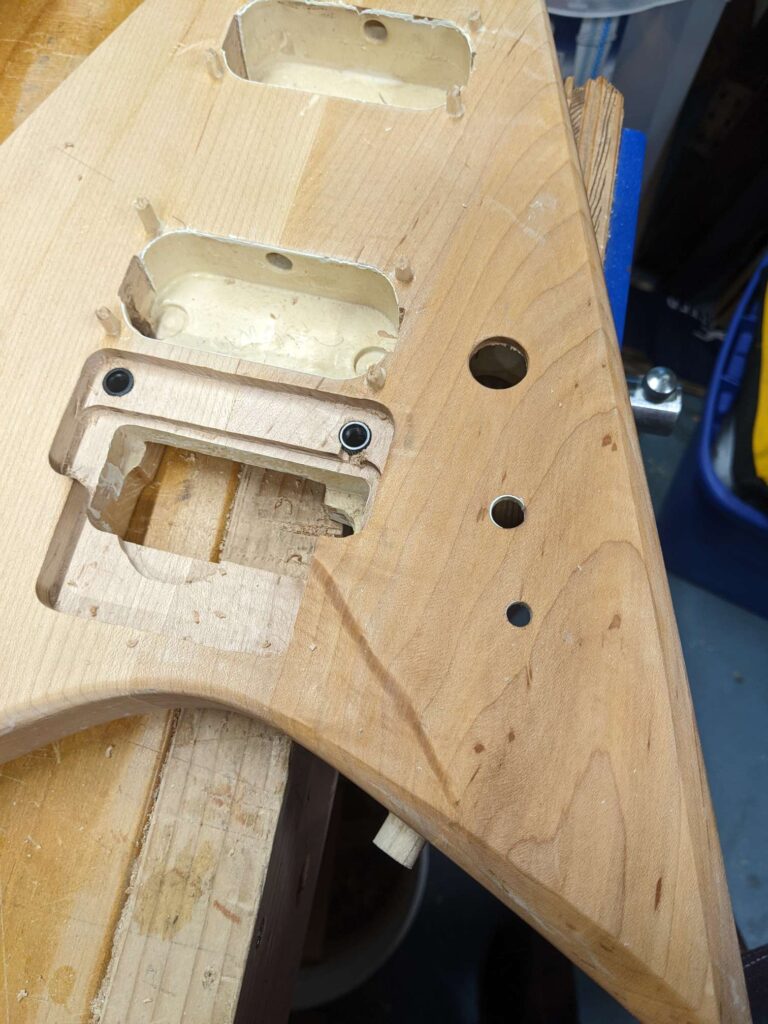
I plugged all the holes in the guitar body. I don’t think I will use any of the old screw holes, plus I am moving the strap button, and the output jack is moved. Plug them all!
Also there was a screw with a twisted off head that needs to come out.
A busted screw that needs to come out. This will be a piece of cake!The little $#¶$! was a royal pain to removePlug the old output jack and pickup ring screw holesPlug the tremolo cover screws
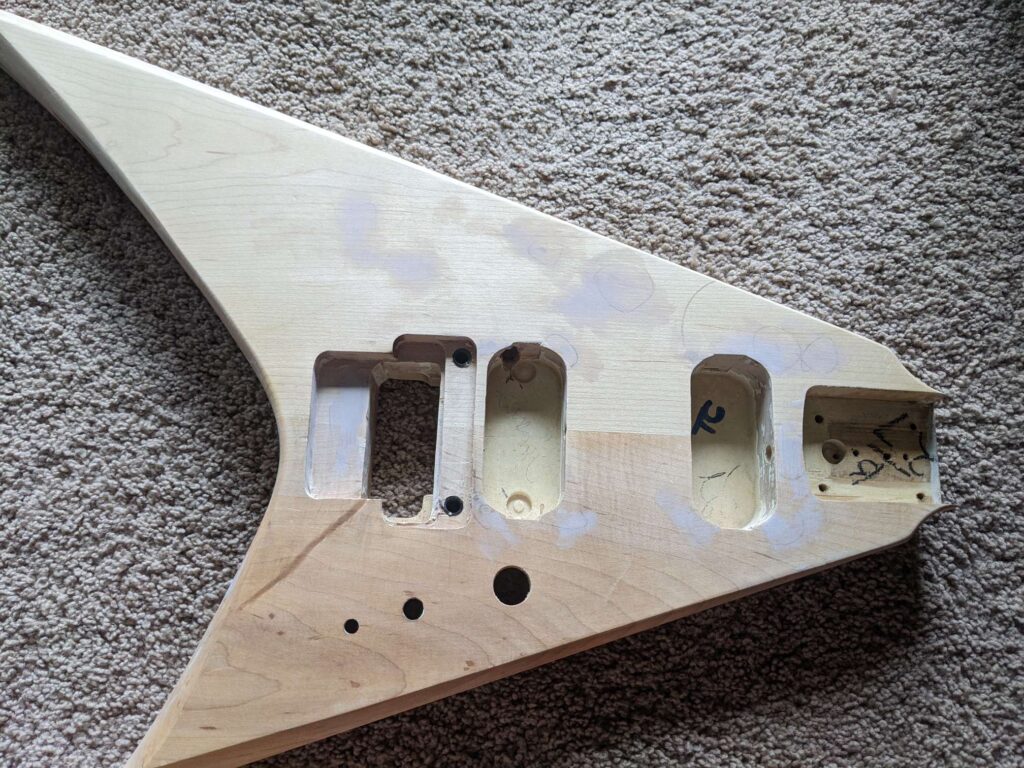
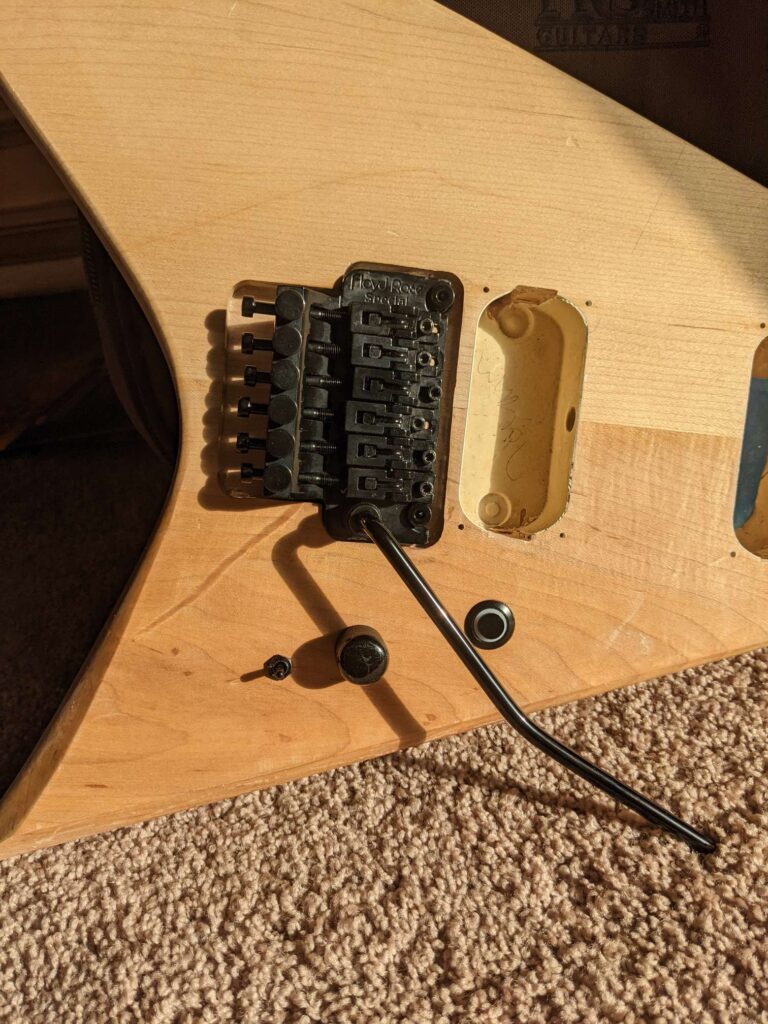
I finished a couple little jobs like drilling for the tremolo posts, and increasing the hole size for the kill switch. Next is mocking up to make sure stuff fits and lines up.
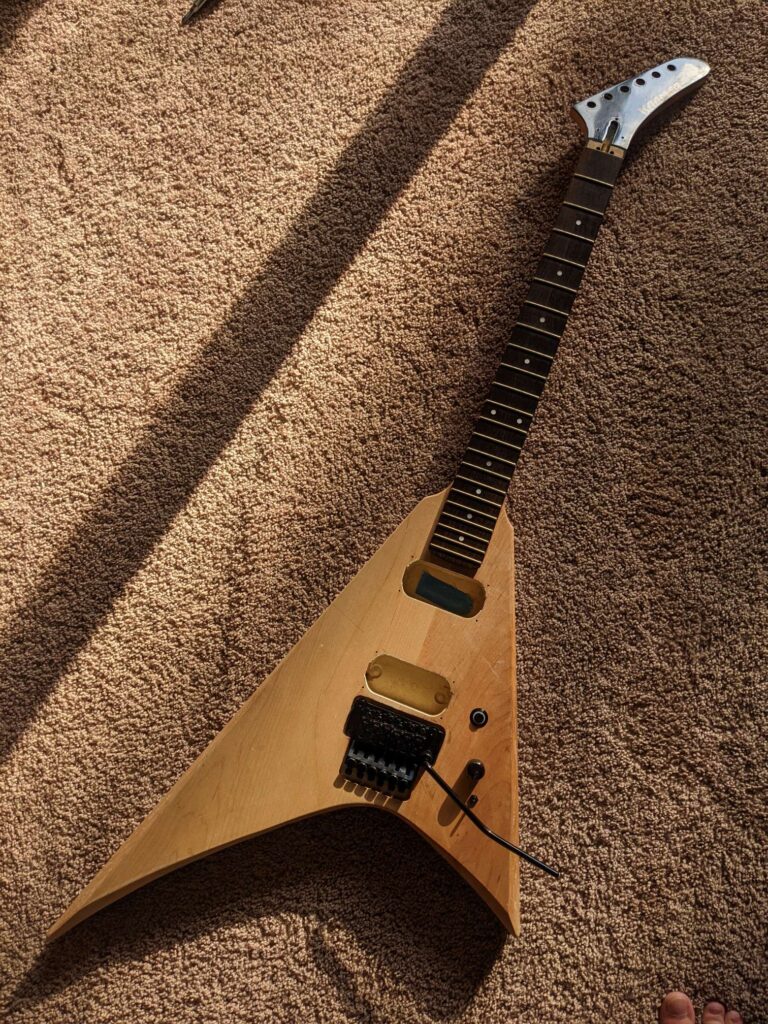
I installed the tremolo posts and tremolo. I installed the killswitch, volume pot, and pickup selector switch.
I used some string to approximate the guitar strings and the tremolo lines up real good.
Looking secksyIt looks cool with the neck back on!
Next steps are prepping for paint and re-fretting the neck.


You must be logged in to post a comment.