I am going to put some black binding on the Tele guitar body. I think it will look super cool with the pink body and other black hardware.
To install binding, you need to cut away part of the body in an accurate and clean way. I think big builders use a router and choose a cutter and bearing that cuts the right depth.
I don’t like that, so I will do it by hand. I bought a really cool special tool named a gramil that will help me do this. The gramil comes with a blade and is adjustable to cut pretty much any size rabbet.
You set the distance the cutter is from the fence based on the size of the binding and then cut all the way around.It makes a nice clean line. A combination of deeper cuts with the gramil and some sharp chisels removes the wood where the binding will be.Yay!The end grain was a pain
I am very happy with the results. This tool was very fun to use!
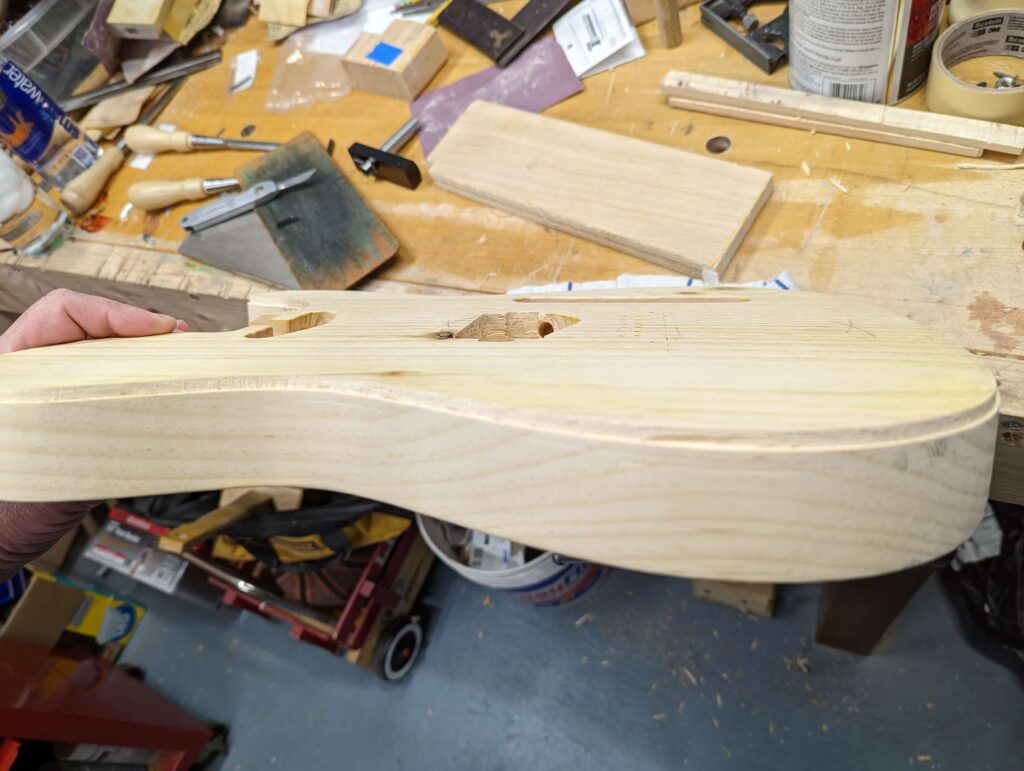
Telecaster style bodies are not super comfy to hold and play. Gonna make the heel where the neck meets the body more comfy and accessible.
I bought a neck plate that is curved and then knocked the corner off the body.
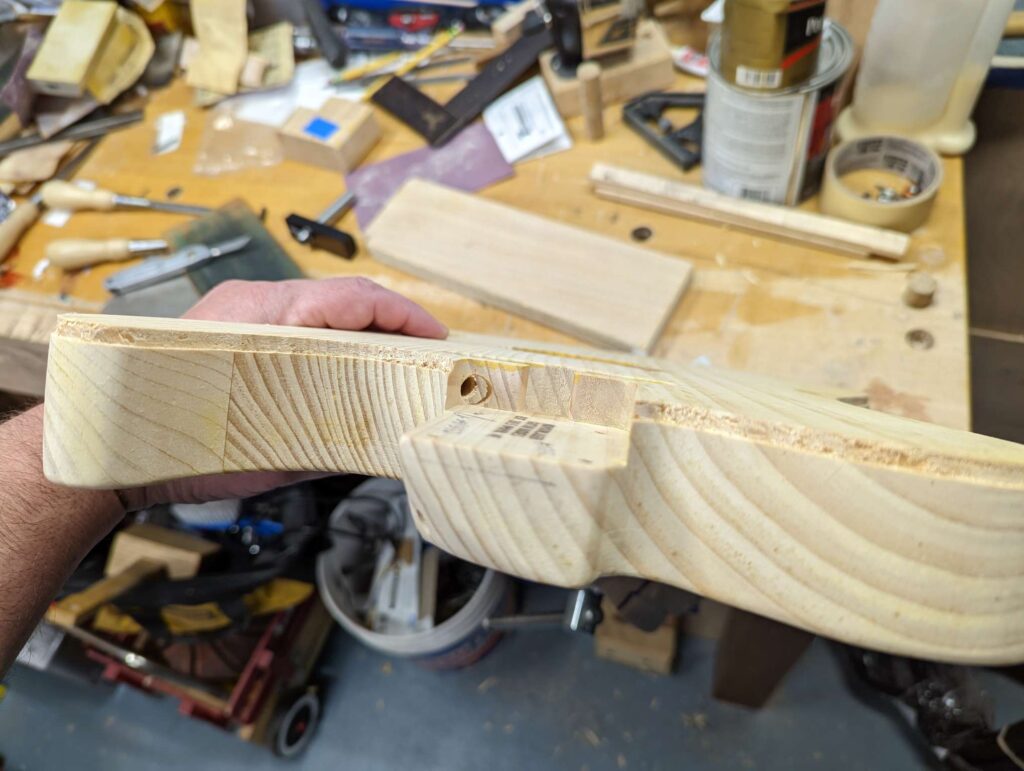
Neck plate attached and used a pencil to mark the curve.I marked out some curves that look nice and remove the pokey corner.Some sharp chisels and sand paper make short work of removing that corner.
I’m not sure if I’m gonna plug that hole or leave it. I’m leaning toward leaving it.
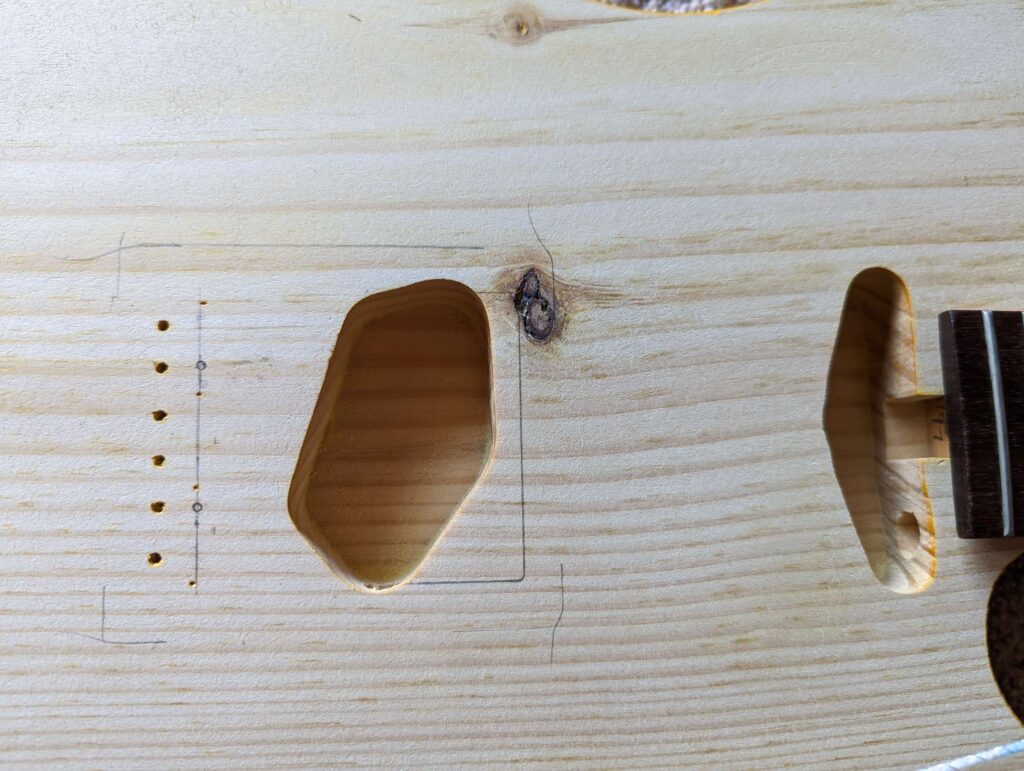
Time to fix the string hole location! Now that the bridge is located, I can drill the string holes in the correct location for this bridge. After the string holes are drilled, I can install the cool brass string ferrule block.
The first step is to plug the old string holes on the back of the body. The new holes will be about 1/4″ away. Some dowel rods and glue will do the trick!
The old string holes are plugged.After the glue dried, some chisels smooth out the plugs pretty nice. I’ll sand them later when I sand the whole back.
Next is time to mark the location of the new string holes using the actual bridge and then drill through the body as straight as I can. Then mark the location the ferrule block will live.
A few sting holes drilled and the ferrule block is marked out.
Now time to remove the wood and make a recess for the ferrule block. I used some forstner bits and chisels to do this. The block fits pretty good!
Forstner bits move most of the wood out of the way.Chiseling pine is hard because it’s so soft. But the hole cleaned up ok.The ferrule block fits pretty good. I prolly didn’t drill totally straight, so the new holes are not totally aligned with the old ones. Good thing I’m not OCD.
I’ll polish the ferrule block super nice before it goes on for reals.
So lucky for me, some person (who I definitely want to buy a beer for) created a computer font that mimics the writing on the truck! Also lucky for me, my lovely wife found it! The font is named Action Is and is available here.
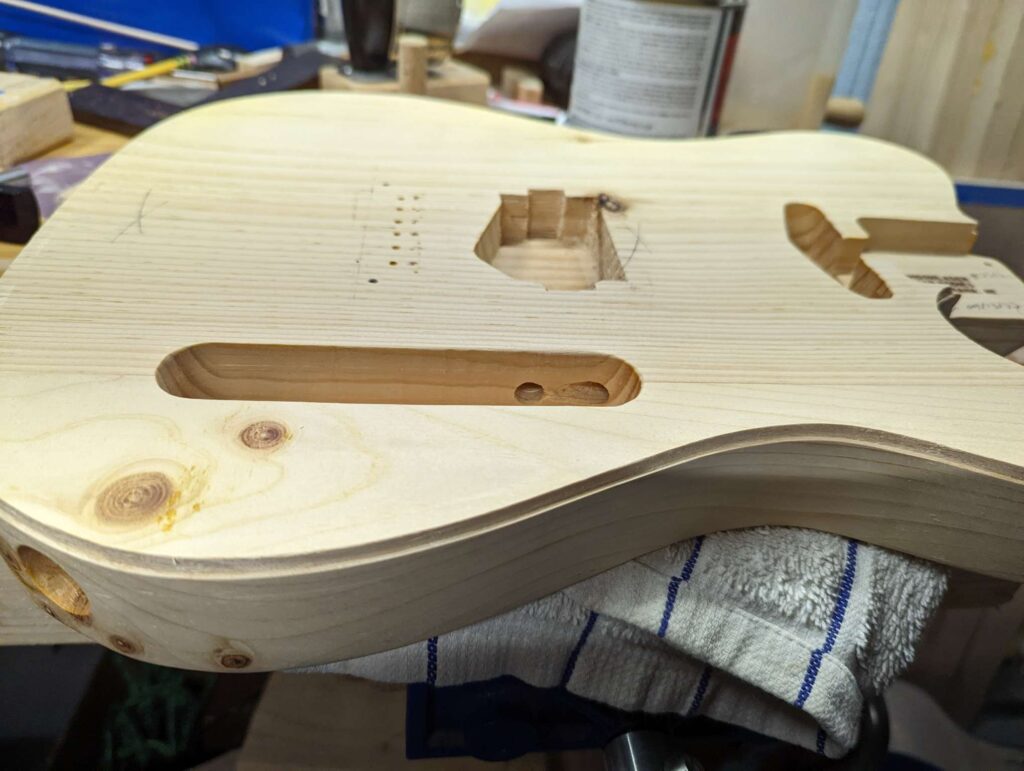
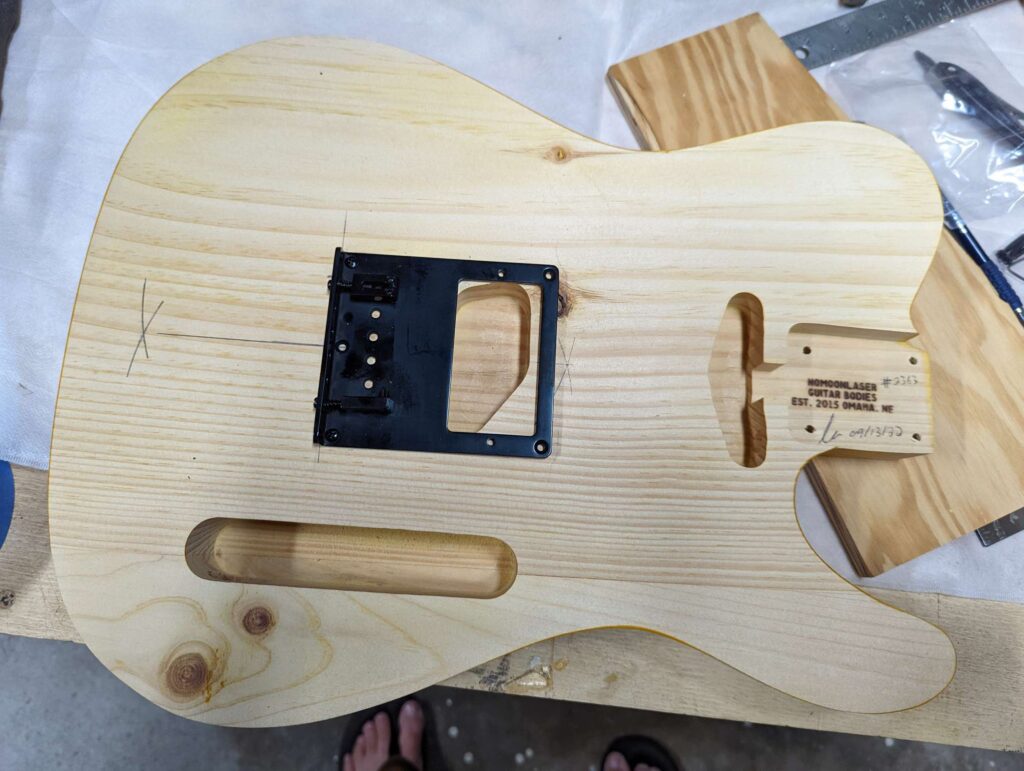
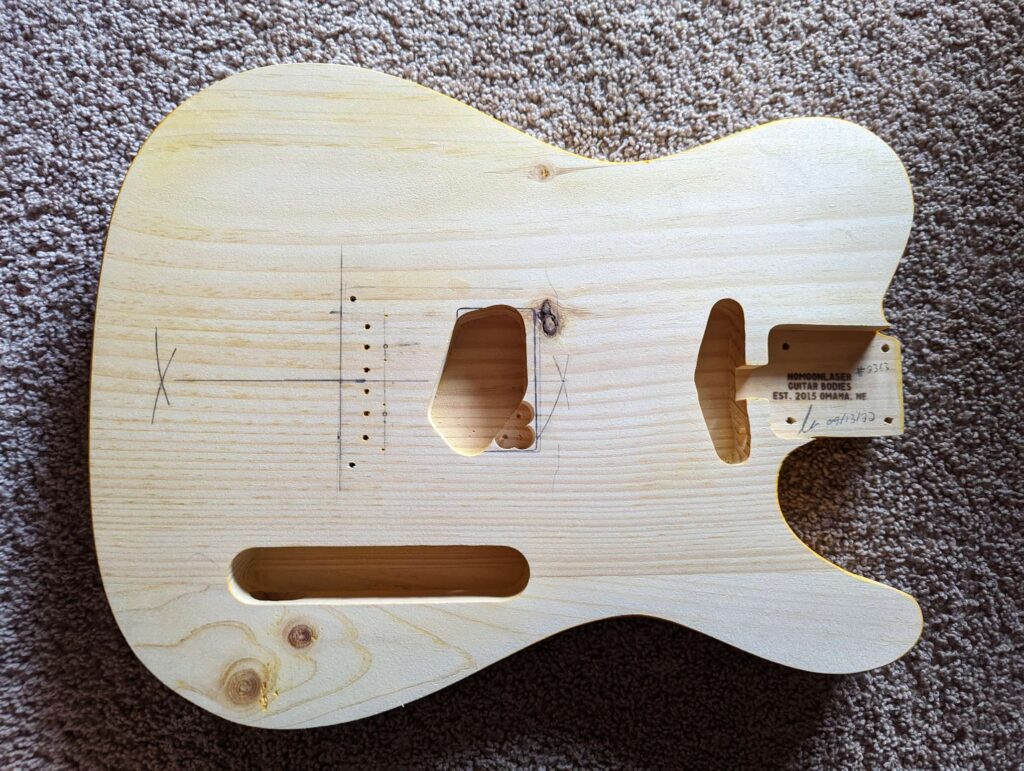
I plan to install a full on humbucker in the bridge. Since this body is routed for a traditional single coil pickup, I need to do some surgery.
In order to mark out the pickup location, I need to fist determine the bridge position. This was a pain in the butt, but I think I got it right.
The bridge is located in it’s correct home based on 25.5″ scale length.
Then the pickup area is marked on the body, and some forstner bits remove the bulk of the material.
Drilling out material is way easier than routing or chiseling
My friend made me a template for the pickup and I’ll use this as a guide to mark out the areas for the pickup screws.
Pickup template my friend made for me with his CNC router.
Now it’s time to get busy with the chisels. I made the cavity a little bigger to provide wiggle room for the pickup.
Humbucker cavity is marked out. Time to chonk out the stuff in the way.The chisels got most of it. Although it smells awesome, it’s a bitch to chisel this because it’s so soft. Now I need to use my router plane to clean up the bottom.The router plane is super fun to use and shaved up all the leftover stuff in the bottom and in the corners.
Now the bridge pickup cavity is done 😀
Next I will do some sanding on the edges, locate and drill the new string holes, and install the brass ferrule block on the back of the body.
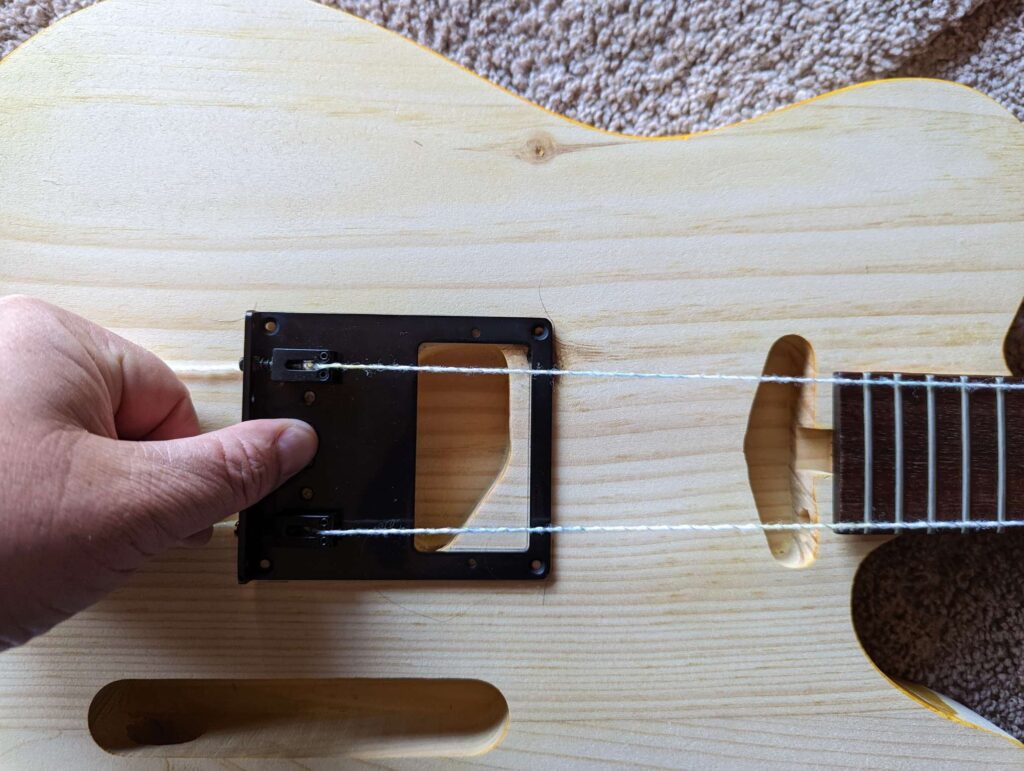
I want to start routing the Tele body to install the humbucker. That means placing the bridge in the correct spot and marking the pickup location.
Easy peasy. Just put the bridge on and line up the string holes with the holes in the body. Then a quick double check with a correct size neck to make sure the saddles are in the correct spot with some adjustment and all should be good.
Except it’s not
Apparently this guitar body is made for vintage style telecaster bridge, not a modern one like I have. This means the holes for the strings are in the wrong spot. Vintage bridges have the string holes farther back from the saddles.
Bummer, but much better to figure this out now than later!
What to do now? Move the string holes to the right spot (about a 1/4″ toward the neck). No big deal because the bridge will cover this up.
This is what the bridge looks like when it’s in the correct spot with wifey poo’s yarn standing in for strings. The line in front of the six holes is where the string holes need to go.
I’ll also have to deal with the ferrule holes on the back of the body. I’ll prolly plug the holes and then install one of these cool brass string ferrule blocks.
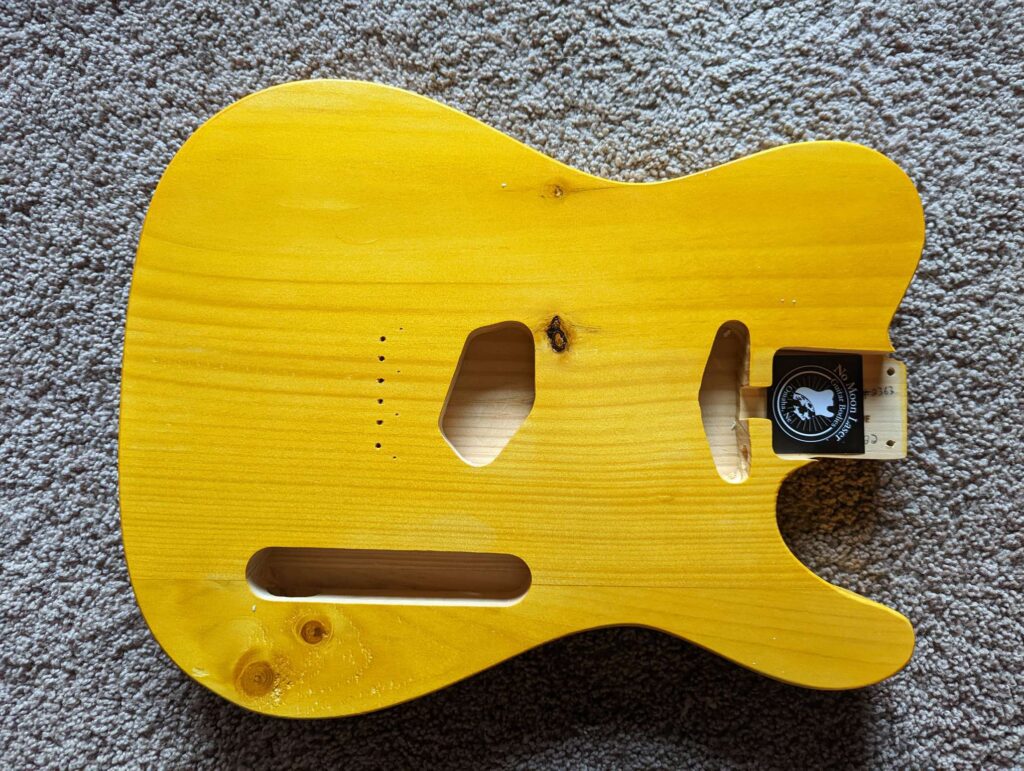
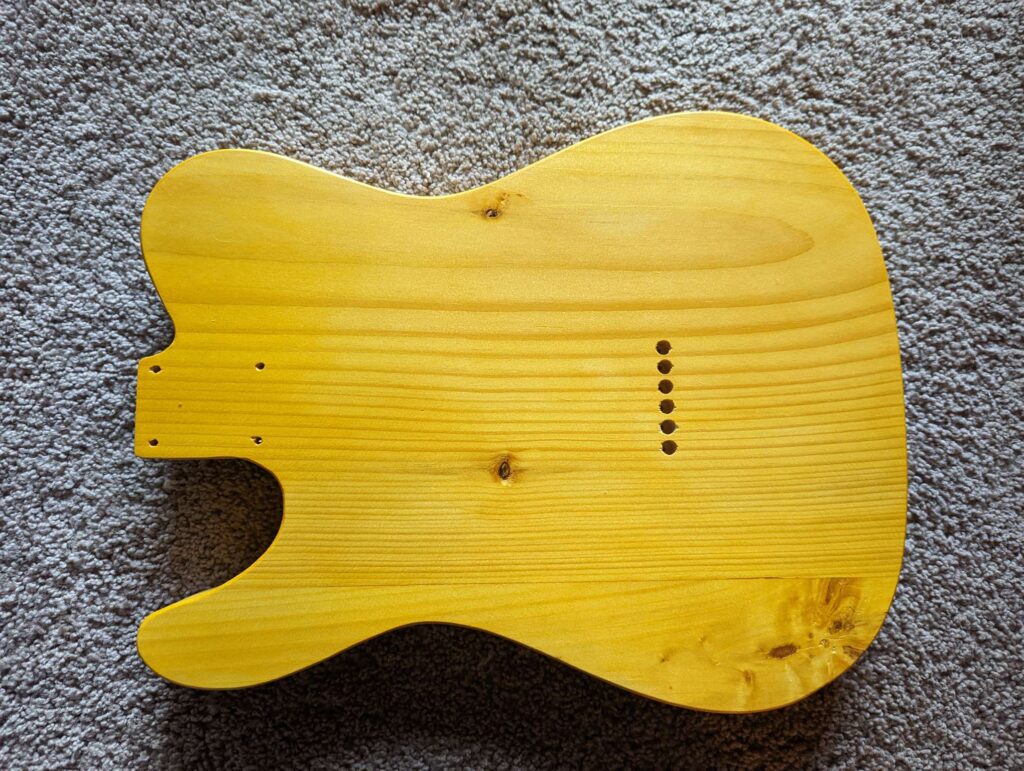
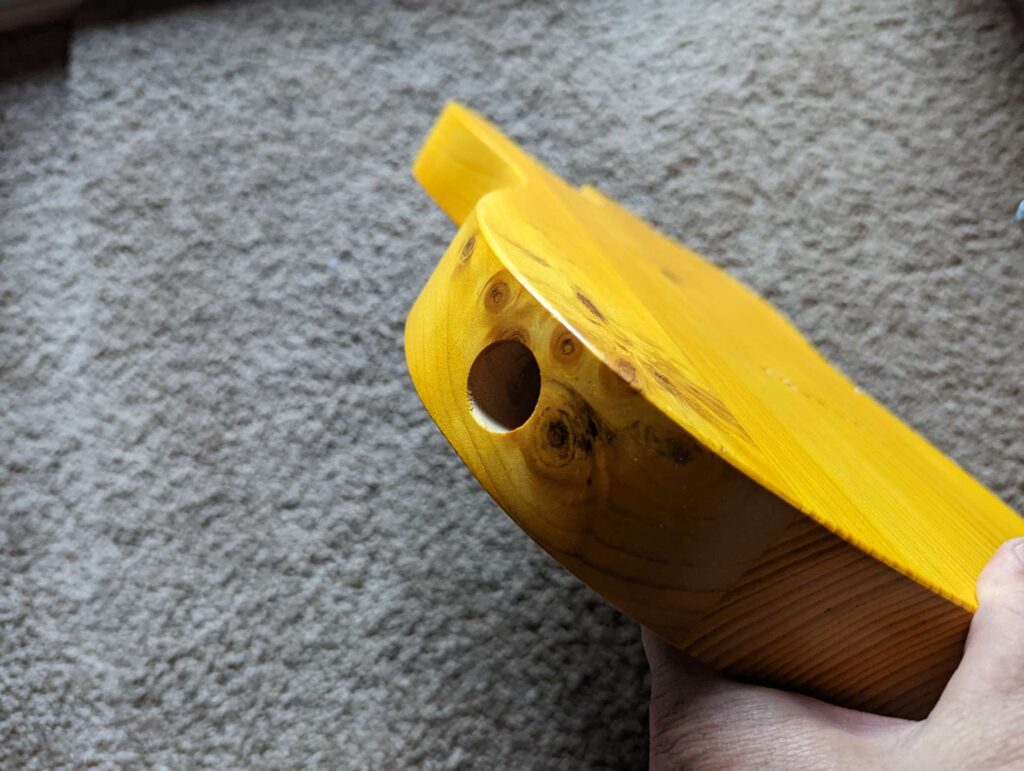
The Tele body came with some yellow stain and lacquer as a finish. I need to strip it off so I can fill the grain and some holes around the knots and stuff. The goal of this is to make the wood really smooth so it ends up smooth and shiny at the end.
I used a random orbit sander to remove the bulk of existing. Lucky it was thin and came off quickly.
Change of plans with my Telecaster guitar build. I’m going to do some customizing of the guitar body. I also decided to go for a more smooth finish instead of the “barn” kinda finish.
I also consulted with my wife boss about the color. She is not a fan of the yellow and suggested pink! I’m sold!
I like the look of the wood grain and decided to stick with a transparent color. I found a minwax stain in a cool pink color at Lowes. I think it looks really sweet!
Minwax Blossom Pink semi transparent stain
I also get a kick out of naming these guitars. The wife has great suggestions and threw out Pink Panther. I took that name and twisted it a bit and decided on “Sex Panther”. If you need an explanation..
60% of the time, it stays in tune every time
It’s made with bits of real panther so you know it’s good.
It’s a formidable sound. It stings the ears…in a good way.
Let’s go see if we can make this kitty purr
What is that sound?!? It’s the sound of desire m-lady.
Time to build a Telecaster! I’m taking my time on this one.
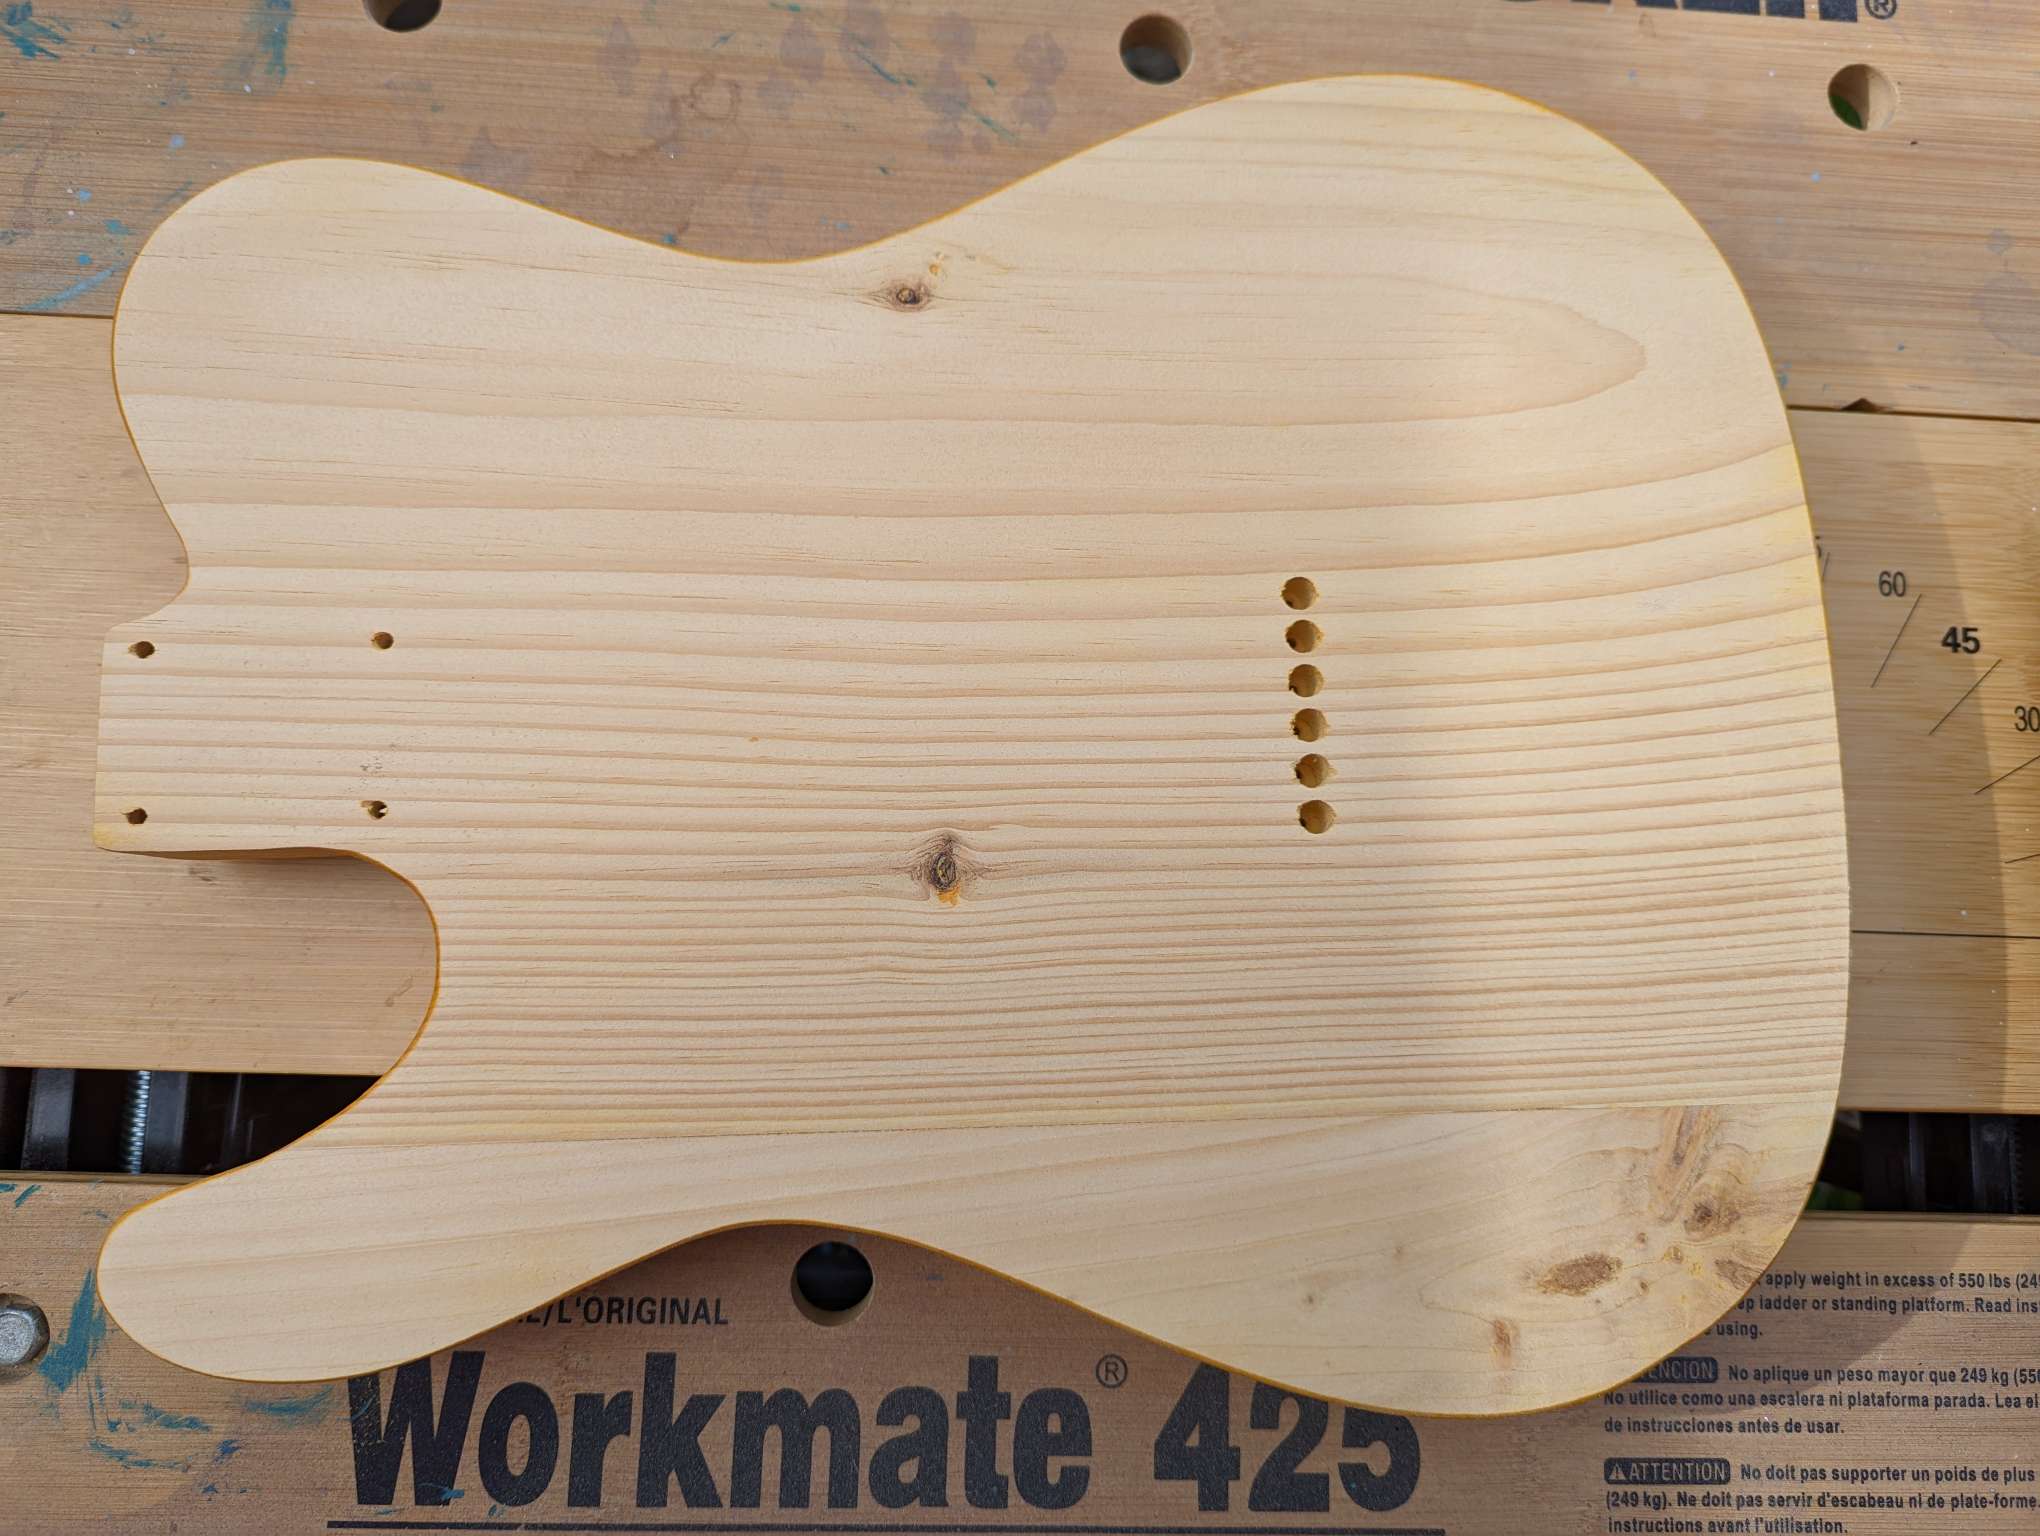
Here are some photos of the body. It is sprayed with yellow lacquer and I LOVE the look of it. This sucker is gonna get a maple neck with a strat shaped headstock, a humbucker in the bridge, and all black hardware.
Look at the cool wood grain and knots!The back looks cool too!Lots of knots around the output jack hole


You must be logged in to post a comment.